Home and Learn: Intermediate Programming
Designing the User Form with a Data Grid

What we'll do with our Windows Form is to add a couple of buttons, a text box, and a data grid. We'll use the first button to pull all the records from the tables and place them in the data gird. For the second button, we'll allow a user to type a student number into the text box. We'll get that number and display the records from a single student. We'll use our Stored Procedures in the code.
Add a button to your form. Change the name to something appropriate, like BtnGetAll. Change the Text property, as well. In the Data section of the Visual Studio Toolbox, drag and drop a DataGridView control onto your form.
DataGridViews have lots of properties you can change. One you might want to change is the font size. Scroll down and locate the DefaultCellStyle property:

Click the button with the three dots in it. You'll see this dialog box appear:
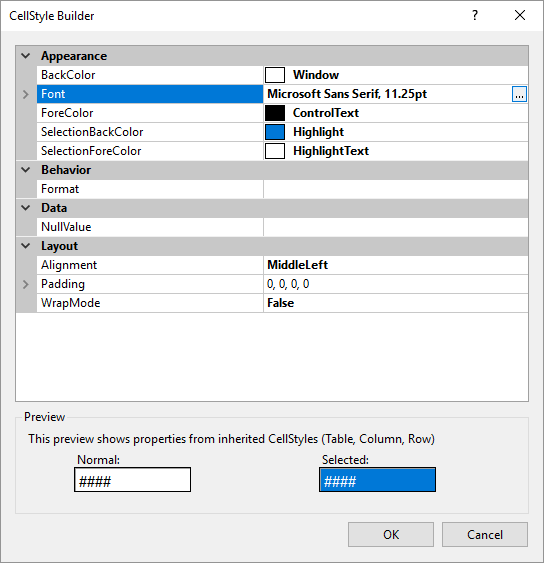
Change the Font to anything you like. The bigger sizes don't look too good, however.
Your form will look something like this:

Before getting to the code, we can set a Property for the Data Source of our database. That way, we won't have to add a long and complex string.
In the Solution Explorer on the right, C# users should double-click the Properties item:

VB NET users should double-click the My Project item:

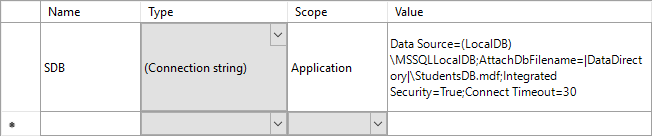
Click on the Settings tab and set the Name to anything you like, something like SDB will do, for Student Database. Set the Type to Connection String and the Scope to Application. Click inside the Value box and the click the button on the right:

When you click the button, you'll see this dialog box:
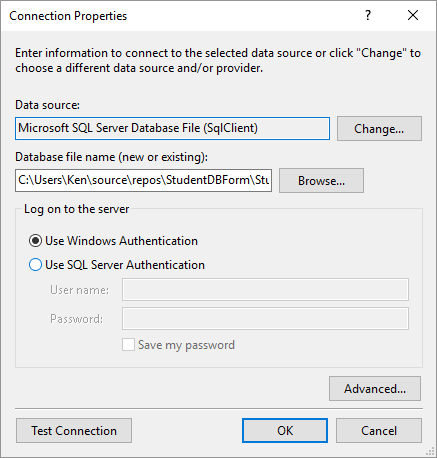
Change the Data source to Microsoft SQL Server Database File (SqlClient).
Click the Browse button and locate your database. It should be in your project folder. The image below shows ours, with the StudentsDB file selected:

You can test your connection to make sure everything's working. Then click OK. The Value column in your settings will then be like this:
You can close the Properties tab now. In the next lesson, we'll start the coding

Coding for to Database Tables >>
Back to the Intermediate Programming Contents Page