Home and Learn: Intermediate Programming
Coding for the Update

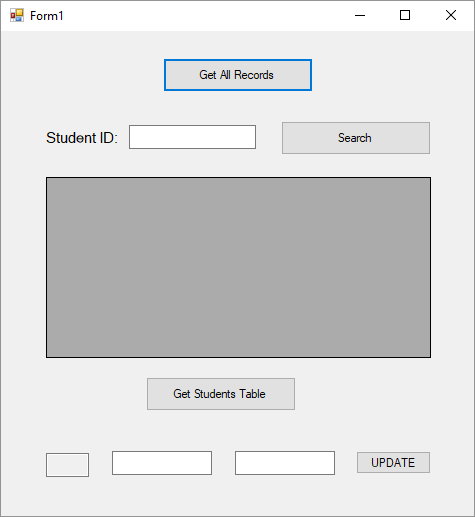
We'll add some new buttons and a few text boxes to our form. Add a button and change the name to BtnGetStudentsTable. Set the Text property to Get Students Table. When this button is clicked, all the record from just the Students table will appear in the Data Grid.
Editing the cells in a Data Grid can be a little fiddly. What we'll do is to have a row from the Data Grid appear in text boxes whenever you click in the grid. That way, they will be easier to change.
Add three text boxes to your form. The first is for the ID. Change
the name to txtID. We don't want anyone changing the ID, so you can
make the text box read only. With the txtID text box selected, scroll
down the Properties and locate the ReadOnly property. Change this to
True.

For the other two text boxes, change the names to txtFamily and txtGiven.
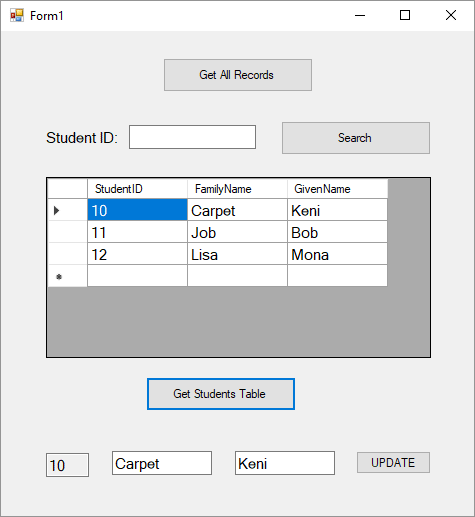
Now add another button. Change the name to BtnUpdate. Change the text on the button to UPDATE. Your form should look something like this:
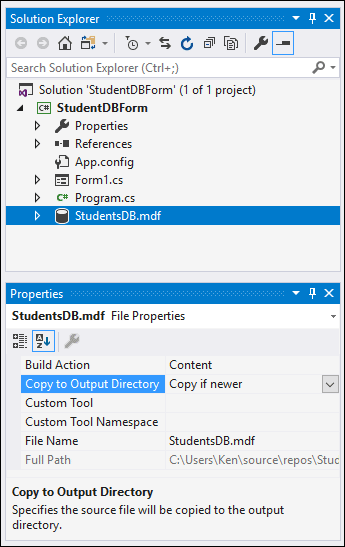
One last thing we can do before the coding. In the Solution Explorer on the right, click on your database to highlight it. In the Properties area, locate the Copy to Output Directory item. Change this to Copy if newer: (If you don't do this, you won't see any updates that you make. C# on the left, VB on the right.)

Now we're all set to do the coding.
Double-click your Get Students Table button to create the code stub for it.
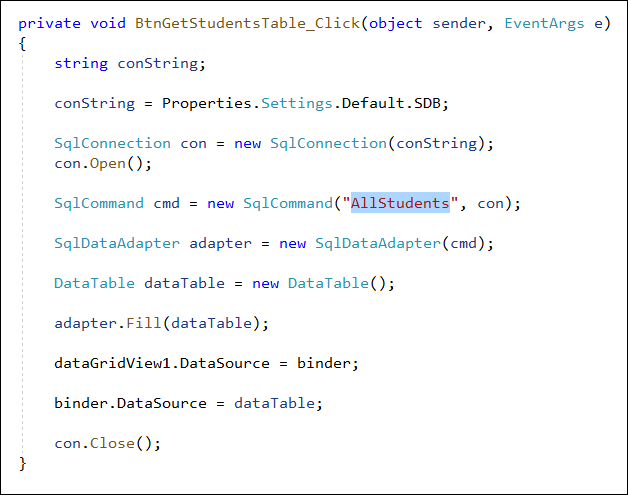
Again, we can copy and paste the code from the first button, the BtnAll one. Again, it would be better if we created a separate method, as there's lots of duplicate code. (It's a good exercise to do this yourself.)
Once you've pasted the code over, change the SqlCommand from NamesAndCourses to AllStudents, which is the name of one of the Stored Procedures we've just created. But your code should look like this in C#:
And this in VB Net:

Test it out. Run your form and click the Get Students Table button. You should see this:

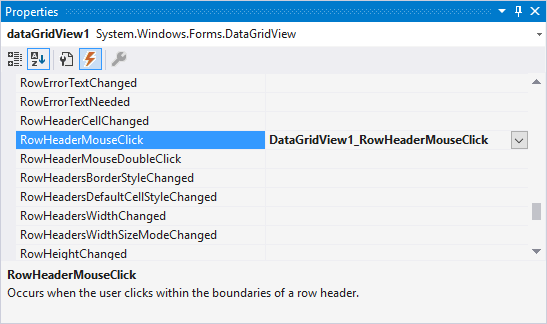
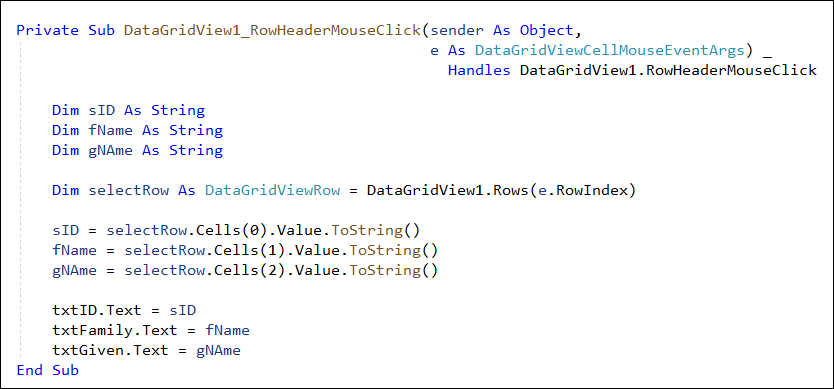
Now what we want to do is to click onto any of the rows and have the data in that row appear in the text boxes. To do this, there is an event of the Data Grid called RowHeaderMouseClick.
Go back to your form in design view. Click on your Data Grid to select it. Now have a look at the Properties area. Click the lightning bolt symbol to see a list of events. Double click the one called RowHeaderMouseClick:
Let's set up some variables, first. Add these to the code stub in C#:
string sID;
string fName;
string gName;
And these in VB Net:
Dim sID As String
Dim fName As String
Dim gNAme As String
To get at the row values in a Data Grid, there is a class called DataGridViewRow. This is used to get an array of all the cells in the row. Add the following line:
C#
DataGridViewRow selectRow = dataGridView1.Rows[e.RowIndex];
VB Net
Dim selectRow As DataGridViewRow = DataGridView1.Rows(e.RowIndex)
Our object array is called selectRow. After the equal sign, we have this:
dataGridView1.Rows[e.RowIndex]
The Rows property gets you which row was selected. But it does that through e.RowIndex. The e part comes from round brackets of the Button:
object sender, DataGridViewCellMouseEventArgs e
The e event has a property called RowIndex, which is the row number you clicked.
We can now access each cell in the row. Add this line:
C#
sID = selectRow.Cells[0].Value.ToString();
VB Net
sID = selectRow.Cells(0).Value.ToString()
The difference between the two lines of code is the C# uses square brackets for Cells and VB Net uses round ones.
Our selectRow object has a Cells item. In between square or round brackets, you type the cell number you want. The first cell is 0. You get this Value and convert to a string.
We need two more, so add these lines:
C#
fName = selectRow.Cells[1].Value.ToString();
gName = selectRow.Cells[2].Value.ToString();
VB Net
fName = selectRow.Cells(1).Value.ToString()
gNAme = selectRow.Cells(2).Value.ToString()
Finally, we can place the cell values in the text boxes:
txtID.Text = sID;
txtFamily.Text = fName;
txtGiven.Text = gName;
Your code should look like this in C#:

And this in VB Net:
Try it out. Run your form and click your Get Students Table button. Now click on one of the row headers, circled in red in the image below:

When you click on a row header, you should see the row data appear in the text boxes.
Now that row cell data is in the text boxes, it can be edited more easily. After an edit, you can click the UPDATE button. Let's do that now.
Updating the Students Table
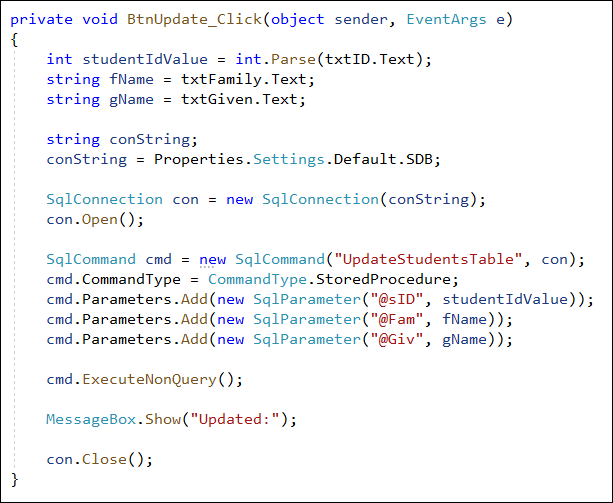
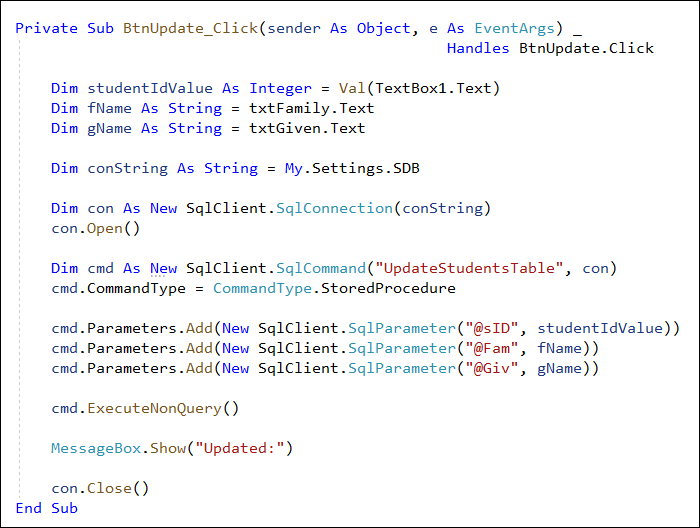
First, we can get the data from the text boxes:
C#
int studentIdValue = int.Parse(txtID.Text);
string fName = txtFamily.Text;
string gName = txtGiven.Text;
VB Net
Dim studentIdValue As Integer = Val(TextBox1.Text)
Dim fName As String = txtFamily.Text
Dim gName As String = txtGiven.Text
Ideally, you'd want to do some error checking here, before going ahead with the rest of the code. You can add an if statement and check that none of the text boxes are blank. But we'll leave that part off.
The next lines will be familiar to you now, and you can copy and paste from elsewhere in your code. Just remember to change the name of your Stored Procedure.
C#
string conString;
conString = Properties.Settings.Default.SDB;
SqlConnection con = new SqlConnection(conString);
con.Open();
SqlCommand cmd = new SqlCommand("UpdateStudentsTable", con);
cmd.CommandType = CommandType.StoredProcedure;
VB Net
Dim conString As String = My.Settings.SDB
Dim con As New SqlClient.SqlConnection(conString)
con.Open()
Dim cmd As New SqlClient.SqlCommand("UpdateStudentsTable",
con)
cmd.CommandType = CommandType.StoredProcedure
Now we need to add the parameters. There are three this time:
C#
cmd.Parameters.Add(new SqlParameter("@sID",
studentIdValue));
cmd.Parameters.Add(new SqlParameter("@Fam", fName));
cmd.Parameters.Add(new SqlParameter("@Giv", gName));
VB Net
cmd.Parameters.Add(New SqlClient.SqlParameter("@sID",
studentIdValue))
cmd.Parameters.Add(New SqlClient.SqlParameter("@Fam", fName))
cmd.Parameters.Add(New SqlClient.SqlParameter("@Giv", gName))
To actually update the database table, you only need one line of code. Add this (without the semicolon on the end, for VB Net users):
cmd.ExecuteNonQuery();
So it just the method ExecuteNonQuery after your SqlCommand object. That's enough to update the table using your parameter information.
Finally, you can add a message box and close the connection:
MessageBox.Show("Updated:");
con.Close();
Your code should look like this in C#:
And this in VB Net:
You can give it a try now. Run your form and click your Get Students Table button. Click on one of your rows:
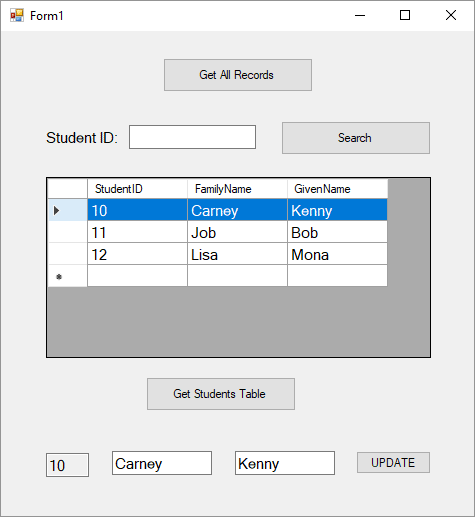
Now make changes to the name:

Click your UPDATE button to commit the changes to the database. Now click your Get Students Table button again:
Close down your form and relaunch it. You should find the changes you made are still there.
And that's it for this section. You should now have a good idea how to create more than one table in SQL Server, how to add a relationship, how to run queries, and how to create Stored Procedures. You should also have a good working knowledge on how to code for SQL Server databases.

Back to the Intermediate Programming Contents Page