Home and Learn: Intermediate Programming
Drawing the arms

Stick Figure App - Head, Arms, Legs
In the previous lesson, we drew the legs for our stick figure. In this lesson, we'll draw the arms.
The arms are the only thing that change in our stickmen. We want three positions: arms straight, arms up, and arms down. We can get which one we want from the Booleans. If the button called BtnArmsStraight is clicked then the Boolean value called drawStickManStraight will be true. If the button called BtnArmsUp is clicked then the Boolean value called drawStickManArmsUp will be true. If the button called BtnArmsDown is clicked then the Boolean value called drawStickManArmsDown will be true.
So we only need a series of If Statements in our code that draw the figures. Add these to the bottom of your DrawStickMan Sub in VB Net:
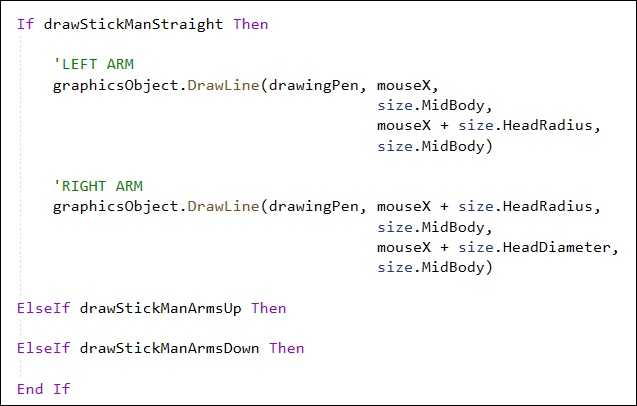
If drawStickManStraight Then
ElseIf drawStickManArmsUp Then
ElseIf drawStickManArmsDown Then
End If
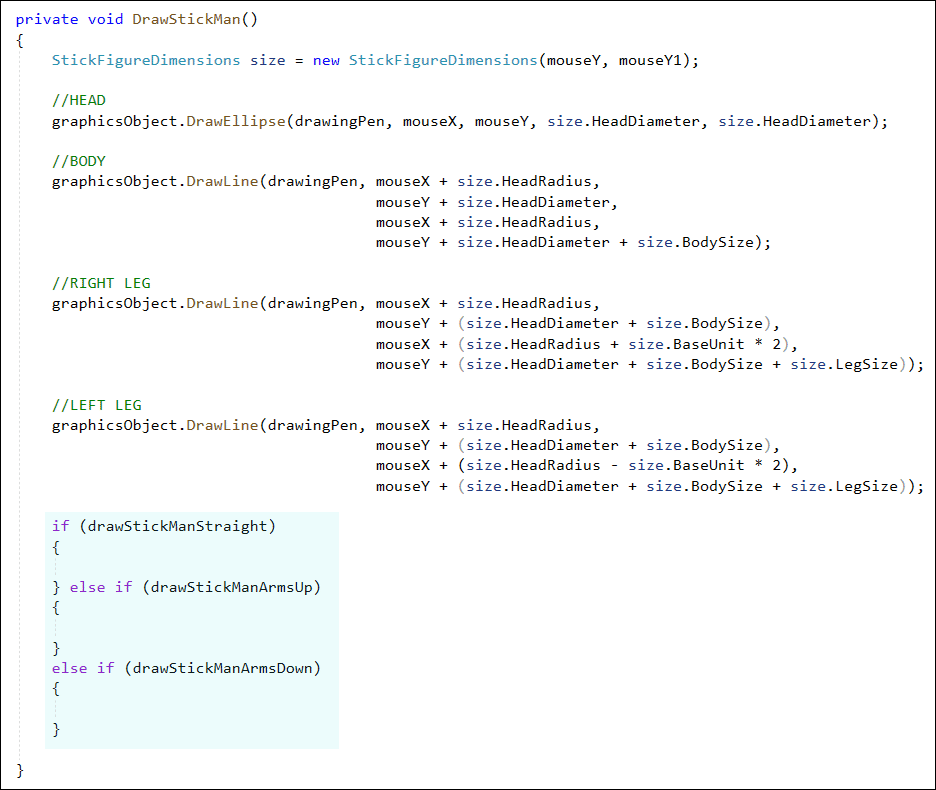
And add these to your DrawStickMan method in C#:
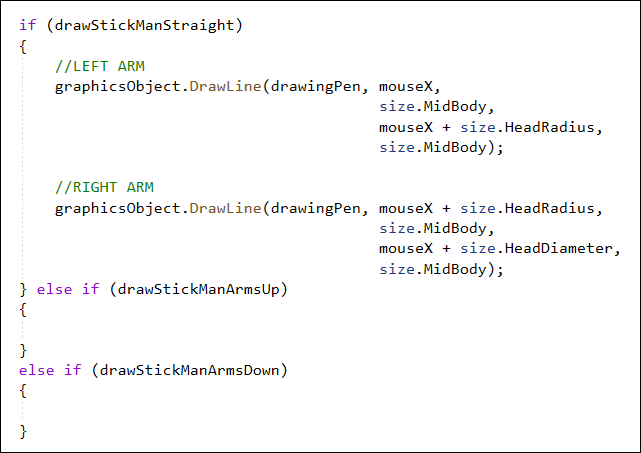
if (drawStickManStraight)
{
} else if (drawStickManArmsUp)
{
}
else if (drawStickManArmsDown)
{
}
Your code will then look like this (VB):
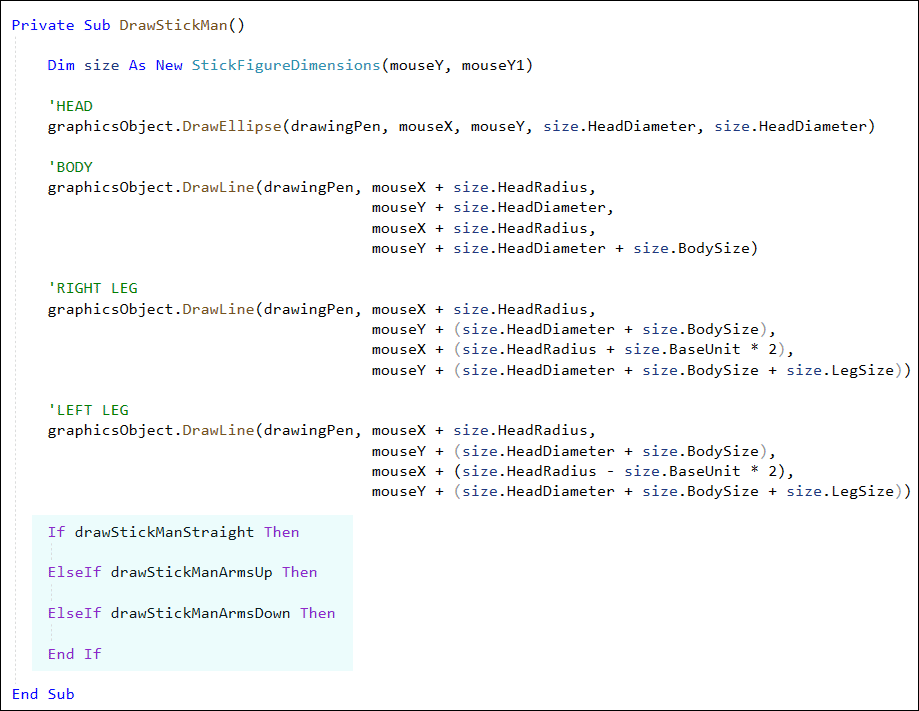
Or this (C#):
Draw Arms Straight
You could get away with drawing a single horizontal line for the straight arms. But we'll do two separate arms. That way, if you wanted, say, arms like this:
If you wanted a new stick figure with arms like that, you'd could copy and paste code and just make changes to one of the arms.
We want to get the middle of the body when we're drawing the arms. For the left arm, you take the mouseX and the mid body for the Y:
x = mouseX
y = size.MidBody
To get the end of the line, add the mouseX and the radius. To get the end Y, it's just the mid body again (because it's a horizontal line).
x1 = mouseX + size.HeadRadius
y1 = size.MidBody
For the right arm, you want the start of the line to be mouseX plus the radius. The Y is the same - the mid body:
x = mouseX + size.HeadRadius
y = size.MidBody
For the end of the right arm, add the mouseX and the diameter. Again, the end of the right arm is the mid body:
x1 = mouseX + size.HeadDiameter
y1 = size.MidBody
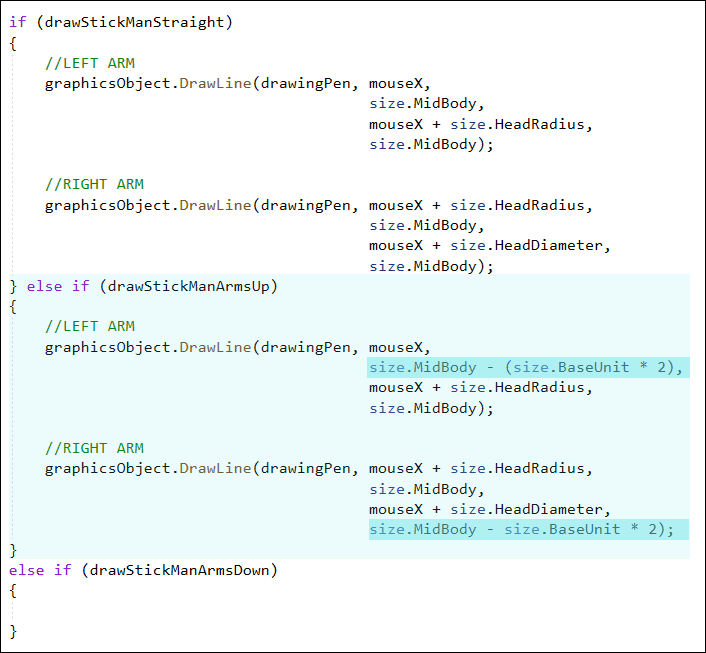
The code for both arms then (drawStickManStraight) is this in VB Net:
And this in C#:
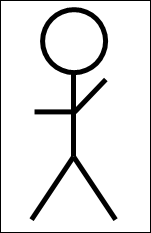
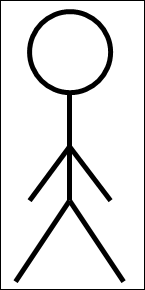
Try it out. Run your program. Hold down your left mouse button on the white canvas. Keep it held down and sweep to the right. When you release the left mouse button, you should see a complete stickman with arms straight:

Draw Arms Up
To get a stickman with the arms up, we need to add code to the drawStickManArmsUp Else If part of the If statement.
To get the left arm up, we only need to change the start of the line we had for the arms straight. To get the right arm up, we change the end of the line we had for the straight arm. This means you can copy and paste the code for straight arms into the drawStickManArmsUp Else If.
The start of the line for the left arm is now this:
x = mouseX
y = size.MidBody - (size.BaseUnit * 2)
So, for y, you take the mid body position and deduct 2 Base Units. This will move the left arm up in the Y direction. That's the only change to make.
The code to raise the right arm is the same as for a straight, right arms except for a change to the y1 position:
x1 = mouseX + size.HeadDiameter
y1 = size.MidBody - size.BaseUnit * 2
Again, we take the mid body position and deduct 2 Base Units.
Your code for drawStickManArmsUp in VB Net will look like this:

And in C#, you should have this:
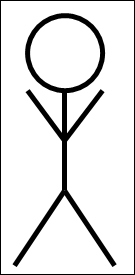
Try it out. Run your program. Click your Arms Up button. Now draw a stick figure. It should look like this:
Draw Stickman Arms Down
At this stage, you should be able to write the code to get a stickman with arms down. Think about which X and Y you need to change for the DrawLine code. You've just changed the starting point for the left arm and the end point for the right arm. To get arms down, you make the changes to the same X and Y.
The code you should have in VB Net is this (the changes are highlighted):

And here's the code you should have in C#:
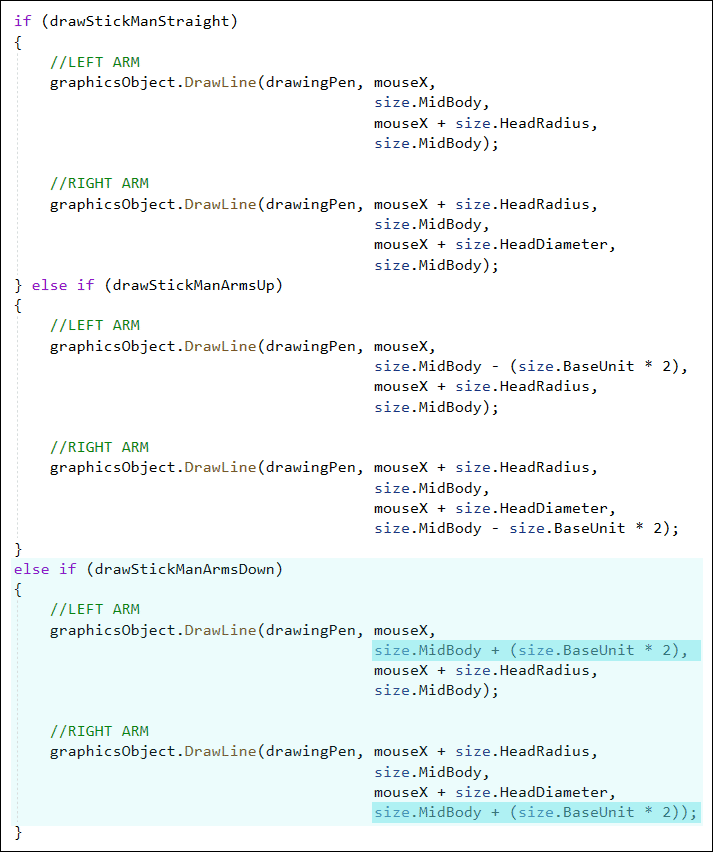
So, the only change to make when you copy and paste the code into the drawStickManArmsDown Else If part is to have a plus sign instead of a minus sign in the highlighted code.
Run your program and try it out. Click your Arms Down button. The stick figure man will then look like this:
Try them all out. You will find that you can now draw as many stick figures as you want on your white canvas, and in any size.
But that's all the men done. We'll come back and do the stick figure woman later. What we'll tackle now is the Undo and Redo feature.
