Home and Learn: Intermediate Programming
Stick Figure Dimensions

Stick Figure App - Coding Prep Work
OK, it's taken us over 10 lessons to draw something. That's a lot of work to draw a head. But it's all good prep work for when we do the rest of the drawing. There's only one thing left to do that will make our lives easier and that's to set up a class to handle the dimensions of the stick figures. For example, take a look at this image:

We have a stick figure drawn on a grid. The grid is 10 units by 10 units. From the top (mouseY), the head is 3 units big, the body is 4 units big, and the legs are 3 units. We can use that information to create a Stick Figure Dimensions class.
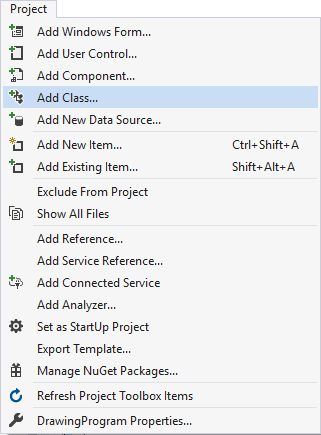
At the top of Visual Studio, click Project > Add Class:
In the dialog box that appears, type StickFigureDimensions as the Class name. Here's the Add New Item dialog box from C#: (VB users will see a vb ending rather than a cs one.)
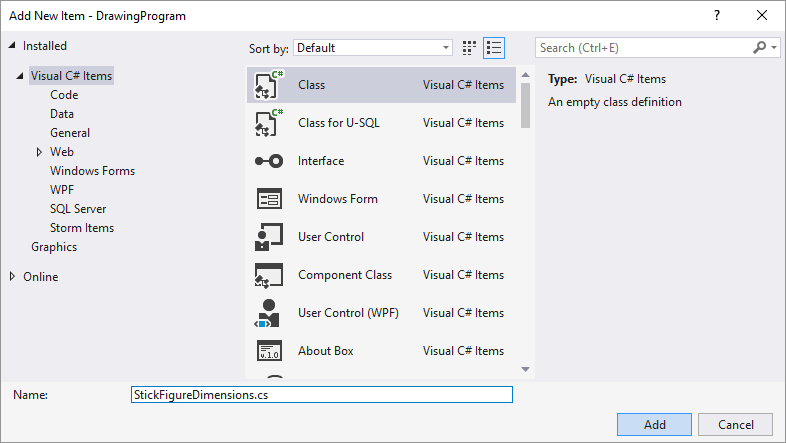
Click Add when you've changed the name.
The code for your new class should look like this in VB Net:
Public Class StickFigureDimensions
End Class
And this in C#: (You can delete all the using statements at the top.)
namespace DrawingProgram
{
class StickFigureDimensions
{
}
}
Inside the Class in VB Net, add this Field:
Private ReadOnly Yvalue As Integer
Inside the curly brackets of the Class code for C#, your field to add is this:
private readonly int Yvalue;
We're not doing a great deal with the Yvalue integer, so we can make it read only.
Now we can add a Class Constructor. These get called whenever you create a new object from your class. You can pass values into your Class Constructor. They are like Subs or methods. They take the same name as the Class itself. A Class Constructor is an ideal place to set up values for your field variables.
Add this Class Constructor in VB Net:
Public Sub New(mouseY As Integer, mouseY1 As Integer)
BaseUnit = (mouseY1 - mouseY) / 10
Yvalue = mouseY
End Sub
And this one in C#:
public StickFigureDimensions(int mouseY, int mouseY1)
{
BaseUnit = (mouseY1 - mouseY) / 10;
Yvalue = mouseY;
}
You'll get red underlined for BaseUnit. We'll fix this in a moment. But notice that the Class Constructor has the name StickFigureDimensions, which is the same name as Class itself. In between the round brackets of the Constructor, we're passing in two values, an integer for the mouseY position and an integer for the mouseY1 position.
Notice the BaseUnit line:
BaseUnit = (mouseY1 - mouseY) / 10
The height of our stick figure is mouseY1 - mouseY. mouseY1 is where you lifted the left mouse button up, remember, and mouseY is where you held it down. Subtract one from the other and you get the height of the stick figure. We divide this by 10 to get the base units. We're trying to recreate that 10 by 10 grid you saw earlier. One square on the grid is one base unit.
The Yvalue line just stores the mouseY value into the field variable we've called Yvalue.
To get rid of the red underline from BaseUnit, we can set up something called an auto property. An auto property is one where you're not going to be doing anything with the code in terms of logic or fancy algorithms. It's just height divided by width in the Constructor. This saves you from setting up a private field at the top of the code, and then a separate property to access the BaseUnit value.
Add this auto property in VB Net:
Public ReadOnly Property BaseUnit() As Integer
And this one in C#:
public int BaseUnit { get; }
So the auto property just gets the value in BaseUnit.
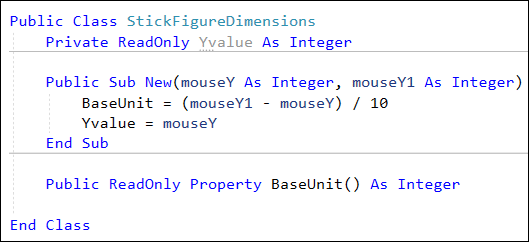
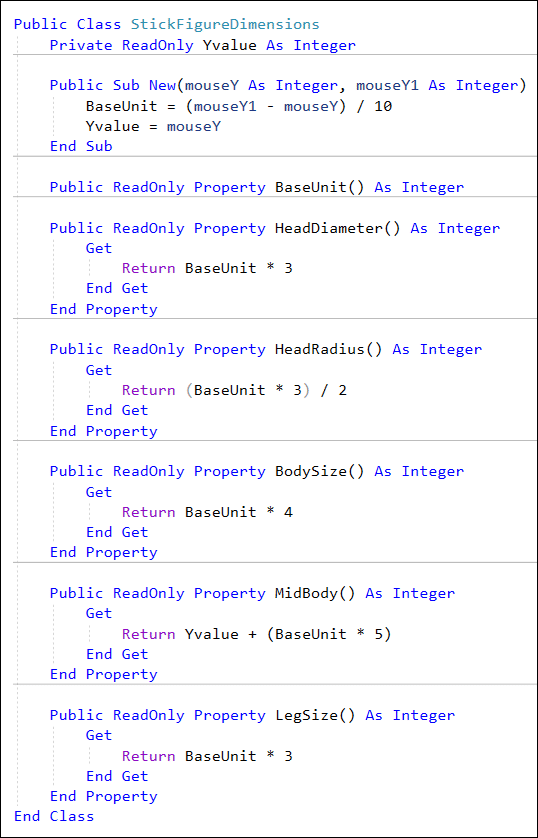
Your new Class should now look like this in VB Net:
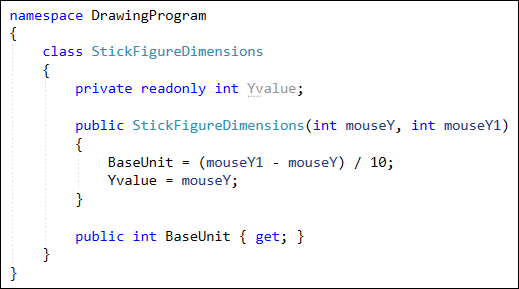
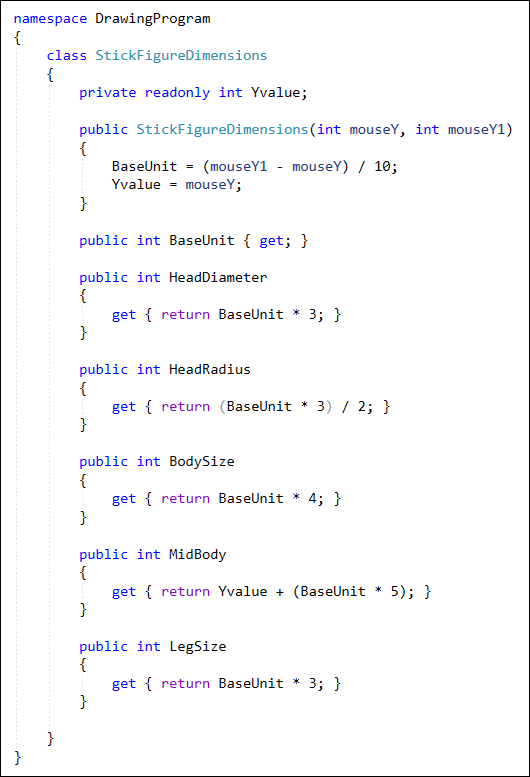
And here's what your Class should look like in C#:
The rest of the class is just a bunch of properties. They can all be read only. A read only property is one where you only need a get part. You can miss out the set.
The properties we want to set up are for the head diameter, the head radius, the body size, the mid body point (where the arms are going to go), and the leg size.
If that's not clear, take a look at this image:
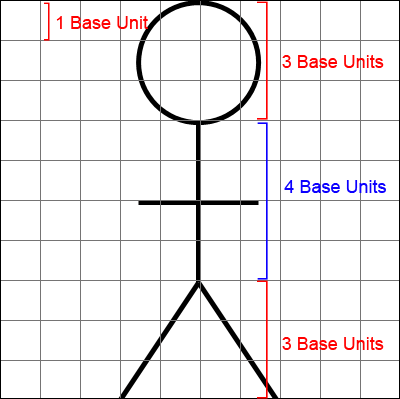
The head is 3 Base Units. This means the diameter of our circle is also 3 Base units. The radius is, of course, the head divided by 2.
We can set up a HeadDiameter property. Add this to your class in VB Net:
Public ReadOnly Property HeadDiameter() As Integer
Get
Return BaseUnit * 3
End Get
End Property
And this in C#:
public int HeadDiameter
{
get { return BaseUnit * 3; }
}
This property returns the diameter of the head, which is 3 Base Units.
We can also get the radius of the head. Add this property to your code in VB Net:
Public ReadOnly Property HeadRadius() As Integer
Get
Return (BaseUnit * 3) / 2
End Get
End Property
And here's the property to add in C#:
public int HeadRadius
{
get { return (BaseUnit * 3) / 2; }
}
Instead of saying BaseUnit * 3) / 2, you can just use HeadDiameter / 2. But we'll keep everything in Base Units.
We can add a property to get the dimensions of the stick figure body. Add this property in VB Net:
Public ReadOnly Property BodySize() As Integer
Get
Return BaseUnit * 4
End Get
End Property
And this property in C#:
public int BodySize
{
get { return BaseUnit * 4; }
}
The height of the body is 4 Base Units.
We also need to get where the middle point is on the body. The middle point is where the arms go. Here's the property for that in VB Net:
Public ReadOnly Property MidBody() As Integer
Get
Return Yvalue + (BaseUnit * 5)
End Get
End Property
And here's the property in C#:
public int MidBody
{
get { return Yvalue + (BaseUnit * 5); }
}
The calculation to get the body height is the Yvalue plus 5 Base Units.
The final property to add is for the leg size. Here it is in VB Net:
Public ReadOnly Property LegSize() As Integer
Get
Return BaseUnit * 3
Get
End Property
And here's the property to add in C#:
public int LegSize
{
get { return BaseUnit * 3; }
}
The size of each leg is 3 Base Units.
The code for your Class should look like this in VB Net:
And here's the C# version:
That's it for the StickFigureDimensions Class. Before you leave it, you can add a Summary comment to the top of each property, if you want. The summary uses three single quotes on three lines in VB Net. In C#, you use three forward slashes. For example, add this to the HeadDiameter property in VB:
''' <summary>
''' Get the diameter of the head for a stick figure
''' </summary>
Public ReadOnly Property HeadDiameter() As Integer
Get
Return BaseUnit * 3
End Get
End Property
And add this in C#:
/// <summary>
/// Get the diameter of the head for a stick figure
/// </summary>
public int HeadDiameter
{
get { return BaseUnit * 3; }
}
Let's put the Class to use now, though. In the next lesson below, we'll draw a head and a body using our new class.
