Home and Learn: Intermediate Programming
Adding the Buttons to the Form

Stick Figure App - Form Design
Add a button to your Stick Figures Group Box. Change the Name to BtnArmsStraight. Change the size to 64 by 64. Delete the default text to leave it blank. Now copy and paste the button three times so that you have four buttons in your Group Box. Change the Name properties of the other three button to these:
BtnArmsUp
BtnArmsDown
BtnStickWoman
We can now set the images for the buttons.
Select the BtnArmsStraight button. Locate the BackgroundImage property in the Properties area:

Click the little button to the right of (none) to bring up the following dialog box:
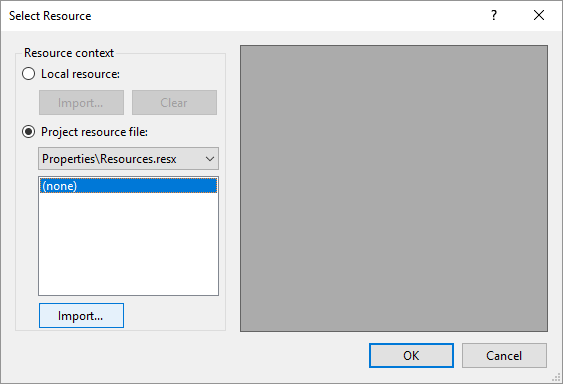
Make sure the Project resource file item is selected. Click the Import button and navigate to where you saved and unzipped your images. (If you haven't grabbed the images yet, click here: Button Images) Select them all. The Select Resource dialog box will then look like this:
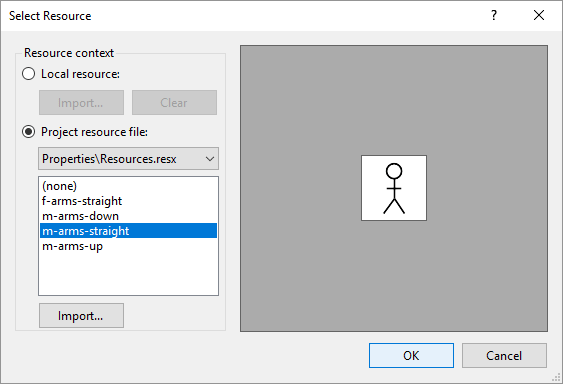
Select the m-arms-straight item from the list and click OK. Your button will then have an image on it.
Do the same for the rest of the buttons. Add the appropriate images to them.
Your Stick Figures Group Box will then look like this:

The Color Buttons
In the color area, we'll have six buttons that we'll turn in to color squares, a button that will bring up a color dialog box, and a label that will display the chosen color.
Add a button to your Colors Group Box. Change the Name to BtnBlue. Set the size to 20 by 20. Delete the default Text for the button. To change the color, locate the BackColor property. Click the dropdown box and select the Custom tab rather than Web or System:

Select a Blue square.
Now locate and set the following properties in order to change the button
into a color square:
FlatStyle: Flat
FlatAppearance > BorderColor: The same blue as for the BackColor
property

Now copy and paste your button five times. Change the following properties for your new buttons:
Name: BtnRed
BackColor: Red
FlatAppearance > BorderColor: Red
Name: BtnGreen:
BackColor: Green
FlatAppearance > BorderColor: Green
Name: BtnYellow:
BackColor: Yellow
FlatAppearance > BorderColor: Yellow
Name: BtnBlack
BackColor: Black
FlatAppearance > BorderColor: Black
Name: BtnGray
BackColor: Gray
FlatAppearance > BorderColor: Gray
Just under your color squares, add another button. Change its Name to BtnCustomColor. Change the Text property to Custom. Stretch the width so that it's the same width as the six color square buttons.
Add a label to your Group Box. Change the name to labelColor. Set the BorderStyle property to FixedSingle. Delete the default text. This will leave you with a tiny label. It's difficult to change the size of a label if it hasn't got any text in it. To get round this, click into the Text property. Instead of entering text, hit the spacebar on your keyboard twice. Now set the Font property to 36 points.
Your Colors Group Box should look like this:

The Action Buttons
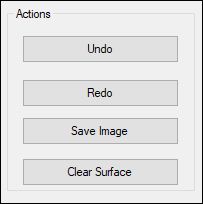
The final buttons we'll add to the form are the action buttons in the Actions Group Box. We'll have four of these: An Undo button, a Redo button, a button to save the image and an image to clear the Picture Box.
Add four buttons to your Actions Group Box. The size of ours were 157 wide by 28 high. Set the following Properties for them:
Name: BtnUndo
Text: Undo
Name: BtnRedo
Text: Redo
Name: BtnSave
Text: Save Image
Name: BtnClear
Text: Clear Surface
Your Actions Group Box will then look like this:
Now that we have the buttons added, we'll finish off the form in the next lesson. There's not much left to do before we start the programming.
