Home and Learn: Intermediate Programming
Connecting to Excel

Excel Chart Project: For C# and VB NET Students
What we'll do is to connect to Excel in the Form Load event of Visual Basic and C# .NET. However, in order to connect to Excel, you need add a line of code to the very top of the coding window. First though, create a Form Load event. You can do this quite easily by double-clicking anywhere on your form (the grey area and not the chart, button or Combo Box). Alternatively, with the form selected, click the lightning bolt in the Properties area. Locate the Form Load event and double click it.
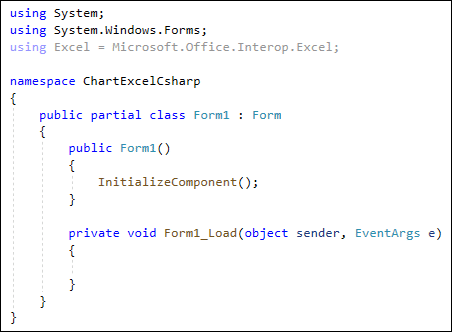
In C#, you should this in the coding window:
private void Form1_Load(object sender, EventArgs
e)
{
}
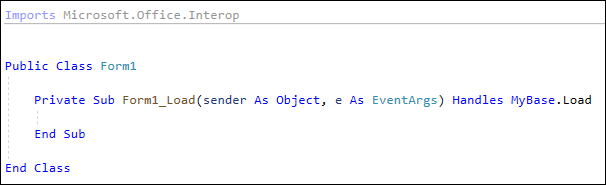
In VB Net, your form load event will look like this:
Private Sub Form1_Load(sender As Object, e As EventArgs) Handles MyBase.Load
End Sub
At the very top of the window in C#, where you have all the other using statements, add this line:
using Excel = Microsoft.Office.Interop.Excel;
(You can delete all the greyed-out ones.)
This creates a namespace called Excel. This will save you from having to write Microsoft.Office.Interop.Excel all the time in the rest of the code.
Visual Basic Net users, add this to the top of your coding window:
Imports Microsoft.Office.Interop
(You don't need to create an Excel namespace in VB.)
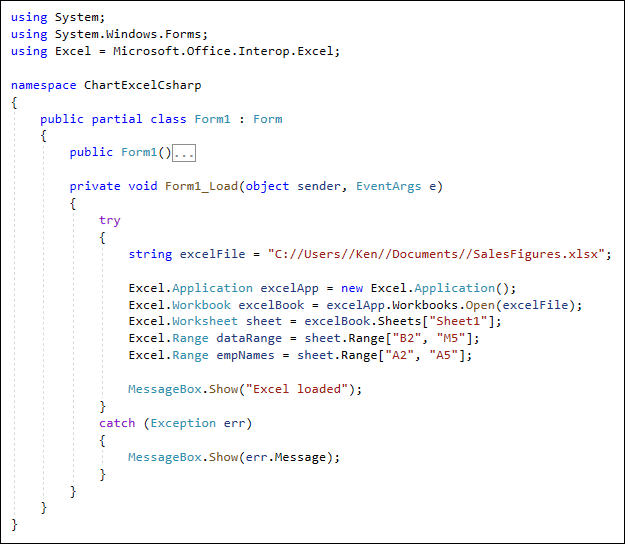
Your coding window should look like this in C#:
And this in VB Net:
Now download the following Excel file:
Save it somewhere on your computer and note the location.
Incidentally, if you have problems opening this file in the code that follows, you can create a spreadsheet for yourself in your version of Excel. Create the following:

You don't need exactly the same numbers as ours. Any will do. But make
sure you have names in A2 to A5 and data in cells B2 to M5.
First, we can add a try … catch block to the form load event. Add
this in C#:
try
{
}
catch (Exception err)
{
MessageBox.Show(err.Message);
}
And this in VB:
Try
Catch err As Exception
MessageBox.Show(err.Message)
End Try
Now, in the try part, add the file name and location to your code as a string:
C#:
string excelFile = "C://Users//Ken//Documents//SalesFigures.xlsx";
VB
Dim excelFile As String = "C:\Users\Ken\Documents\SalesFigures.xlsx"
(Obviously, change the file path so it points to your own SalesFigures spreadsheet.)
The next thing we need to do is to create an Object from an Excel Application. Add the following code in C#, just below your excelFile string line:
Excel.Application excelApp = new Excel.Application();
And this in VB Net:
Dim excelApp As Excel.Application = New Excel.Application()
We can open the excelFile workbook we've added at the top of the form load event. Add this line in C#:
Excel.Workbook excelBook = excelApp.Workbooks.Open(excelFile);
And this in VB:
Dim excelBook As Excel.Workbook = excelApp.Workbooks.Open(excelFile)
(Note where the singular and plurals are for "workbook", in C# and VB Net. Alos, this assumes that the file is not password protected.)
We now need to get the Sheet in the workbook. Add this line to your code in C#:
Excel.Worksheet sheet = excelBook.Sheets["Sheet1"];
And this one in VB Net:
Dim sheet As Excel.Worksheet = excelBook.Sheets("Sheet1")
The name "Sheet1" is the default name of a sheet in the excel file you downloaded. Instead of the name of a worksheet you can use a number:
excelBook.Sheets[1];
The 1 refers to the first sheet in the workbook. However, if you have more than one sheet, and you rearranged the order, then the first sheet wouldn't be the right one anymore. So it's better to use a name rather than a number.
Now that we have a reference to a worksheet, we can specify the range of cells we want to use. We can get the data, first. That's the one with all the numbers. Add this to your code in C#:
Excel.Range dataRange = sheet.Range["B2", "M5"];
And this in VB Net:
Dim dataRange As Excel.Range = sheet.Range("B2", "M5")
The first cell in the range is B2. After a comma, type the end of the range, M5 for us.
Now we can add the names from the A column. Here's the next line for C# users:
Excel.Range empNames = sheet.Range["A2", "A5"];
And here it is in VB Net:
Dim empNames As Excel.Range = sheet.Range("A2", "A5")
This gets us a range from A2 to A5, which is all those staff names from the spreadsheet.
Your code so far should look like this in C#:
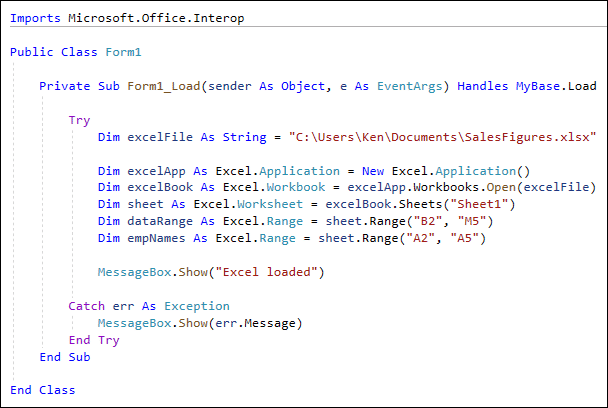
And this in Visual Basic .NET
Let's run the code and see how we're getting. Add a message box to your code (without the semicolon in VB):
MessageBox.Show("Excel loaded");
Run the program and you should see the "Excel loaded" message box.
(If you created your own spreadsheet, you may get an error message instead, depending on how old your version of Excel is. The Interop.Excel service doesn't play well with old spreadsheets, unfortunately. If this happens to you, you would need to upgrade your version of Excel, or just use our file.)
Cleaning Up
There is a problem when you create Excel COM objects like we've just done: they tend to stick around in memory. So you need to release them, otherwise it could cause you problems.
To do the memory management, add this line to the top of your code in C#:
using System.Runtime.InteropServices;
And this one in VB:
Imports System.Runtime.InteropServices
After the "Excel loaded" message box, add this if statement in C#:
if (dataRange != null)
{
Marshal.ReleaseComObject(dataRange);
}
And this one in VB:
If dataRange IsNot Nothing Then
Marshal.ReleaseComObject(dataRange)
End If
Marshall is a class that provides a collection of methods that
deal with memory management. One of these is called ReleaseComObject.
In between round brackets, you type the name of the object you want
to release, dataRange in this case. The first line of the of
statement just checks if the object isn't null (or Nothing in VB).
Because we create five COM objects, we need four more if statement,
do we can release each object. Add four more if statements to release
the following COM objects:
empNames
sheet
excelBook
excelApp
For the last two, you can close the workbook and quit Excel before the Release lines (without the semicolons on the end in VB):
excelBook.Close();
excelApp.Quit();
It's a bit of a chore adding all the if statements to release your COM objects. But it needs to be done!
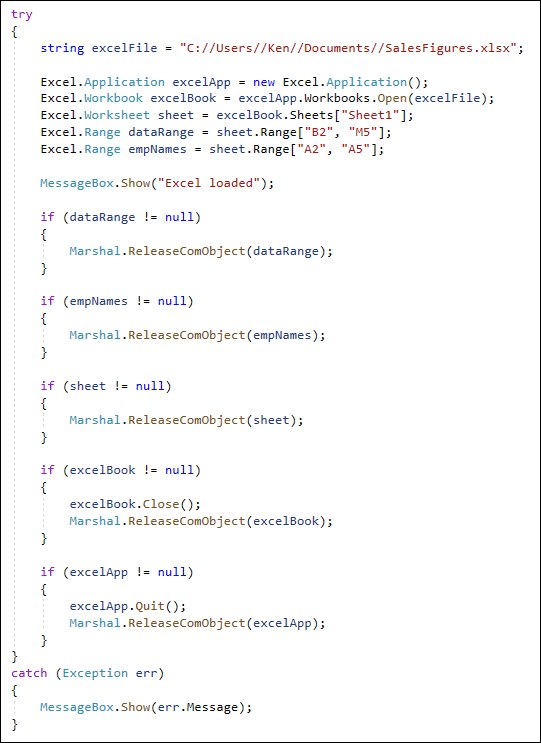
But here's what your try … catch statement should look like in C#:
And here's the VB Net version:

In the next lesson, we'll load the sales staff names into the combo box. We can also transfer the chart data into an array.

Back to the Intermediate Programming Contents Page