Home and Learn: AI Beginners Course
How to Remove a Background from an Image with the help of AI
Created:
Of course, there are plenty of websites out there that will allow you to upload an image and remove the background. But it's nice to keep it on your own computer. It costs nothing, there's no account to create, your images stay private, and you won't run into anyone else's rules about what you can and can't work on.
In this lesson, you'll learn how to remove an unwanted background from an image. Again, just like the previous lesson, we'll use FooocusPlus.
Why remove the background?
People remove backgrounds to make a subject stand out, fit a particular design, or reuse an image in different settings. Common reasons include:
- Product listings: Put an item on a clean or consistent background.
- Marketing and design: Create graphics, ads, thumbnails, or presentations.
- Profile photos: Make a portrait look more polished or match a specific style.
- Compositing: Place a person or object into a new scene.
- Practical editing: Remove clutter or distracting elements around the subject.
Background removal works best when the AI can clearly tell subject from background.
Work very well with:
- A single person or object, clearly separated from the background.
- Strong contrast: a dark-haired person against a pale wall, for example.
- Simple backgrounds: sky, studio backdrops, blurred scenery, plain walls.
- Clear outlines around the subject.
- Sharp, well-lit images.
- Product-style pictures where the item is fully visible and not overlapping other things.
Struggles most with:
- - Hair, fur, feathers, smoke, fog, water spray, and transparent materials. Alpha Matting can help here.
- - Similar foreground and background colours, such as a black coat against a dark doorway.
- - Busy scenes with several people, objects overlapping, or clutter behind the subject.
- - Cropped limbs or objects touching the edge of the image.
- - Shadows: the tool may remove them entirely, keep too much of them, or make a hard-edged cut-out.
- - Reflections in mirrors, glass, water, or shiny surfaces.
- - AI images with odd anatomy or unclear edges can confuse the mask (extra fingers, blended clothes/background, impossible jewellery) .
- - Very low-resolution, blurry, dark, or heavily compressed images.
With that in mind, let's use FooocusPlus to remove the background from an image.
AI Background Removal
We have an AI-generated image here of a newsreader. We'd like to remove the background. Let's see how it's done.
Download this image onto your own computer:

Start your FooocusPlus, just like you did last time.
In FooocusPlus, check the Features box to toggle the option on. When you do, you'll see the following appear:
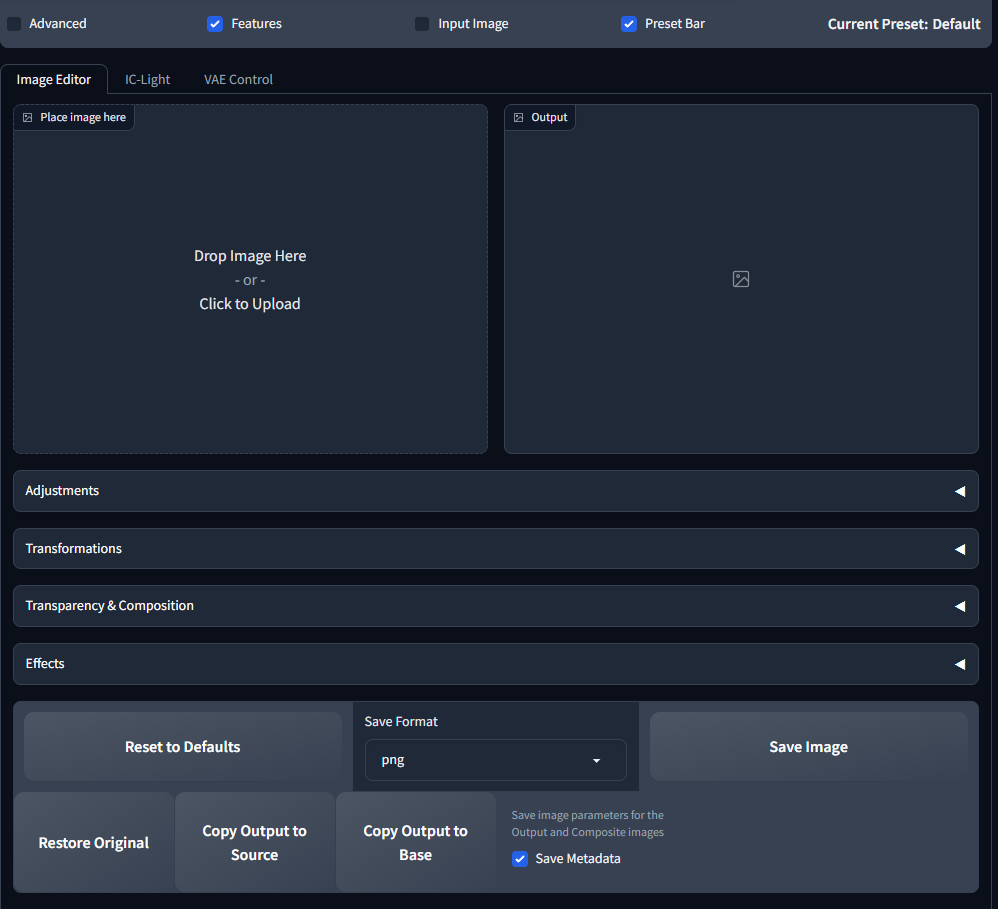
On the lefthand side, you select the image you want to change. The output image on the right will then be updated, showing you any changes that have been made.
Select your newsreader image as the input image. It will then be duplicated on the right:
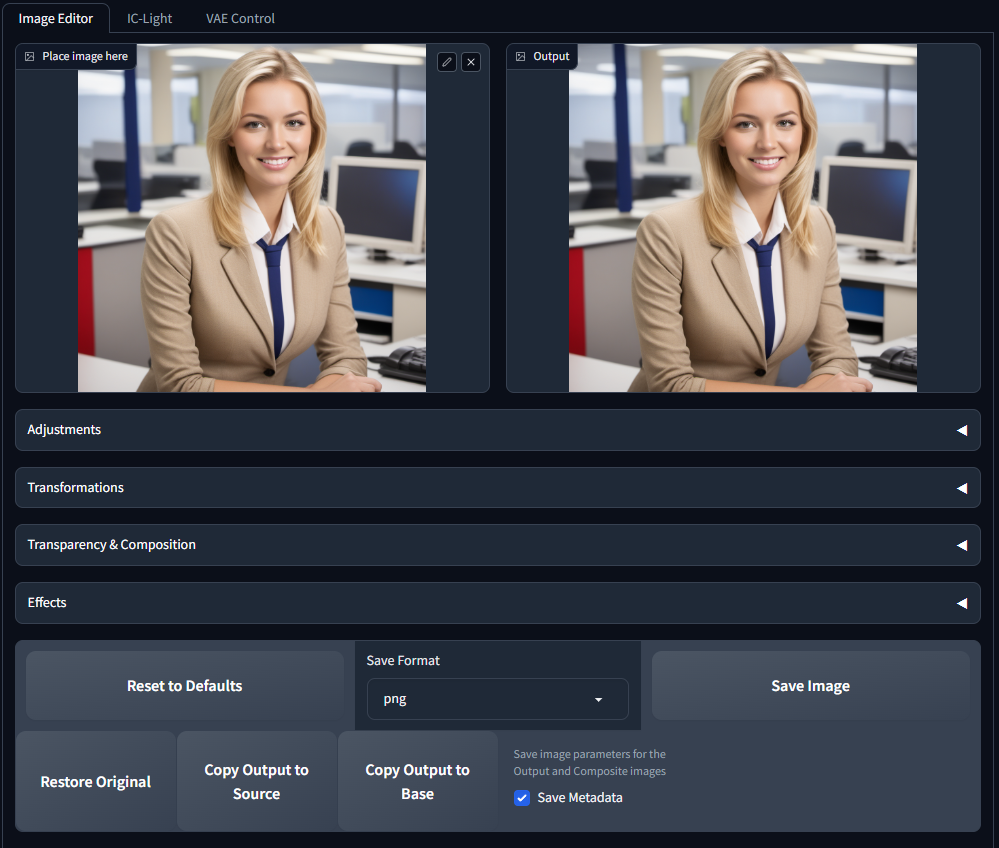
Now expand the item below, Transparency & Composition. You'll see these options:
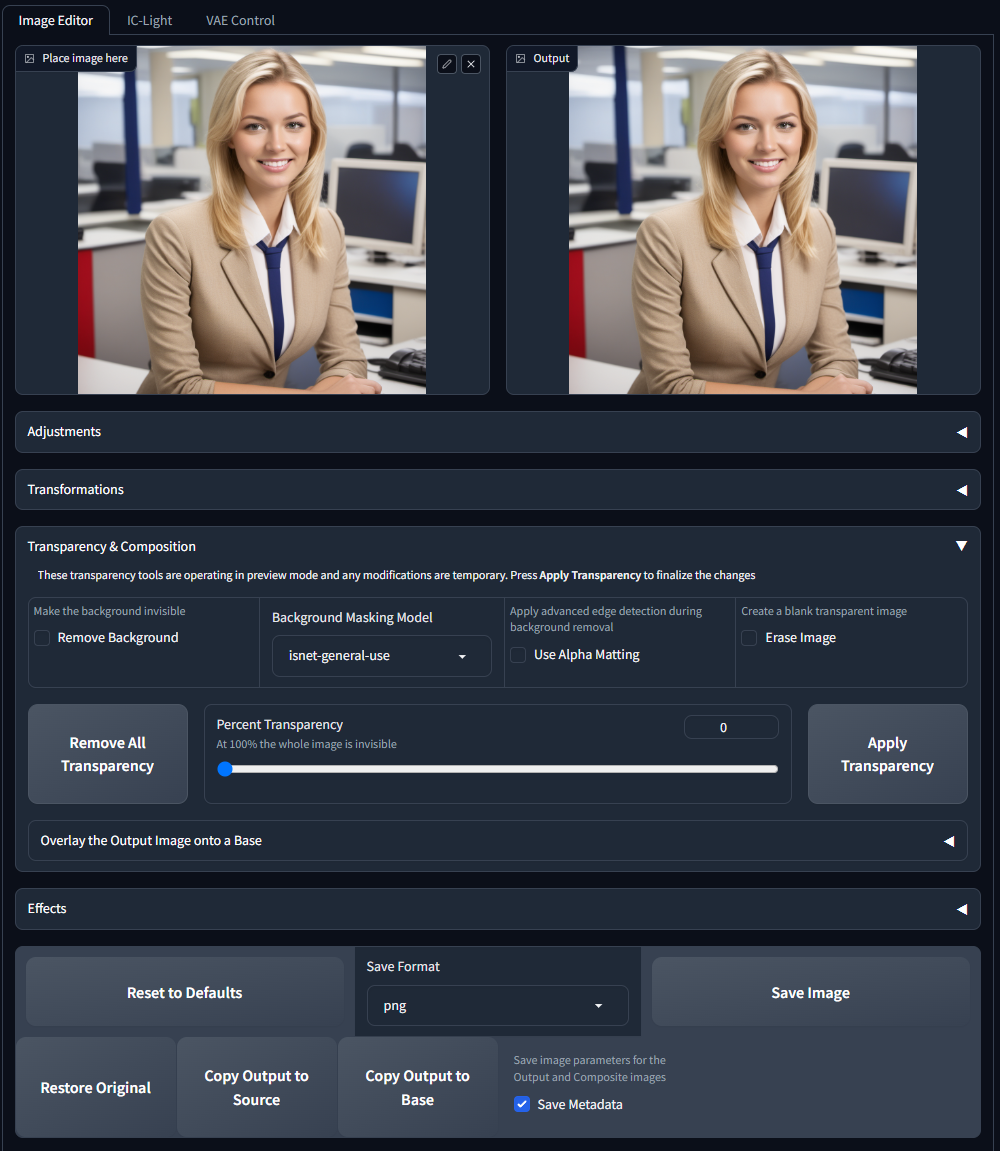
The headline feature is Remove Background. Don't toggle this just yet.
To the right of Remove Background, you have some more options - Background Masking Model and Use Alpha Matting. Click the dropdown for Background Masking Model to see the available options:

The ones you'll use most are: u2netp, u2net_human_seg,
and isnet-general-use. The default is isnet-general-use.
Background Masking Models are alternative AI models that create the cut-out mask. The white/visible part is kept, and the background becomes transparent or is replaced.
- u2netp - A smaller, faster general-purpose model. Best first choice if you want speed or have limited VRAM/RAM. Its edge quality can be a little rougher.
- u2net_human_seg - Tuned specifically for people. Use it for portraits and full-body photos as it usually separates a person from the background more reliably than a general model.
- isnet-general-use - A newer general-purpose model for people, objects, animals and products. It often gives softer, cleaner edges around hair, clothing and complex shapes.
We'll look at the Use Alpha Matting option in a moment.
Select u2net_human_seg as the Background Masking Model for your newsreader. Now toggle Remove Background. FooocusPlus then gets to work removing the background:
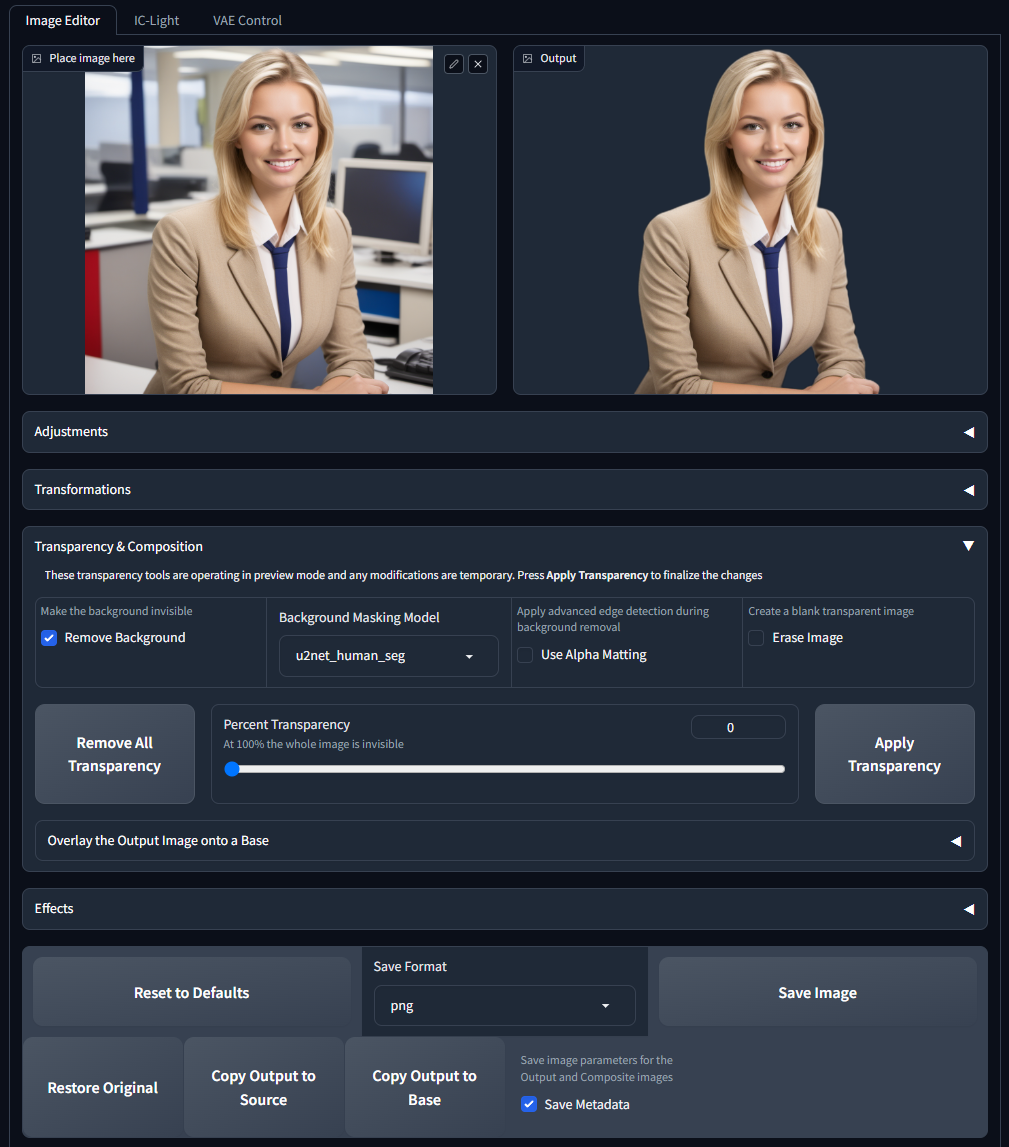
At first glance, it's difficult to see how successful (or not) the background removal has been. What you need is a closer look at the image.
Click the button bottom right to save your image. On a Windows machine, the default location is:
C:\Users\USER_NAME\api\FooocusPlus.git\UserDir\Outputs
(Obviously, change USER_NAME to your own username.)
In the Outputs directory, you'll see folders with names in the date format. For example, 2026-11-07 (year-month-day). Double-click a date folder to see your images.
If you double-click an image, Windows opens it in its default image viewer. However, your image viewer may be set to Dark Mode. If so, you'll see something like this:

In Dark mode, you can't see if the background has been removed successfully around the edges. Fortunately, the Windows image viewer has a light mode.
Click the three dots at the top of the viewer, indicated by a red arrow in the image above. From the menu that appears, select Settings. In Settings, change the App theme to Light:

Close the Settings screen and the Windows image viewer will be in light mode:

Much better. We can now see the problem: the background has not been properly removed from the edges.
To solve this, go back to FooocusPlus. Toggle the option to Use Alpha Matting:

Unfortunately, just toggling Alpha Matting doesn't update the image. You can either click the Apply Transparency button or uncheck Remove Background and then check it again. This will force FooocusPlus to update the output image. Save your image again and double click the new version to see what it looks like in the Windows image viewer:

As you can see, the edges are much better. But not perfect. If you continue to zoom in, you'll see jaggy edges and stray grey background bits that haven't been removed. It's a bit of trial-and-error here. If it looks terrible at first, play around with the settings. There isn't a one-size-fits-all when it comes to background removal.
In the next lesson, you'll learn how to take an image with the background removed, just like the one above, and add it to a new image, all using AI. This time, we'll do some manga!
Image Overlays - a Manga Example -->