Home and Learn: Microsoft Access Course
Access Report Headers
In the previous lesson, you created a report using the Report Wizard. We'll now have a look at the various sections of a report, and do a bit of formatting.
You should be in Design View, at the moment. If not, make sure your report is open in the main window. Then click the Design View icon in the bottom right:
![]()
Or right-click your report in the All Access Objects area on the left and select Design View from the menu:

Design View can be a bit confusing. This is where you can add new controls or play around with the controls already on the report. You can also delete any controls you don't need. (A control is things like labels, text boxes, buttons, and a whole lot more.) It looks like this:
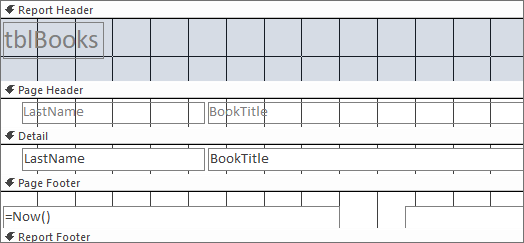
Notice that there are 5 main areas to your report:
Report Header - This will appear on the first page of your report but not on other pages
Page Header - This will appear on every page and contains things like column labels
Detail - Your data. Only one row appears in Design View
Page Footer - This will appear at the bottom of every page
Report Footer - This will appear at the bottom of the first page but not other pages
To see what your report will look like right now if it were printed, click the Print Preview icon in the bottom right of Access. Or select Print Preview from the View dropdown menu on the Design Ribbon. The report should look something like this:
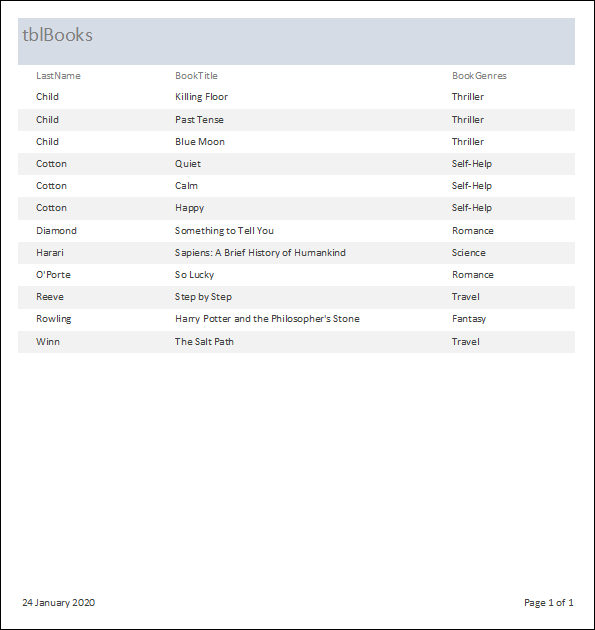
The Report Header is the one at the top, with a blue background and tblBooks in it. The Page Header has the column headings: LastName, BookTitle, BookGenres. The Detail is every row of data in the report. The date and page numbers are in the Page Footer.
Let's play around with the Report Header.
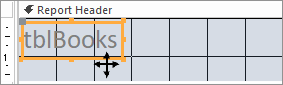
At the moment, the heading just says tblBooks, which was the default name left over from the Report Wizard. You can change that. Click on tblBooks and you'll see it outlined in orange:
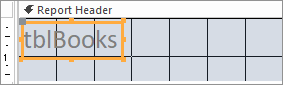
Notice the squares around the edges. These are sizing handles. Move your mouse over a sizing handle and the mouse pointer will change shape to a double headed arrow.
If it changes shape to four arrows, then that's the Move icon and you need to try again. Here's the move icon:
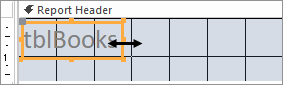
But pick the square in the in the middle on the right edge of the orange box. When you see the pointer with two arrows, hold down your left mouse button and drag to the right. Your orange box will change size:

You can change the size of any control on your report in the same way.
To change the actual text, double click where it says tblBooks. The box will turn white, ready for you to type a new title:

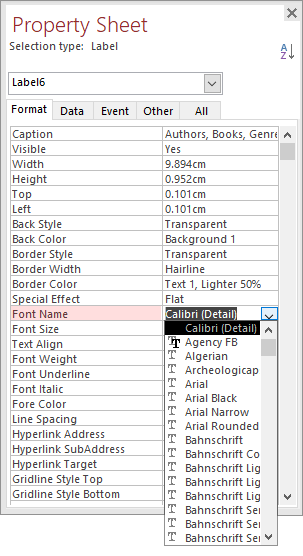
You can also change the title via the Property Sheet on the right. Locate the Caption item. Click inside the box to the right of it:

Delete the current contents and type a new caption.
Change the Caption to Authors, Books, Genres. Your Report Header will then look like this:

If you want to move the title in the Report Header to a more central location, you need to move the whole orange box across. Move your mouse onto your orange title box until the pointer changes shape to the four arrows you saw in a previous image. Hold your mouse down and drag the whole box to the right. Let go of the left mouse button when you're happy with the new location:

Changing Font Properties
You can change the Font for your text. Be aware, though, that you can't select one font for the Header and have a different font for the text in, say, the Detail area. When you change the font, you change it for the whole report. (You can change the font size for just one control, though.)
If you want to change the font, you can do it either via the Ribbon at the top of Access or from the Property Sheet. To change the font via the Ribbon, make sure the Design Ribbon is selected at the top of Access. Locate the Themes panel. Click the Fonts dropdown:

To change it via the Property Sheet, locate the Font Name property. Click the dropdown and select a font:
Two more properties worth exploring are the Font Weight and the Fore Color properties:
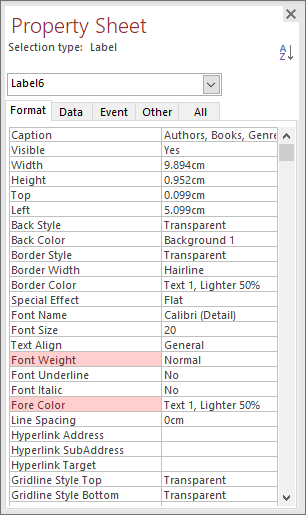
Click to the right of where it says Font Weight. You'll see a dropdown list of options to choose from:
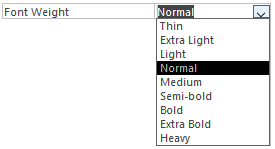
Select an option from the list.
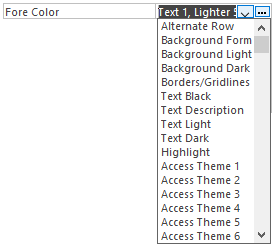
Now click in the box for Fore Color. This time, you'll see a dropdown option and a little button with three dots in it. Click the dropdown to see a list of color names:
Click the three dots to see actual colors:
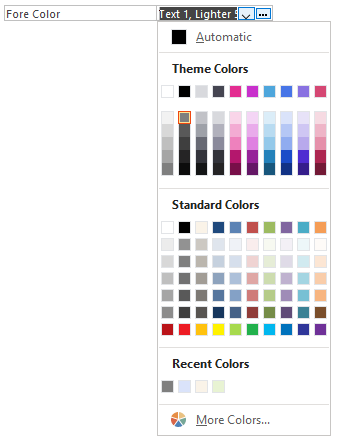
Select a new color for your title.
Report Header Logos
You can add a logo to your Report Header. Make sure the Design Ribbon is selected at the top of Access. Locate the Header/Footer panel and the Logo item:
![]()
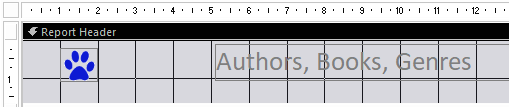
When you click Logo, you'll see an Insert Picture dialog box appear. Select an image from your computer to use as a logo and click Open. The image will appear on the left of the report header:
![]()
You can resize and move the image just like you did with the title.
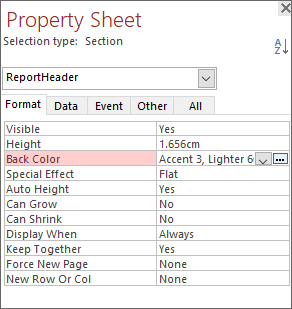
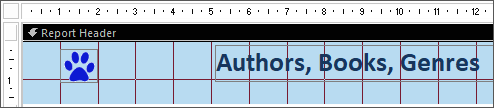
If you want to change the background color of the Report Header from that bland grey color, click on Report Header so that it tuns black:
Now look at the Property Sheet on the right. You'll see there's a reduced number of properties to choose from. But there is a Back Color one. Select a different color, just like you did for the font.
In the image below, we've gone for a blue color to match the color of the logo. We've also changed the font color and the font weight:
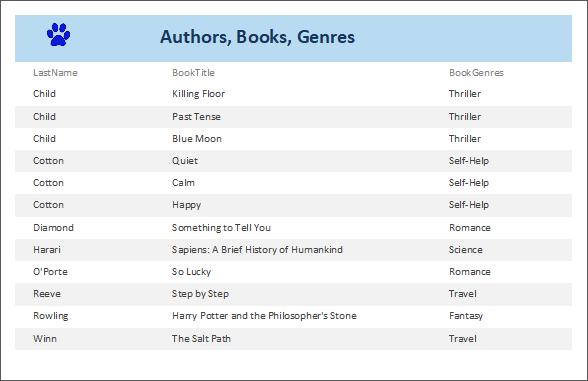
Switch to Print Preview to see what it looks like:
There's a lot more formatting we could do in the Report Header, but let's move on.
You'll notice that the labels in the Page Header are a bit too close to the Report Header and the Detail area. Let's add some space and some formatting. We'll do that in the next lesson.
<-- Previous Lesson: The Reports Wizard | Next Lesson: Access Reports, the Page Header -->
<--Back to the Microsoft ACCESS Contents Page