Home and Learn: Microsoft Access Course
Microsoft Access - Relationships and Data Entry
In the previous two lessons, you have imported an Excel file and a CSV file, truning them both into Access tables. Now, we'll cretae a relationship between the two tables and enter some data.
If you haven't done those lessons, or something when wrong, you can download our Access database here: (Right-click > Save As)
Access Database After Importing From Excel and CV File
Before creating the relationship, close down any tables you have open (just click the X to the right of table name). If you don't close down your table, Access can't create a relationship, and it will nag you about it.
To create a relationship, click on Database Tools at the top of Access. From the Database Tools ribbon, click the Relationships item on the Relationships panel.
In earlier versions of Access, you'll get a popup box with the names of all your tables in it. Select both of the tables and close the popup box down. In later versions of Access, you'll see a panel appear on the right. Select both tables (hold down a CTRL key on your keyboard and left click the tables). Click the Add Selected Tables button at the bottom:
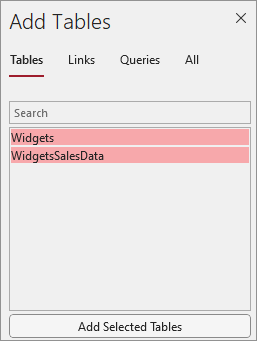
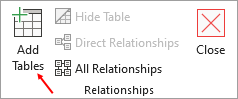
If you can't see an Add Tables area, click the Add Tables item on the Relationships Design ribbon at the top of Access:
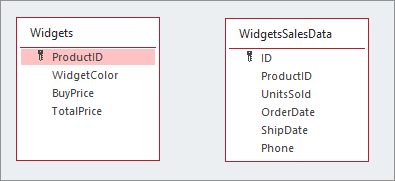
You should see this in the main Relationships window, once you've added the tables:
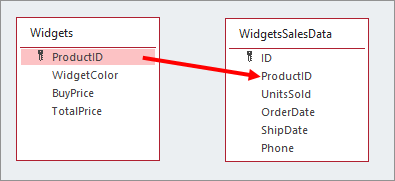
To create a relationship, drag the ProductID item from the Widgets table onto the ProductID of the WidgetSalesData table:
When you let go of your left mouse button, you should see a dialog box appear. This one:

Check the box for Enforce Referential Integrity, just like we did before. This will ensure you don't get orphaned records if you delete something.
Click the Create button and you'll see a line appear between your two tables:
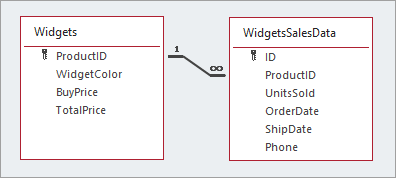
This is the one to many relationship, just like we had in a previous lesson. One ProductID in the Widgets table can have many rows in the WidgetSalesData table. The Red widget, for example, can be bought many times.
Close the relationship down, as we're done with it. Open up the Widgets table and you'll plus sign next to each widget:
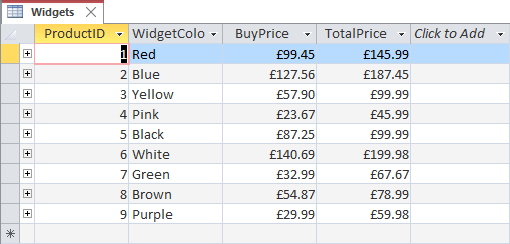
Click a plus symbol on the left to expand that item. You should see all the sales associated with the item. Now expand the Purple item at the bottom and you'll see it has no orders:
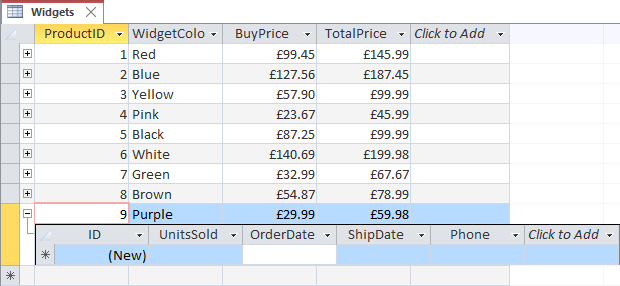
Let's add an order to it.
Click into textbox under the UnitsSold field. Enter any number you like, say 7. Now click into the textbox under OrderDate. You should see an icon appear:

Click the icon to reveal a calendar.
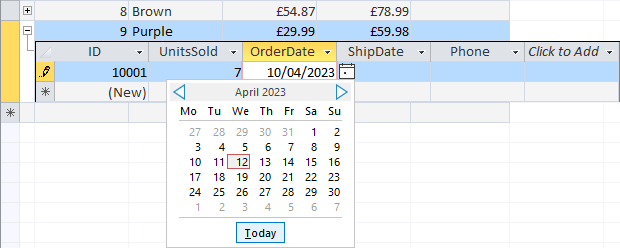
You get a calendar because you set the OrderData field to be of the Data Type Date With Time.
Select an order date, though. Now click into the ShipDate textbox and select a date a few days in the future.
Note that there's nothing stopping you from selecting a date in the past, before the order date. This is not what you want, so you'll soon learn how to set a validation rule to stop this from happening.
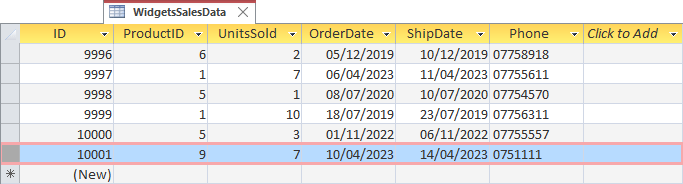
Complete the row, though, by entering a phone number:

If you open up your WidgetSalesData table and scroll right to the bottom, you should see your new entry:
OK, now let's look at setting up things like formatting and validation rules.
<-- Previous Lesson: Import CSV File | Next Lesson: Access Format -->
<--Back to the Microsoft ACCESS Contents Page