Home and Learn: Intermediate Programming
Intro and Form Design

Image Information: For C# and VB NET Students
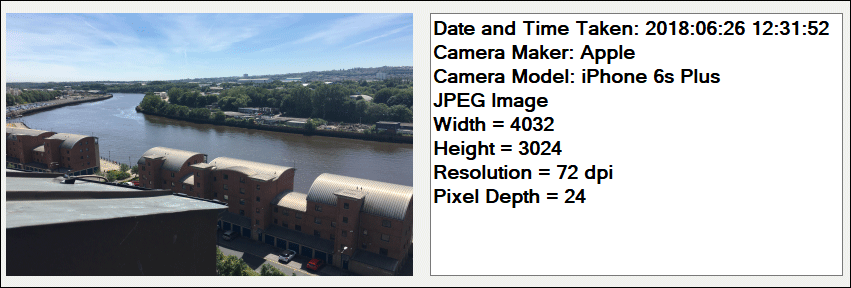
In this series of lessons, you'll see how to get information about an image. The information we'll get is the height and width, the resolution, the pixel depth, and the image type. If the image is a JPEG, we'll see if it has a date taken and display that. We'll also get the camera maker and the model. You'll also see how to get what colors an image has. If it has 256 colors or less, we'll display these colors in a grid. Here's an image of what you'll be doing:

The above image is for a GIF file and shows the colors used in the image. The next screenshot is from when you open a JPEG file. (You don't want to list the colors in a JPEG - there are 16 million of them!)
Windows Form Design
Start a new Windows Forms project for this. Call it anything you like. Resize your form. Make it quite big. 900 wide by 800 high should be OK.
Add a Button, a PictureBox and a TextBox to your form. Add an OpenFileDialog control, too. Set the following properties for the three controls:
Button
Name: BtnLoad
Text: Load Image
PictureBox
Name: pbImage
SizeMode: StretchImage
TextBox
Name: txtImageInfo
MultiLine: True
Font: Anything you like
OpenFileDialog
Name: ofd
Title: Load Image
Arrange the controls anywhere you like. But leave plenty of room at the bottom of your form. We're going to be adding labels in the bottom half of the form. We'll use these as color squares. We'll add the labels at Run Time.
Double click your button to create a code stub. Clear the text box with this line:
C#
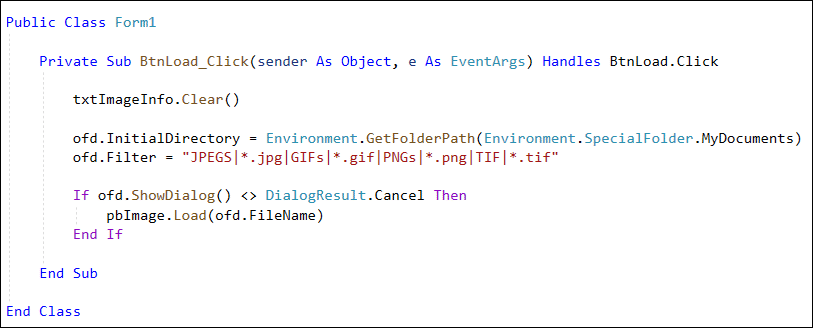
txtImageInfo.Clear();
VB Net
txtImageInfo.Clear()
The semicolon is the only difference between the two programming languages.
Next, we'll set the Initial Directory and a Filter for the OpenFileDialog control. Add these two lines (just delete the semicolon on the end in VB Net):
ofd.InitialDirectory = Environment.GetFolderPath(Environment.SpecialFolder.MyDocuments);
ofd.Filter = "JPEGS|*.jpg|GIFs|*.gif|PNGs|*.png|TIF|*.tif";
You've done this before in previous lessons, so no need to explain it.
When the OpenFileDialog box is displayed, we can check if the cancel button has been clicked or not. Add this if statement in C#:
if (ofd.ShowDialog() != DialogResult.Cancel)
{
}
And this one in VB Net:
If ofd.ShowDialog() <> DialogResult.Cancel Then
End If
The code for the rest of your BtnLoad will goes inside the if statement.
As the code for the if statement, let's grab an image and place it in the picture box. Here's the line to add (again, no semicolon on the end in VB):
pbImage.Load(ofd.FileName);
Here's how your code should be looking in C#:

And here it is in VB Net:
Notice the using statements at the top of the code in C#:
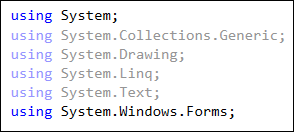
Change yours to match, and add one more:
using System.Drawing.Imaging;
For VB Net, add these Using statements to the top of your coding window, above Public Class Form1.
Imports System.Drawing.Imaging
Imports System.Text
That way, you'll have all the references you need for this project.
You can test it out, now. Click your button and select an image on your computer. Click Open and the image should appear in your Picture Box.
So far so good. Now let's see if we can detect which type of image has been opened. We'll do that in the next lesson below.

Back to the Intermediate Programming Contents Page