Home and Learn: Android Course
Coding for the Share icon
In the previous lesson, you create a new Activity when an icon on the Toolbar was pressed. You can do the same for the other icons on your toolbar - create a new Activity and then set up an Intent object. However, this approach doesn't work quite the same for Sharing. You still need to set up an Intent, though.
Previously, we set up an Intent that had two parameters - a context, and a class file name:
Intent favIntent = new Intent(this, DisplayFavs.class);
This was something called an Explicit Intent. The second parameter is an instruction to load a specific class file. With an Implicit Intent, you don't need to specify a particular file to handle the Intent. That's because the Android system itself can determine what to do with an Implicit Intent. Typically, a popup menu will appear asking the user which app they want to use to handle the Intent.
If all that is a bit confusing, let's see an example of how the implicit intent works when we use one for our Share button.
For your R.id.action_share case, create a new Intent:
case R.id.action_share:
Intent menuShare = new Intent( Intent.ACTION_SEND );
This time, notice what we have between the round brackets of Intent:
Intent.ACTION_SEND
There are lots of these actions you can set up. When you type a dot after the word Intent, you should see a list appear:
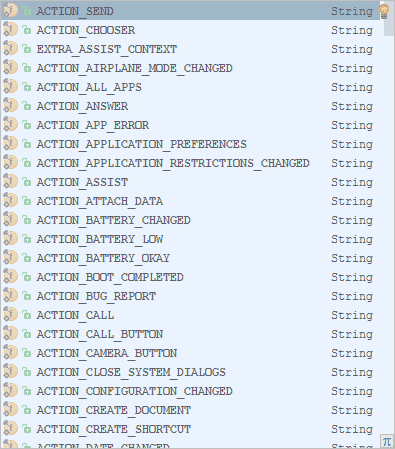
Select the ACTION_SEND one. As its name suggests, this is used when you want the Intent object to send something, typically a message or an image.
The next thing you can set is a MIME type (MIME is a communication protocol):
menuShare.setType("text/plain");
If you miss out setType then Android tries to work out what type of action it is.
As with all Intents, you can use putExtra to send some extra information. If you want to send an email you can use:
Intent.EXTRA_BCC
Intent.EXTRA_CC
Intent.EXTRA_SUBJECT
Intent.EXTRA_TEXT
Intent.EXTRA_EMAIL
Add these two lines to your code:
menuShare.putExtra(Intent.EXTRA_SUBJECT, "This is
the subject");
menuShare.putExtra(Intent.EXTRA_TEXT, "This is the body text");
Finally, start the Activity:
startActivity(Intent.createChooser(menuShare, "Share this text"));
Notice what we have between the round brackets of startActivity:
Intent.createChooser(menuShare, "Share this text")
The createChooser method is what gets you the popup menu with apps that can handle your message. Inbetween the round brackets of createChooser you first need the name of your Intent. After a comma, you can type some text that will be used as the title of the popup menu.
Your action_share code should look like this:
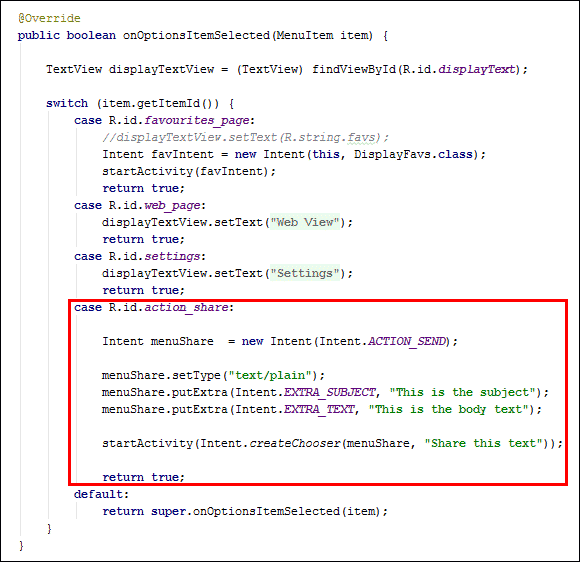
Try it out. But try it out in portrait mode. Click or tap your Overflow Menu. You should see the share item on it. When you tap on Share, you should see something like this:
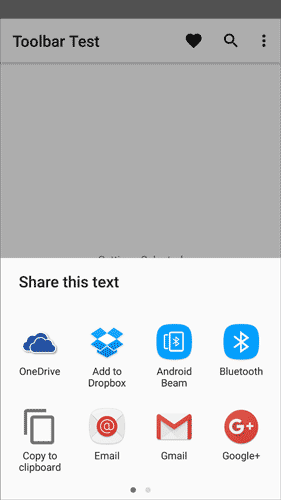
Under "Share this text" we have a list of apps that can handle the message we want to send. (This is from a real device, rather than the Emulator, which may not display anything at all.)
There is a problem, however. If you rotate your phone, you'll see the Share item is on the toolbar:
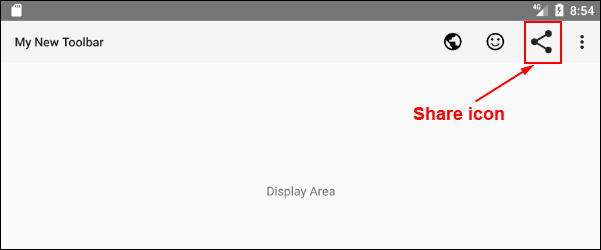
Whether you are testing on a real device or on the Emulator, nothing will happen when you tap the Share icon. The reason is that the Share icon on a toolbar doesn't respond to the onOptionsItemSelected method. We need a different way to activate the share icon when it appears on a toolbar - with a ShareActionProvider.
The ShareActionProvider
A ShareActionProvider is used when you want to turn one of your menu items into a share Intent. Set up the following variable at the top of your code, just under public class MainActivity:
private ShareActionProvider share = null;
The ShareActionProvider text may turn red. Click on this text and press ALT + ENTER. This time, you'll see two choices of libraries you can add:
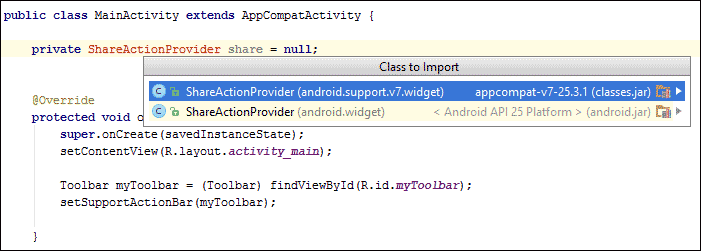
Select the one that says android.support.v7.widget. Or you can just add import android.support.v7.widget.ShareActionProvider; to the top of your code.
Now that you have a ShareActionProvider set up, jump down to your onCreateOptionsMenu method. We need to get a reference to the action_share menu item, so add this line:
MenuItem theItem = menu.findItem(R.id.action_share);
This sets up a MenuItem object that we've called theItem. (If you get red text, press ALT + ENTER to add the correct library, or type import android.view.MenuItem; at the top of your code.)
After an equal sign, we have this:
menu.findItem(R.id.action_share)
The onCreateOptionsMenu has Menu menu between its round brackets. This is setting up a Menu object that you can use. The name of the object variable is menu. You can use this to call the findItem method. In between the round brackets of findItem, you type the ID of your action_share menu item.
Now that you have a reference to the action_share menu item, you can use it with your ShareActionProvider. Add this line:
share=(ShareActionProvider) MenuItemCompat.getActionProvider(theItem);
You'll probably get red text for MenuItemCompat, so use ALT + ENTER to add the correct library. Or type import android.support.v4.view.MenuItemCompat; at the top of your code.
What MenuItemCompat does, though, is make sure older devices can use the menu item code. You need to add getActionProvider after MenuItemCompat. In between the round brackets of getActionProvider, you need the name of your menu item, which was theItem for us. This then provides the action for the menu item.
We can now go ahead and set up the Intent, just like we did before. This time, however, we can check the share variable to see if it's null or not. We only want to set up the Intent if share is null. Add these lines to your code:
if (share != null) {
Intent shareIntent = new Intent();
shareIntent.setAction(Intent.ACTION_SEND);
shareIntent.setType("text/plain");
shareIntent.putExtra(Intent.EXTRA_SUBJECT, "This is the subject");
shareIntent.putExtra(Intent.EXTRA_TEXT, "This is the body text");
share.setShareIntent(shareIntent);
}
Notice the last line:
share.setShareIntent(shareIntent);
We started an Activity previously with startActivity. This time, we're using share (the name of our ShareActionProvider) followed by setShareIntent. As its name suggest, this method sets up an Intent that is used for sharing. In between the round brackets of setShareIntent you need the name of an Intent, which was shareIntent for us.
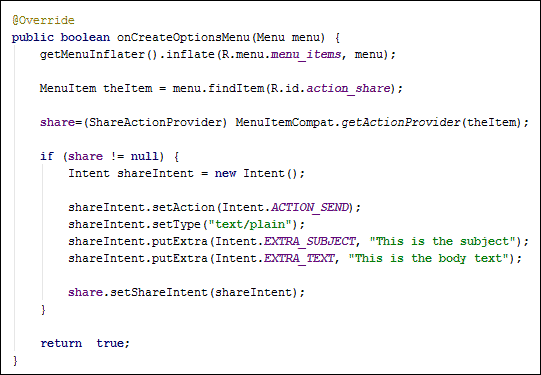
Here's what your onCreateOptionsMenu method should look like:
Before giving this a try, comment out your code for case R.id.action_share, otherwise you'll get two sharing menus:
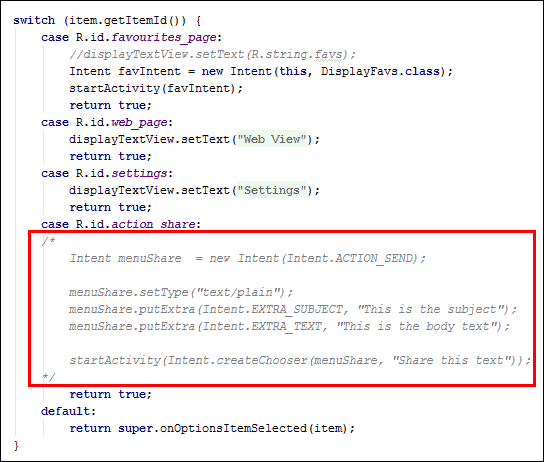
Now give it a try. Whether you are in portrait or landscape mode, you should see a share menu appear. (The Emulator may only show you one option for sharing text. You'll see more choices if you test with a real device.)
We'll leave it there with Toolbars, and move on to a new section, which is a GridView and WebView project.
< New Activity | GridView and WebView Project Intro >
Back to the Android Contents Page