Home and Learn: Android Course
Designing the XML layout for Portrait View
In the previous lesson, you saw how to create an XML file for landscape view. In this lesson, we'll design the layout for that file.
Click on your layout\activity_main tab at the top. In Design view, delete the default Hello World TextView. Now let's add an ImageView.
Locate the ImageView widget in the Palette to the left of Android Studio. Drag an ImageView onto your white layout. When you get the Resources dialogue box, select the bridge_wide drawable and click OK.
In the properties area on the right, set the following values (you don't need the ID, though):

The layout_width and layout_height are both set to wrap_content. You only need three sets of constraints in the box at the top.
The margins we set are 8, 0, 0.
Your layout should look like something this (without the blue bar at the top):
We'll add a TextView, next. First, we'll set up a string resource.
Double click the strings.xml file, which is in the res > values folder of the explorer on the left of Android Studio. Set up the following string name:
<string name="tower_bridge"></string>
Your strings file will then look like this:
As the text for this string, paste the following between the two tags:
This is Tower Bridge in London. A lot of people get it confused with London Bridge, which is not one bridge but refers to different bridges that have spanned the river Thames between the City of London and Southwark (pronounced SU-thark). The old London bridge that stood for over 600 years was pulled down in the 19th century and replaced with a much more modern one designed by John Rennie. This bridge was then sold to Robert McCulloch, who had it shipped to Arizona where it still stands.
Work started on Tower Bridge in 1886 and was finished in 1894, and is a marvel of Victorian engineering.
Your file will then look like this: (We've added some line breaks just so that you could see all the text. You don't have to format it like ours. But you can if you want. It won't do any harm!)
We would like to add some bold to the text, as well as some italics and an underline. You can add these with HTML tags.
Locate the first occurrence of "Tower Bridge". Add opening and closing B tags:
<b>Tower Bridge</b>
Now locate the name Robert McCulloch. Use the italics tags on this name:
<i>Robert McCulloch</i>
For the SU of SU-thark, add underline tags:
<u>SU</u>-thark
You can also add paragraphs with the \n characters. Add two of them, just before "Work started on …":
\n\nWork started on
And here what your strings file will look like:
Let's also add two string resources for the images. That way, we won't get plagued by warnings in Android Studio. Add these two strings to your XML file:
<string name="tower_bridge_portrait">Tower Bridge portrait mode</string>
<string name="tower_bridge_landscape">Tower Bridge landscape mode</string>
Your file will then look like this:
We can now add the TextView.
Add the Android TextView
In the Common section of the Palette, drag a TextView onto your layout, just below the ImageView. With your TextView selected, add constraint to the bottom of the Image and the bottom of the screen (you should know how to do this by now). Add contraints the left and right, as well.
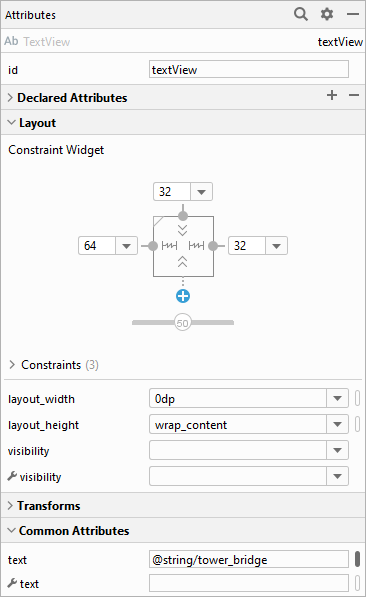
For the text property, delete the default text and click the Pick a Resource button: (In later versions of Android Studio, expand the Common Attributes item to set the text.)
From the Resource box that appears, select your string resource:
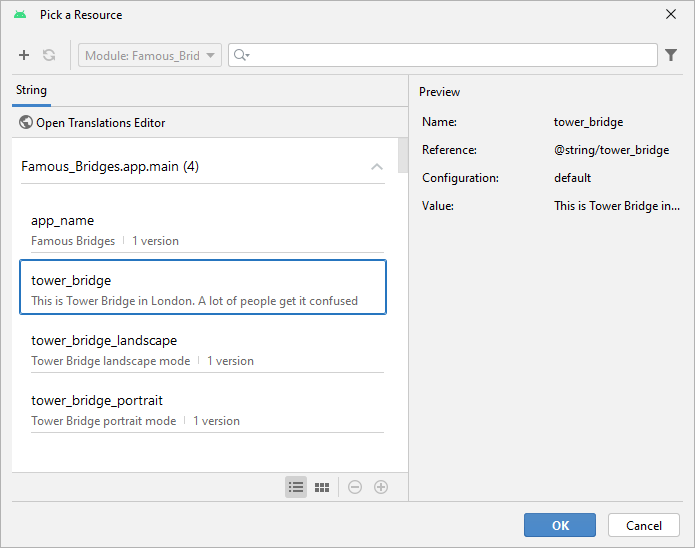
Your layout will then look like this (your text formatting won't show up until you run the app):
The text looks a bit squashed. Let's see if we can fix it.
In the Attributes area for your TextView, set layout_width to 0dp and the layout_height to wrap_content. For the top margin, we set a value of 32. For the left margin, click inside the dropdown box and type 64. For the right margin, select 32 from the dropdown list:
Now click on your image to select it. In the Attributes area on the right, locate the contentDescription property (it's under Common Attributes in later versions of Android Studio). Bring up the Pick a Resource box and select your Tower Bridge portrait mode string:
Click OK to set the string:
Test it out, now. Run your app and see what it looks like so far.

You should see that your text formatting has been applied. We have bold text for Tower Bridge, underline for SU-thark, and italics for Robert McCulloch.
Now rotate the view. You'll see an entirely blank screen. This is because the landscape layout is loaded. Since we haven't designed anything for this view, the screen will be blank. Let's design a landscape layout. We'll do that in the next lesson below.
< Alternative Layouts| Landscape Layout Design >
Back to the Android Contents Page