Home and Learn: AI Beginners Course
Using Reference Images in InvokeAI
Created:
In this lesson, you'll learn what a Reference Image is, and how to use reference images in your work.
So, what is a Reference Image?
A Reference Image in Invoke is a visual hint given alongside your written prompt. It helps the model understand things that are difficult to describe precisely in words—such as a color palette, overall style, lighting, mood, clothing design, or a rough composition. In InvokeAI this is commonly implemented through an image-prompt adapter such as IP-Adapter, which processes visual information separately from the text prompt so the two can work together.
For example, your prompt might say:
A small cabin beside a lake at sunset, cinematic fantasy illustration.
That describes the subject, but not exactly what you imagine. If you add a reference image showing warm orange-and-purple colors, misty lighting, and a painterly fantasy look, Invoke can use those visual qualities while still following your written instruction. The text says what to create; the reference image helps show what you want it to look or feel like.
Let's get some practical work done.
In InvokeAI, select the DreamShaper 8 model. Use a size of 512 x 512 and a random seed. For the Scheduler, use DPM++ 2M Karras. Set the Steps to 35 and the CFG scale to 7.5. In the prompt box at the top, enter this:
Gothic revival mansion, with elements of Victorian architecture and decaying Southern plantation. Tall, narrow, asymmetrical. Steeply pitched roof. Prominent central tower. Tall, narrow windows. Large, shadowed porch. Weathered, overgrown exterior.
Hit the Invoke button at the top and you'll get a nice Gothic house back as a result. Something like ours below:
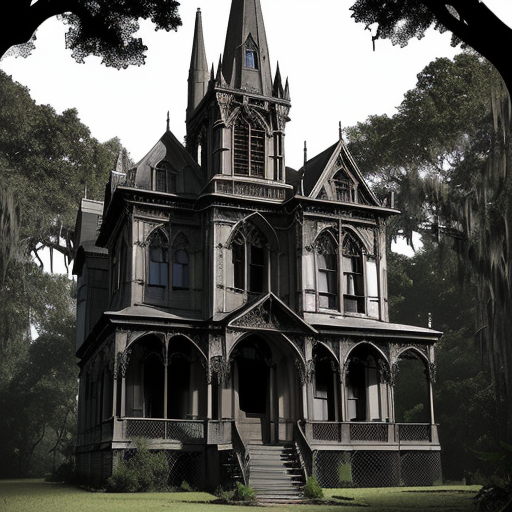
Not a bad image. However, what we'd like to do is increase the spookiness and get an Addams Family vibe going. We'd also like to put the house in a nighttime setting with a full moon and maybe some fog.
Now, you can add all that to your prompt. But it is easier to use a reference image alongside the prompt. A good rule is to use the prompt for the 'what' and the reference image for the 'look'. For example, "a red fox reading in a library" belongs in the prompt; "soft children’s-book watercolor with warm paper texture" can be supplied by either the prompt, a reference image, or both.
For a reference image, you can use ours below:
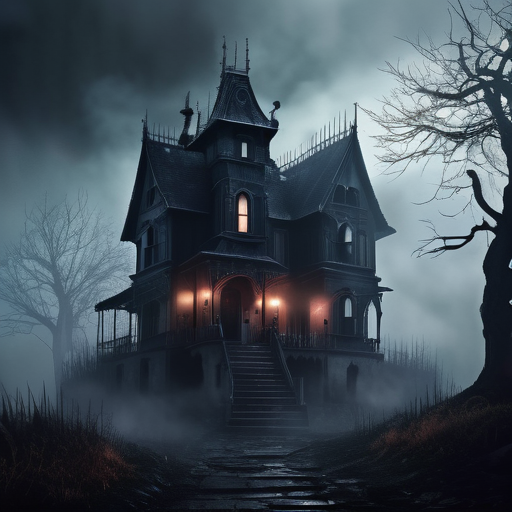
Right click and save the image to your own computer.
Back to Invoke and notice the reference image area just below the prompt box:
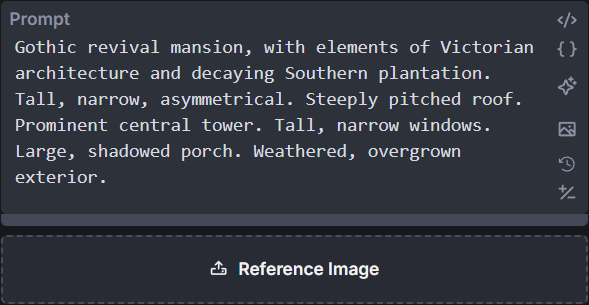
You can drag and drop an image here. Or you can simply click inside the area. When you do, you'll see an Open File dialog box appear. Navigate to where on your computer you saved our image.
Once you've added the image, a new section will appear:
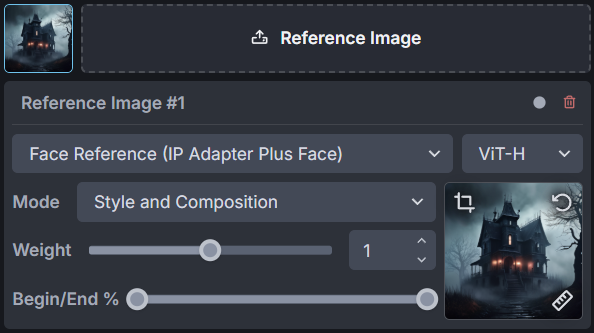
The settings are all for something called an IP Adapter. A standard IP reference adapter gives you broad inspiration from the image. A 'Plus' variant (if available) tends to follow the image more literally and strongly. IP Adapters must match your base-model family, such as SD 1.5 or SDXL. Because we loaded the DreamShaper 8 model, we have three options on the Reference dropdown:
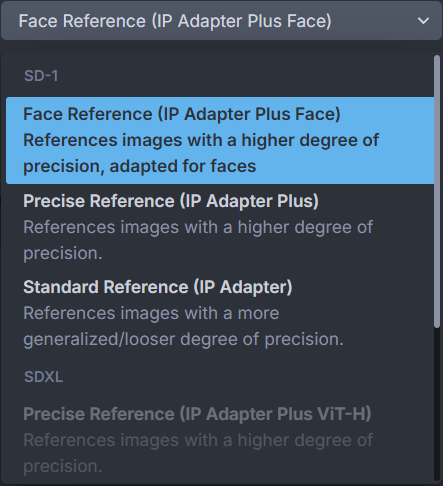
Here's a table that may help explain the options:
| Reference choice | Best for | What to expect |
|---|---|---|
| Face Reference (IP Adapter Plus Face) | A portrait or a person's facial appearance | Specialised for a clear, reasonably large face. It gives facial features more attention than the rest of the scene. Use a well-lit, front/three-quarter portrait; it is not a perfect identity lock or a face-swap tool, so change of angle, expression, age, lighting, and model randomness can still alter the person. |
| Precise Reference (IP Adapter Plus) | Closer image resemblance | The stronger, more detailed option. It reads patch-level image detail, so it tends to retain more of the reference's objects, materials, clothing, colours, and visual character. Use a lower Weight first - about 0.3 to 0.5 - because it can overpower the prompt. |
| Standard Reference (IP Adapter) | General inspiration | The loosest, most prompt-friendly option. It takes broad ideas such as subject, colours, and overall look, but gives DreamShaper more room to reinterpret them. |
The next dropdown to look at is Mode:
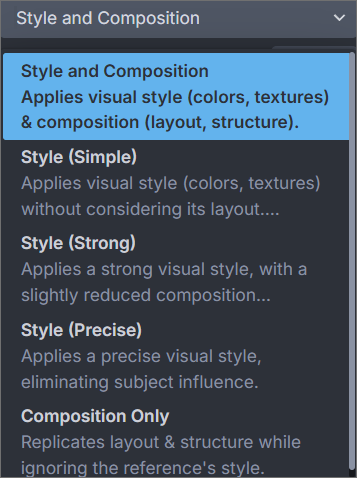
And here is a table that might help to understand the Mode options:
| Mode | What it takes from the reference | When to use it |
|---|---|---|
| Style and Composition | Overall visual look and broad subject/layout information. | You want a new image clearly inspired by the whole reference. |
| Style (Simple) | A light, broad impression of colour, medium, lighting, and mood. | You want your text prompt to stay firmly in charge. |
| Style (Strong) | A more obvious transfer of the reference's visual character. | You want 'make this prompt look like this image'. |
| Style (Precise) | The most specific and detailed style reading of the three. | You are trying to carry over fine stylistic cues, materials, texture, or a distinctive look. |
| Composition Only | Framing, placement, pose, and large shapes - not the reference's style or colours. | You want a different-looking image arranged like the reference. |
There is also a Weight slider and a Begin/End slider. Here's what they do:
Weight: how forcefully the reference image influences the result. 1.0 is strong. The default is 0.5.
Begin / End: controls when during image creation the reference image has an effect.
- Begin 0, End 1: the reference helps guide the whole process. This is the normal starting setting.
- Lower the End slider — for example, set it to 0.7: the reference guides the early part, then your written prompt has more say over the finishing details.
- Raise the Begin slider: the reference is ignored at first and only starts helping later.
A simple starting point is Begin 0 and End 1. If the result copies the reference too closely, try reducing End to 0.7.
In case you are wondering, here is what the ViT-H does:
ViT-H: the image-understanding encoder used by the adapter. 'ViT' means Vision Transformer; the letter is its model size/variant. Usually leave this at the default selected by Invoke: it needs to be compatible with the Reference/IP-Adapter model you selected. Changing it is not a quality slider, and mismatching it can prevent generation.
But back to the image. Leave everything on the defaults, as in the image above, and click the Invoke button at the top to generate a new image. You'll end with something loosely like this:

So our Gothic house in the daylight is now re-imagined in a night setting with a hint of fog. It looks a lot creepier! And all this because you added a reference image.
Now play around with the dropdowns. Try each one of the Mode options with each one of the reference adapters. Create new images and see what difference they make. Consult the tables above to get an idea of what each setting does.
As an example of what you can do, here is a new image. This one was achieved with the Standard Reference IP Adapter and the Mode set to Style and Composition:
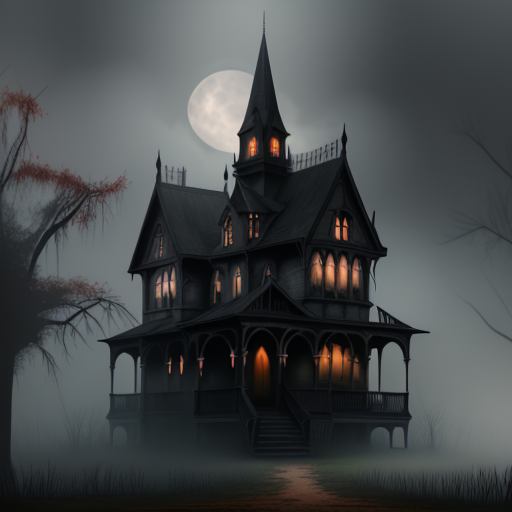
At last - we have a moon!
But the reference image normally does not mean 'copy this image exactly'. It is more like showing the AI an example or mood board. The written prompt remains important: it tells the system what objects, scene, action, and changes you want.
The main control is usually the reference-image strength or influence. At lower strength, the prompt has more freedom and the result may only loosely resemble the reference. At higher strength, the result follows the reference more closely, but may become less original or may ignore parts of the text prompt. Lowering the IP-Adapter scale produces more variety but less consistency with the reference.
Before we leave it there for reference images, let's have an example where you can use yourself as a reference image.
This article's author looks (vaguely) like this:
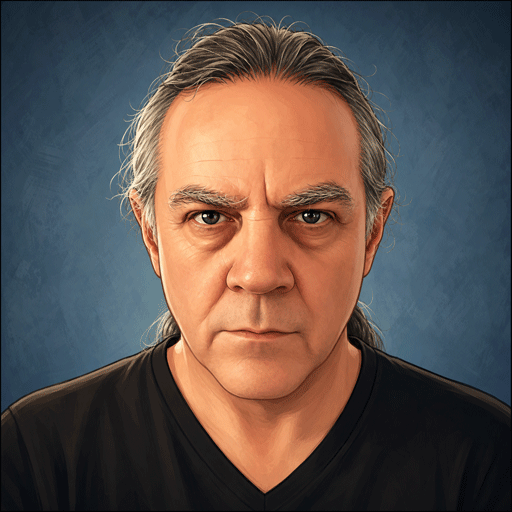
Suppose he wanted to imagine himself as a great Irish hero. He could use the Juggernaut model with a DPM++ 3M Karras scheduler, 25 steps, and a CFG of 5.5. Add a Precise IP Reference adapter, a Style (Strong) Mode, and the following prompt: (DreamShaper 8 is SD 1.5-based, so its available reference adapters can differ from SDXL’s.)
Cú Chulainn, legendary Irish hero from the Ulster Cycle, heroic ancient Celtic warrior, muscular young man, intense fierce expression, standing in battle pose, holding a spear and shield, red war chariot, flowing dark hair, traditional Irish bronze and leather armor, glowing mystical energy, emerald and stormy blue color palette, dramatic cinematic lighting, highly detailed face, mythological atmosphere, epic fantasy realism, ultra-detailed, sharp focus, masterpiece
His negative prompt was:
blurry, low detail, extra limbs, bad anatomy, modern clothing, guns, helmets covering face, cartoon, anime, deformed hands, text, watermark, cropped, out of frame
After clicking the Invoke button, he can look like this:
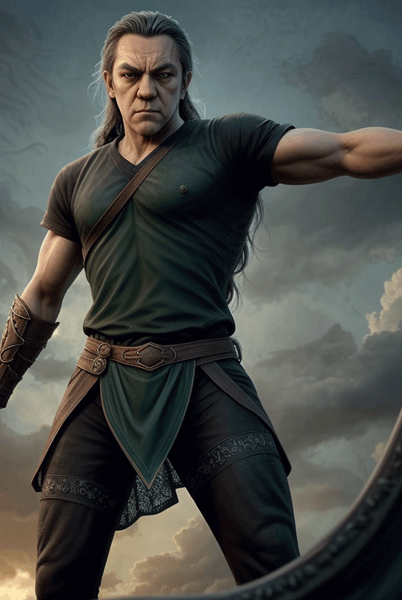
Quite the striking hero!
And with that, we'll move on. But give it a try. Find a decent picture of yourself, add it as a reference image, and write a prompt to put you in the action. As an experiment, try adding more than one reference image - you and your favourite movie star, for example. See what you can come up with. There's great fun to be had!
In the next lesson, we'll take a look at prompt templates.