Home and Learn: VB Net Course
Creating a New VB Project
So, if you already have your VB NET software open, you can get rid of the current project by clicking File from the menu bar. From the dropdown menu, choose Close Solution. You will be returned to the Start Page. Click File > New Project from the menu bars. 2015 and 2017 users will get this dialog box:

When you get the dialogue box popping up, choose Windows Forms App or Windows Forms Application at the top. Then change the Name from WindowsApp to Variables:
2019 and greater users will see this instead:

Because you've already created a project, you should see an entry under Recent project templates. Simply click here, as highlighted above. Then click Next to get to the configuration screen:

Type Variables as the Project Name. You can change your Location to save your project elsewhere.
When you click the OK button, a new form will appear.
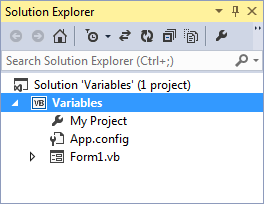
If you look at the Solution Explorer at the top, you'll see the name of the
project has changed to the Name you gave it.

The name of the Project is now Variables - the same name as the folder that is created for you to hold all your project files.
Now that you have a new Project started, we can discuss Variables. We'll do that in the next section.
<-- Back One Page | Move on to the next part -->
Back to the VB NET Contents Page