Home and Learn: VB Net Course
How to Save your VB .NET Projects
If you have a look in the top right of the Design Environment, you'll see the Solution Explorer. (If you can't see it, click View > Solution Explorer from the menu at the top.)
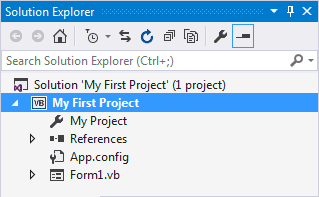
The Solution Explorer shows you all the files you have in your project (Notice that the name of your project is at the top of the tree - My First Project).
At first glance, it looks as though there are not many files in the project. But click the Show All Files icon, circled below:

When you click Show All Files, the Solution Explorer will look something like this:

When you save your project, you are saving all these files.
To save your work, click File > Save All. The files are then saved in the Document folder on your computer, inside of a folder called Visual Studio 2019 (or whatever version you have). Double click inside of the Visual Studio 2019 folder and you'll see a folder called Projects. Your current project is inside of this folder. (For 2019 users, this was the folder structure we recommended when first creating a new project.)
To actually save your work as you go along, just click File > Save All from the menu bar. Or press Ctrl + Shift + S on your keyboard. Or click the icon in the Toolbar (the stack of floppy disks). If you save often then you won't lose any of your work if anything goes wrong with your computer.
In the next section, we'll get down and do a bit of actual programming. It's a gentle introduction, so nothing to get too worried about!
<-- Back One Page | Move on to the next part -->
Back to the VB NET Contents Page