Home and Learn: Intermediate Programming
Load Voices

Text to Speech: For C# and VB NET Students
Now that you have a form designed, we'll use the form load event to populate the combo box with Voices found on the system. First, though you need to add a reference to System.Speech.Synthesis, which is the technology we're going to use for the speech part of our program.
In the Solution Explorer to the right of Visual Studio, right-click on the References item and select Add Reference:

You'll see this dialog box appear, the Reference Manager:

Click on the Browse button in the bottom right. The Speech file you need is buried deep in the operating system. Navigate to this location on your computer (Windows 10):
C:\Program Files (x86)\Reference Assemblies\Microsoft\Framework\.NETFramework\
You should see folders that start with a "v" for version:

Double-click on the latest version with numbers, 4.7.2 in the image above. Now scroll down and locate the following file:
System.Speech.dll
Select the file and click Add:

You'll be taken back to the Reference Manager dialog box:

Make sure there is a check in the box for System.Speech.dll. Click OK and then have a look at your References section again in the Solution Explorer. You should see a one for System.Speech:

Now that we have a reference to the Speech component, we can do some coding.
Click on your form to select it. In the properties area, click on the lightning bolt to see a list of events. Double click the Load one:

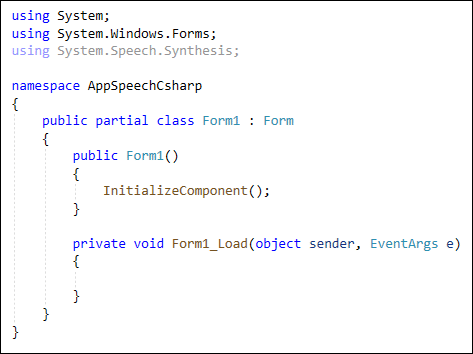
In the coding window, add this right at the top in C#, with all your other using statement:
using System.Speech.Synthesis;
Add this in Visual Basic .Net, just above Public Class Form1:
Imports System.Speech.Synthesis
Your coding window should look like this in C# (you can delete greyed-out using statement to leave just the three in the image below):
And this in VB Net:

(ASIDE: There is a newer speech technology called Azure Speech Service. But this involves signing up for a free 30-day trial. After that, you may be charged, depending on what you want to do. See this page for more details: https://docs.microsoft.com/en-gb/azure/cognitive-services/speech-service/ We're using the System Speech Synthesis built in to Windows 10. )
Now add this line inside of the Class but outside the Form Load event.
C#
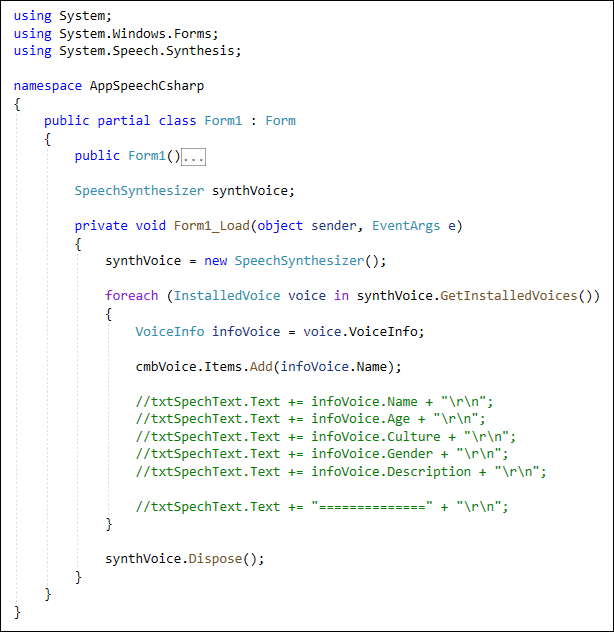
SpeechSynthesizer synthVoice;
VB Net
Dim synthVoice As SpeechSynthesizer
SpeechSynthesizer is a class that has all the speech properties and methods we need for our program. We're calling it synthVoice. We need to access it in a few places, which is why it's set up outside of the Form Load event.
The first thing we can do is to create a new object from our SpeechSynthesizer class. Add this to your form load event in C#:
synthVoice = new SpeechSynthesizer();
And this in VB Net:
synthVoice = New SpeechSynthesizer()
What we can do is to use a for each loop to get all the voices installed on the computer. We'll then add them to the combo box.
The for each loop is this in C#:
foreach (InstalledVoice voice in synthVoice.GetInstalledVoices())
{
}
And this in VB Net:
For Each voice As InstalledVoice In synthVoice.GetInstalledVoices()
Next
The loop variable is called voice. Its type is InstalledVoice. The collection we're looping through is the GetInstalledVoices Function/method of our synthVoice.
As the first line of the loop, add this in C#:
VoiceInfo infoVoice = voice.VoiceInfo;
And this in VB Net:
Dim infoVoice As VoiceInfo = voice.VoiceInfo
We create a VoiceInfo variable called infoVoice. After the equal sign, we access the VoiceInfo property of our voice variable. This allows you to get lots of information about an installed voice. You'll see what all this information is in a moment.
To add the voice to the combo box, though, add this line:
C#
cmbVoice.Items.Add(infoVoice.Name);
VB Net
cmbVoice.Items.Add(infoVoice.Name)
In between the round brackets of the combo box's Add method, we have this:
infoVoice.Name
This gets you the name of a voice, like Microsoft David Desktop or Microsoft Zira Desktop. We'll use this name in the Speak button.
As the final line of the Form Load event, just after your loop, add this (delete the semicolon in VB Net):
synthVoice.Dispose();
This just makes sure to dispose of the synth voice. We'll recreate it later.
There's lots of information about a voice you can get, which might come in useful for you. To try out the rest of the info about a voice, add these lines to your loop in C#:
txtSpechText.Text += infoVoice.Name + "\r\n";
txtSpechText.Text += infoVoice.Age + "\r\n";
txtSpechText.Text += infoVoice.Culture + "\r\n";
txtSpechText.Text += infoVoice.Gender + "\r\n";
txtSpechText.Text += infoVoice.Description + "\r\n";
txtSpechText.Text += "==============" + "\r\n";
In VB Net, add these.
txtSpechText.Text += infoVoice.Name & vbNewLine
txtSpechText.Text += infoVoice.Age & vbNewLine
txtSpechText.Text += infoVoice.Culture.ToString() & vbNewLine
txtSpechText.Text += infoVoice.Gender & vbNewLine
txtSpechText.Text += infoVoice.Description & vbNewLine
txtSpechText.Text += "==============" & vbNewLine
So we're just putting the information in the text box. The infoVoice parts after the dot are these:
infoVoice.Name
infoVoice.Age
infoVoice.Culture
infoVoice.Gender
infoVoice.Description
There are two more you can try:
infoVoice.Id
infoVoice.Enabled
Notice for the Culture one in VB Net, you need to add ToString() after it.
But if you were to run your code, the text box would have information like this in it for C# users:
Microsoft Hazel Desktop
Adult
en-GB
Female
Microsoft Hazel Desktop - English (Great Britain)
Interestingly, the VB Net version is different. It would be like this for Hazel:
Microsoft Hazel Desktop
30
en-GB
2
Microsoft Hazel Desktop - English (Great Britain)
In VB Net, the adults all have an actual age, rather than the Adult you'll see in C#. (They are all 30.) Another thing to note is that in VB, the Gender is a number. C# gives you Male or Female. VB Net gives you 1 and 2. (The males are all 1, the females 2. Sexist?)
The combo box is the important one for us, however. Click the dropdown list and you'll see something like this, depending on the voices installed on your system:

But you can comment out the lines in the for each code for the text boxes. Or delete them all together. It's nice to leave them in commented out, though, as a future reference.
Your code should look like this in C#:
And this in VB Net:

We're done with the form load event, now. Let's do the coding for the Speak Button. We'll do that in the next lesson.

Back to the Intermediate Programming Contents Page