Home and Learn: Intermediate Programming
The Clear Button

Stick Figure App - Wrapping up
One more thing we need to do is to write code for the Clear button. When this button is clicked, the drawings and text currently on the white canvas will be cleared.
To clear the Picture Box, we only need to loop round all the drawings on our Undo Stack. Call the Invalidate event of the Picture Box and it will leave a clear surface. In other words, undo everything.
In Design View, double click your Clear Image button to create a code stub. We're going to adding a Do … While loop. So we need to get how many items are on the Undo Stack and we need a loop counter. We'll go round and round while the loop counter is less than the number of images on the stack.
Add these two variables to your Clear button in VB Net:
Dim stackCount As Integer = UndoStack.Count
Dim loopCount As Integer = 0
And add these two in C#:
int stackCount = UndoStack.Count;
int loopCount = 0;
The first variable counts how many items are on the UndoStack. The second variable sets the loop counter to zero.
We only want to clear the surface if the UndoStack count is greater than zero. So add this If Statement in VB Net:
If UndoStack.Count > 0 Then
End If
And add this if statement in C#:
if (UndoStack.Count > 0)
{
}
Inside of the if statement, add this Do … While loop in VB:
Do
Loop While loopCount < stackCount
And this one in C#:
do
{
} while (loopCount < stackCount);
We're just going round while the loopCount variable is less than the stackCount.
The code to add to your loop is this in VB Net:
bitmapObject = UndoStack.Pop()
graphicsObject = Graphics.FromImage(bitmapObject)
PbSurface.Invalidate()
loopCount += 1
And this in C#
bitmapObject = UndoStack.Pop();
graphicsObject = Graphics.FromImage(bitmapObject);
PbSurface.Invalidate();
loopCount++;
The first three lines are pretty much the same as for the Undo Button. Except we don't need to add to the Redo Stack. The final line in the loop just increments the loopCounter variable.
Your Clear button code should look like this in VB Net:

And this in C#:

Give it a try. Run your program and draw some stick figures. Click your Clear button and you should see a nice white canvas again.
Solid and Dashed Lines
One last thing we can do before we wrap is to write the code or the Line Style Group Box. This one:
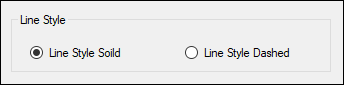
There's not much code to write, here. In Design View, click on your Line Style Solid Radio Button to select it. In the properties area on the right, click the lightning bolt to see a list of events. Locate the Click event and double click it to create a code stub. Add the following code (semicolon on the end in C#):
drawingPen.DashStyle = DashStyle.Solid
We're just accessing the DashStyle property of our Pen object and changing it to Solid.
Do the same for the Line Style Dashed Radio Button: select it in Design View. Double click the Click event again. Now add the following line of code (with a semicolon on the end in C#):
drawingPen.DashStyle = DashStyle.Dash
The only difference is that the DashStyle is now Dash instead of Solid.
Try it out. Select your Dashed line style and you should be able to draw stick figures with dashed lines.
And that completes this walkthrough of the Stick Figure Drawing Maker program. Hope you enjoyed it!
To improve your program, try adding more stick figure buttons options. For example, how about a stick figure angry man, with arms starting near the neck and elbows bent. Like this one:
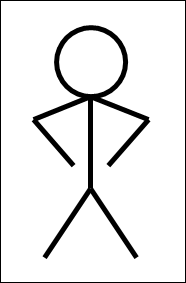
Can you work out the code for it?
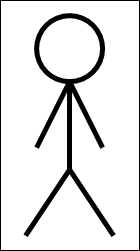
Or the code for arms straight but starting near the neck? This one:
And here's a running man stick figure:

And here's a stick figure cartoons to finish off: