Home and Learn: Android Course
Adding Vector Assets in Android Studio
In the previous lesson, you added a menu item to your toolbar. In this lesson, you'll learn how to add an icon for a menu item.
Right-click the res > drawable folder in the Explorer area on the left of Android Studio. From the menu that appears, select New > Vector Asset:
![]()
When you click on Vector Asset, you'll see the Configure Vector Asset dialogue box appear in Android Studio:

Notice the highlighted button in the image above. Click this button Clip Art to see lots of icons you can choose from (they might take a while to load):
![]()
Select an icon that reflects what your menu item will do. We've gone for a smiley face for our favourites menu item, which is under the Communication category in the dropdown list at the top:
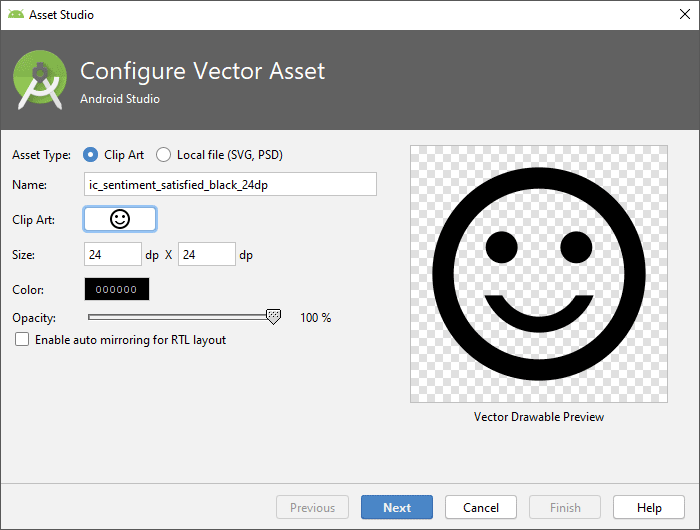
Although the Size says 24dp by 24dp, you can change this. Select the Override checkbox and the size text boxes will activate. Type a new size for your icon. We'll leave ours on 24, though.
Click the Next button to see what folder your icon is going in to. Then click Finish to add the image to your drawable folder.

You can now use this drawable as an icon for your toolbar.
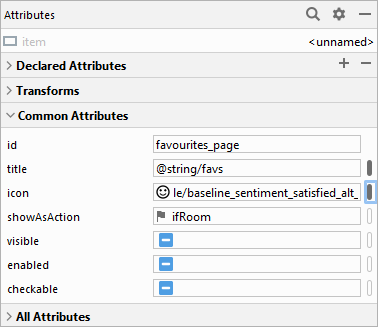
With your favourites_page menu item still selected, locate the icon attribute in the Attributes area to the right of Android Studio. Click the Pick a Resource button again to bring up the Resources dialogue box. You should see your new icon there, in the drawable section:
![]()
Click OK and your Attributes area should look like this:
You should see your selected icon appear on the toolbar:
![]()
If you want to change the colour of a Vector Asset, double click the XML file in the drawable folder (not the ic_launcher ones). You should see something like this:
![]()
A vector image is one built with paths. The path data connects series of points. Contrast this with a bitmap where images are built from a series of dots on a grid. So you can't change the path data without changing the image. But you can change the fill colours.
For the smiley-face we've chosen the first two paths in the XML file are for the eyes. The third set of points are for the mouth and the circle. (There is no fill for the background.) You can change the hexadecimal values from #000000 to anything you like. Click the black colour squares in the margins to bring up a colour dialogue box. Select some new colour for your vector shape.
You're not quite ready to test it out, though, as the icon won't show until we add some code later.
Let's add two more menu items. Try to do these two yourself.
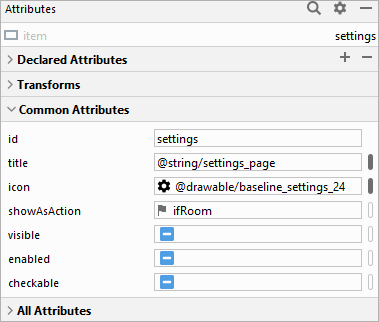
In the menu_items.xml file, add a new menu item to your layout. Change the ID to web_page. Set the title for your web string resource via the Resources dialogue box. Set the showAsAction to ifRoom. Add a new Vector Asset to your drawable folder, choosing any icon you like. Set the icon property to your new drawable. Your Attributes area might then look something like this:

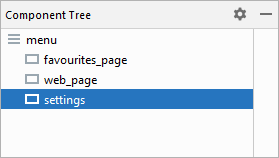
Add a third menu item to your layout. Change the ID to settings. Set the title to your settings_page string resource via the Resources dialogue box. Set the showAsAction to never. Because this menu item will never appear on the toolbar, you don't need an icon. Your Attrributes area might then look something like this:
Here's what your Component Tree should look like:
Your layout will look something like this one, depending on the icons you choose (we changed the colors of our icons to white):
![]()
Now that we have all our menu items in place, we can switch to the Java code. We'll start that in the next lesson below.
< Toolbar Menu Items | Coding for the Toolbar >
Back to the Android Contents Page