Home and Learn: Microsoft Access Course
Access Data Entry Forms
In the last lesson, you entered records using the Datasheet View. Another way to enter data in a table is with a form. Using a form makes data entry a lot easier. To create a form quickly in Access, click on the Create Ribbon at the top. On the Forms panel, click Form:

When you click on Form, Access will create a form for you. It will look like this:
If it doesn't look exactly like the one in the image above, have a look in the bottom right. You'll notice three icons:
![]()
These icons are for the three different kinds of view you can have with forms: Form View, Layout View and Design View. Make sure the first one is selected. We'll come back to the other two views shortly.
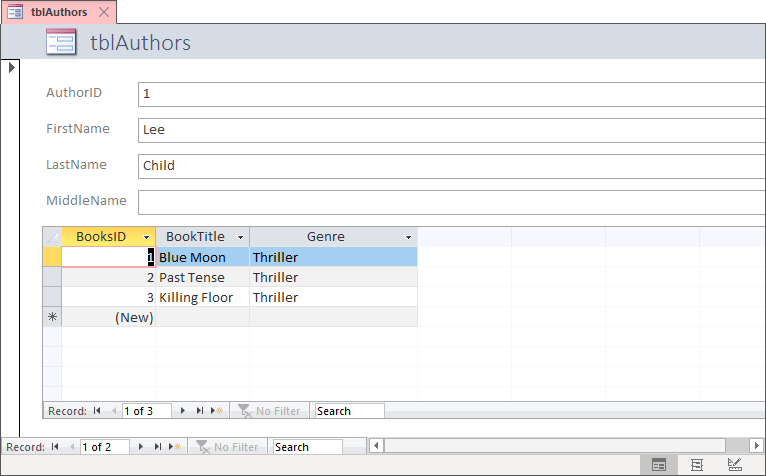
Have a look at the bottom of the form, though, where it says 1 of 3 and 1 of 2:
![]()
The 1 of 3 is for the books. The 1 of 2 is for the authors. The arrows are the scroll icons. The next image shows you what they do:
![]()
Click all the arrows except the Add new blank record one. You should find that different rows (records) are highlighted.
Now, in the 1 of 2 area, click the New Black Record icon. This will allow you to add a new author. Add the following Author:
J K Rowling
And add a book in the Fantasy genre:
Harry Potter and the Philosopher's Stone
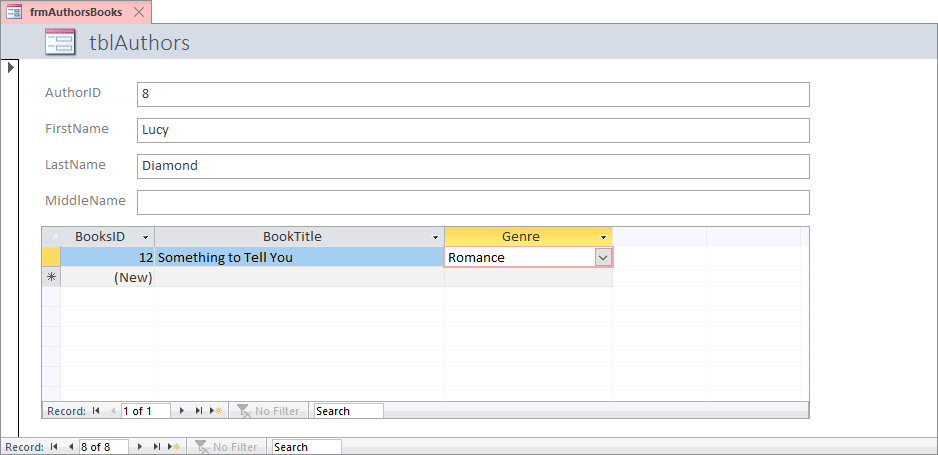
Your Access form will then look like this:

You are now on record 3 of 3 for the authors. For this particular author, we have 1 of 1 books.
Now add some more authors and books to your database. Add the following (Don't forget - click the bottom New Blank Record icon, where it says 3 of 3, in the image above):
| FirstName | Last Name | Middle Name | Book Title | Book Genre |
| Yuval | Harari | Noah | Sapiens: A Brief History of Humankind | Science |
| Dawn | O'Porter | So Lucky | Romance | |
| Raynor | Winn | The Salt Path | Travel | |
| Simon | Reeve | Step by Step | Travel | |
| Lucy | Diamond | Something to Tell You | Romance |
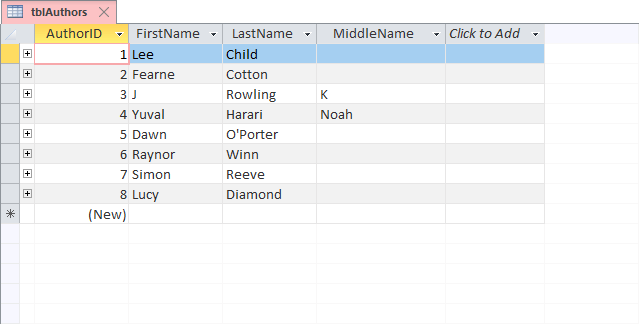
When you have finished inputting the data, your form should look like this:
Notice we now have 8 of 8 authors.
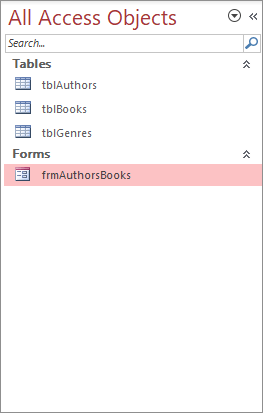
Now, in the All Access Objects area on the left, double click your tblAuthors table. You should see all the new authors in it:
Now double-click your tblBooks table to see all the books:

Save your new form. When you do, you should see a small dialog box appear asking you for a name for your form. Enter frmAuthorsBooks. When you save the form, you should see a new section appear under All Access Objects on the left. The name of your form will be under the Forms heading:
Access Form Header
If you have a look at the top of your form, you'll notice that it has the name of a table there:
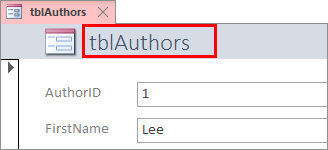
The grey area at the top is the form's header. It has some text in it. By default, it's the name of the table where you have your Primary Key set up, tblAuthors in this case. You can change that text.
Switch to either Layout View or Design View, by clicking one of the icons in the bottom right:
![]()
In the image above, we've clicked the icon for Layout View.
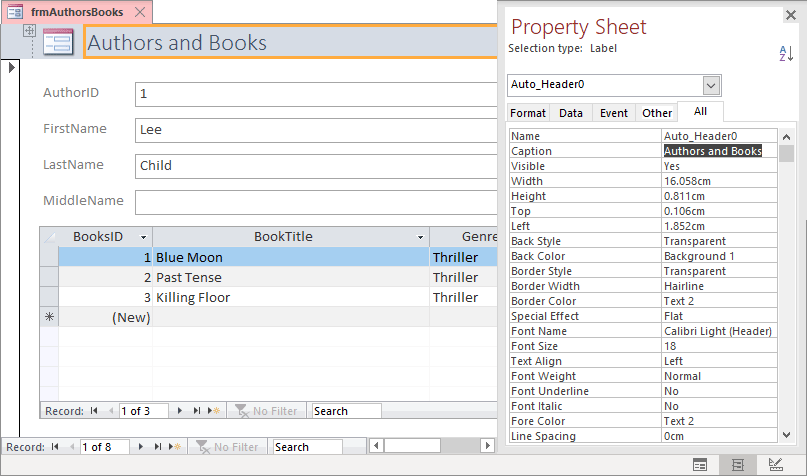
At the top of the form, double click the header text, where it says tblAuthors. Notice two things: one, the header text goes white and becomes a text box that you can type in, and two, you'll see a Property Sheet appear on the right:

You can change the header text either by typing in the text area, or by clicking into the Caption box on the Property Sheet. Change the title to Authors and Books. Your screen will then look like this:
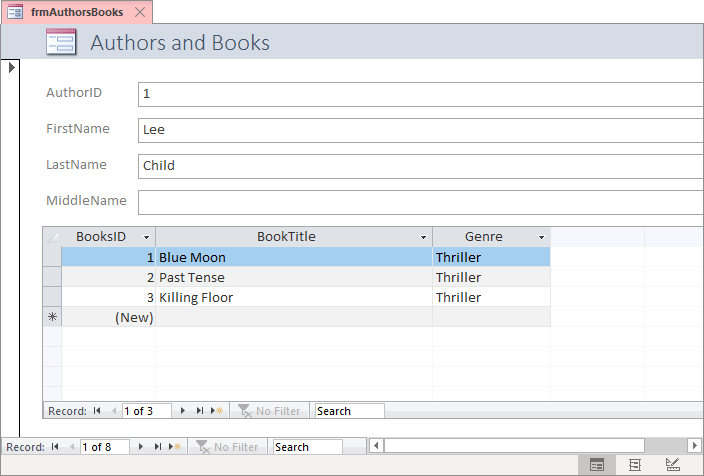
Switch back to Form View by clicking the first of the three icons in the bottom right. You should see your new title at the top of your data entry form:
OK, now that we have some data in our database, we can move on and look at Queries. Queries are at the heart of what a database is and does.
<-- Previous Lesson: Data Entry in Access | Next Lesson: Creating Queries in Access -->
<--Back to the Microsoft ACCESS Contents Page