Home and Learn: VB Net Course
Add Image Icons to Menu Items
You can add image icons to your VB Net menus. So you can have something like this:
You'll need some icons, though. Fortunately, Microsoft has released an icon Image Library that you can download for free. The link is here:
The file size is only 11 megabytes, and you get icons and images that are used throughout Visual Studio. Microsoft allows you to use the images in your own projects so that you can create a modern look and feel for your apps and programs.
To add an icon to a menu item, in Design View, first select an item on your menu. Select just the Open item. With the Open item selected, go to the Properties on area the right. Scroll down and locate the Image Property. Click the little square with the three dots on it to bring up a dialog box:

The dialog box that opens is this one:

Select Local Resource at the top. This will bring up an Open File dialog box. Navigate to where on your computer you downloaded the icon images. There are quite a lot, so you'll want to do a search for opendoc. You should see this, when you've found the file:
![]()
The one you want is OpenDocumentGroup.png. Select that file and click Open. You'll be returned to the Select Resource dialog box where you'll see the icon you imported:
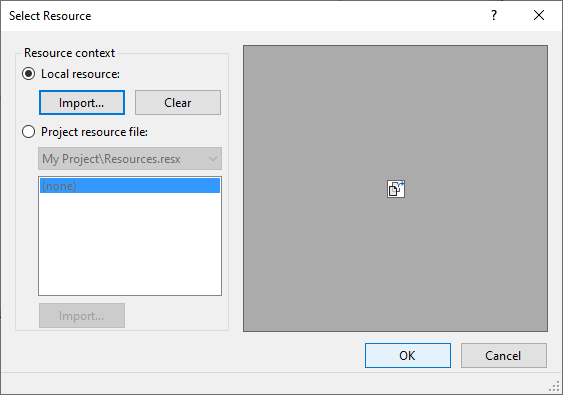
The image is a bit tiny, as it's only 16 x 16 pixels. But you can just about make it out in the grey area on the right.
Click OK on the dialog box and you'll see the icon appear next to your menu item text:

Now look at Visual Studio's File Open menu item:

As you can see, it's the same one as ours!
Now add icons for the other items on your file menu, except for the Exit item, which doesn't need one. The icons to search for are NewDocument.png and Save.png. When you're done, your menu will look something like ours:
![]()
If you study Visual Studio's File menu, you'll see that, again, the icons they use are the same as ours.
In the next lesson below, you'll learn how to add right-click menus to your project.
Back to the VB NET Contents Page