Home and Learn: VB Net Course
Getting Started with Visual Basic .NET
Starting up Visual Studio Community 2019 and Greater
Sadly, Microsoft have decided to do away with the nice start up page from previous versions. Instead, you'll see something like this:

Any projects you create will appear on the left, under Open recent, and you can simply click on your file to open it. Click on Create a new project, the fourth box on the right in the image above.
On the Create a new project dialogue box. You'll see this screen:

At the top, click the dropdown list for Language. Then select Visual Basic:

From the list that appears, select Windows Form App (.NET Framework). Then click Next:
When you click Next, you'll see this screen, Configure your new project:
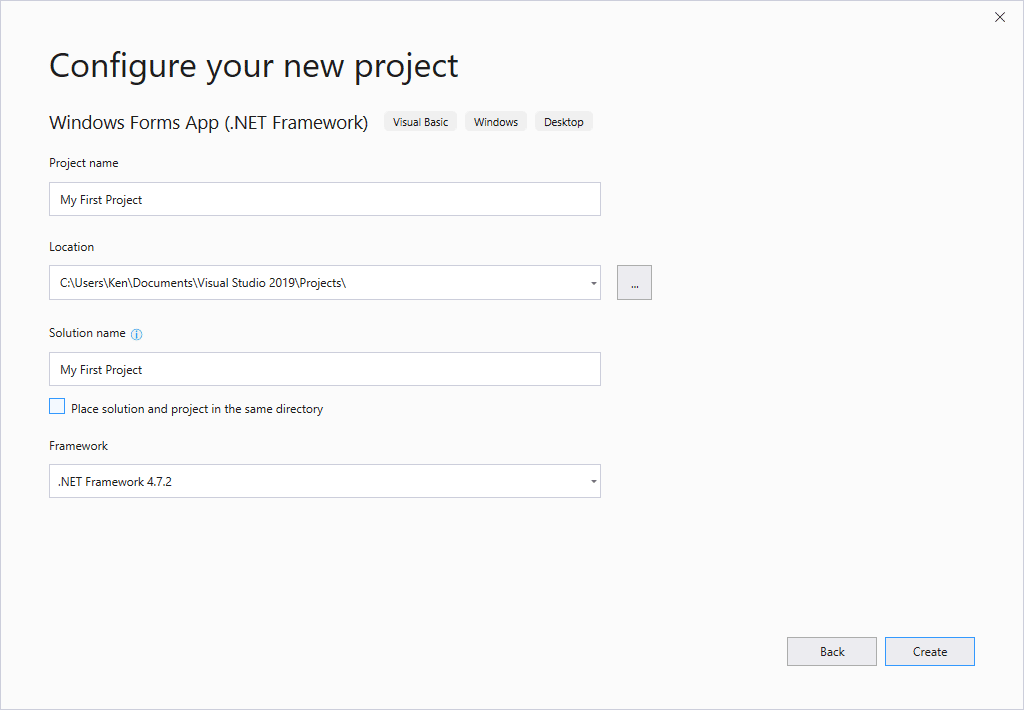
In the Project name box at the top, type My First Project. (It will probably say WindowsApplication1.)
You can choose a location to save your projects. We've created a folder called Projects, in the Documents\Visual Studio 2019 folder.
The Solution name box will get filled in for you. So just click the Create button.
Eventually, a new project will be created. You should see a screen like the one below:
VB NET Community - new popup window (47K)
You can now make a start on the course by clicking the link below on the right, Move on to the Next Part.
Back to the VB NET Contents Page