Home and Learn: Games Programming Course
Unity User Interface Elements
We just did health pickups in the previous lesson. At the moment, however, we're only displaying the player's health in the Inspector. Which is no good for a game. What we'll do now is to display the health on screen using user interface elements. This can be a bit fiddly as we'll be dealing with the canvas. But what we'd like to have is something like this:

So we have a thin strip running across the top, with some text on the left. Let's see how to do that.
(If you'd like to add a health bar instead of text, we have another tutorial here: Health Bars in Unity)
Make sure nothing is selected in the Hierarchy. Now right-click and select UI > Canvas from the menu that appears: (You can also click the Game Object item on the menu at the top of Unity. Then select UI > Canvas.)

Type Background as the name of the canvas. With the canvas selected, take a look at the Inspector on the right and the Canvas Scaler section:
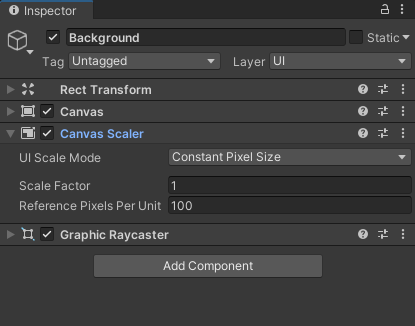
The one we want to change is UI Scale Mode. The default is Constant Pixel Size. This is OK if the screen size is never going to change. But if you want your canvas to stretch to accommodate different screen sizes, then you need to change this. Click the dropdown and select Scale With Screen Size:

When you select Scale With Screen Size, the option for Canvas Scaler will change:
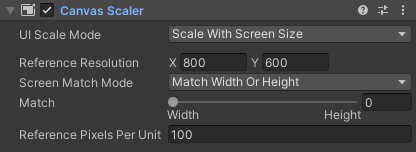
The Reference Resolution is set to a default of 800 by 600. This is the default resolution in Unity. You can set it higher (or lower). For example, a high definition screen might be able to handle 1080 by 720, or even 2048 by 1536 for an iPad retina display. We'll leave it on 800 x 600, though.
The Match slider is OK on Width, for us. This is landscape. If your game is going to be in portrait, you'd move the slider to Height.
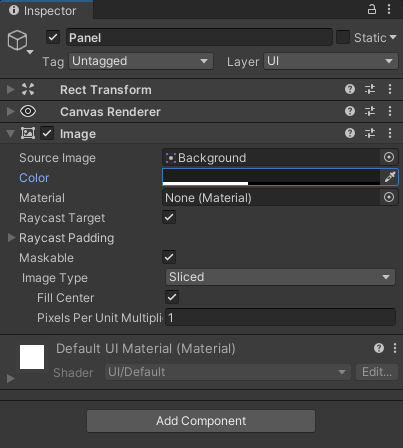
Now we'll add a Panel to the canvas. Right click on your Background item. From the menu, select UI > Panel:

Keep the name on Panel. In the Inspector, the first thing we can change here is the color. You can pick any color you like, but we went for black, and turned the alpha down:

To get the correct position for your panel, it's best to change to Game view, rather than the Scene view you might be on. When you click on the Game tab, you'll probably see the entire screen filled with your panel and its color. So we need to change the values in the Transform section.
Expand the Rect Transform section to see something like this:

Now click the squares in the top left to reveal area where you can select an Anchor Preset:

Select the Top Center one, as in the image above. Now enter the same values as in the image one up. These are the values you need:
Pos X: -190
Pos Y: -30
Pos Z: 0
Width: 1200
Height: 73
Anchors
Min X: 0.5, Y: 1
Max X: 0.5, Y: 1
Pivot X: 0.5, Y: 0.5
Rotation: X: 0, Y: 0 Z: 0
Scale: X: 1, Y: 1 Z: 1
Another way to change the values in the boxes is to drag. Hold your left mouse button down on, say, the Pos X. Keep it held down and drag to reduce the value and right to increase it. The red arrows below show where to hold your mouse down. Your mouse pointer will change shape to a line with two white arrowheads. The Pos X value is being changed, in the image below:

When you make the changes, the top of your Game screen should look like this:

Notice that you can stretch the game window and the panel will shrink to fit.
OK, now let's add some text to the panel.
Unity Text
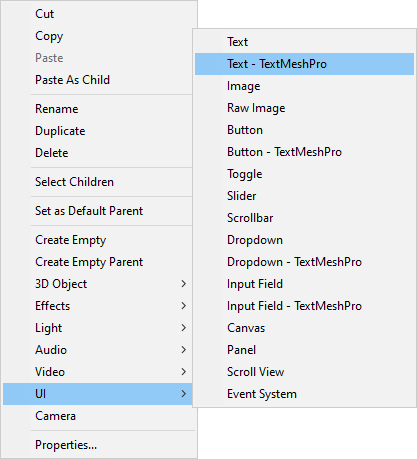
Right-click on your Panel in the Hierarchy. From the menu, select UI > Text - Text Mesh Pro:
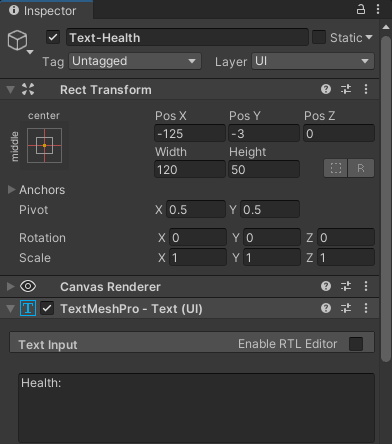
Rename your new TextMesh Pro item. Call it Text-Health. In the Inspector on the right, delete New Text from the Text Input box. In its place, type Health:.
In the Rect Transform section, type the following values:
Pos X: -125
Pos Y: -3
Pos Z: 0
Width: 120
Height: 50
The top of Inspector should look like this:
If you scroll down a bit, you'll see lots more settings you can apply to your text:

The default font size is 36. You can make this bigger or smaller, if you want. If you do, you may need to change the Width and Height in the Rect Transform area. But select a white color for the font. The default font is Liberation Sans. Take a look at the other font options:

You can import fonts as Assets. If you do, they'll show up on the list. Try the fonts out, though, and see what they look like.
You can also choose a different Text Style. Click the dropdown to see a list of inbuilt styles:

Again, try them out to see what they look like. We'll keep ours on Normal.
There are lots of other options you can explore for the font. Take a look at the Font Style icons, for example. You can have Bold, Italic, Underline, Strikethrough, Lowercase, Uppercase, and Small Caps.
The top of your game window should look like this, though:

Now let's add the health value.
In the Hierarchy, right-click your Text-Health item. From the menu that appears, select Duplicate. (Or press CTRL + D as a shortcut.) Rename the new text item Text-Score and your Hierarchy should look like this:

In the Inspector on the right for Text-Score, change the Pos X value from -125 to -2.5. Change the text from Health: to 100:

Health Code
Now go back to your PlayerHealth script. To set TextMesh Pro text, add this variable to the top of your code with the other two:
public TMPro.TMP_Text uiPlayerHealth;
Now let's add a little method to update the text. We can then call this method from different places. Add this method before the final curly bracket of the class:
private void updateHealthText(int score)
{
uiPlayerHealth.text = score.ToString();
}
We've called this method updateHealthText. In between round brackets, we're passing over an integer value that we've called score.
The code for the method is just a single line. This one:
uiPlayerHealth.text = score.ToString();
You only need to add text after uiPlayerHealth. This gets you access to the text part of the Text Mesh Pro component. After an equal sign, we assign our score variable. Because it's an integer, we need to convert it To a String.
We need to call this method from three places. Add this line to the end of your Update method, just before the final curly bracket but after the if statement:
updateHealthText(playerHealth);
In the PlayerTakeDamage method, we need to call it in two places. Add the updateHealthText method call just after the first line. And add updateHealthText again after the line of the if statement.
Your code should look like this: (The new lines are highlighted.)

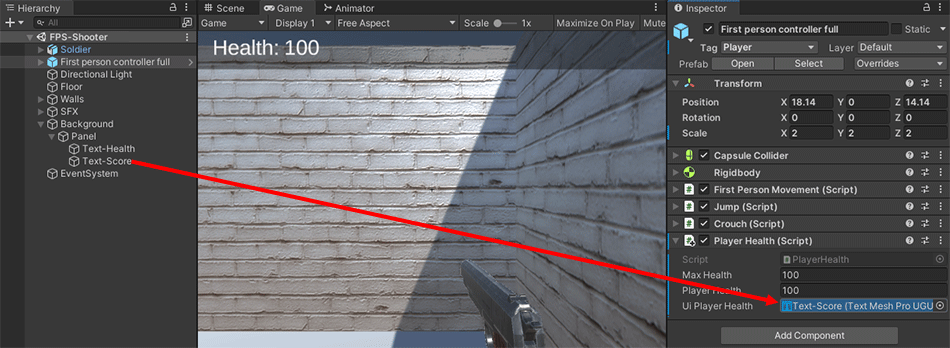
Save your code and go back to Unity. Select your First person camera item in the Hierarchy. Drag and drop Text-Score onto the empty slot, UI Player Health:
Play your game. When you get shot, you should see the health decrease on screen. Your game should look like the one in the short video below. (15 seconds)
What we can do now is record the number of lives the player has left. When the number of lives gets to zero, we can declare the player dead and the game over. We'll do that in thenext lesson below.