Home and Learn: Games Programming Course
Textures and Walls in Unity
In the last lesson, you downloaded a first person controller and walked about on a bare floor. You're probably dying to get the gun in the player's hand and start blasting away. But let's hold off on that. First, we'll build a simple corridor so that the player has something to walk around in. Later, we'll add a soldier so that the player can shoot at something. We'll build something simple like this:

We'll get the first wall in place and then you'll learn how to add a texture.
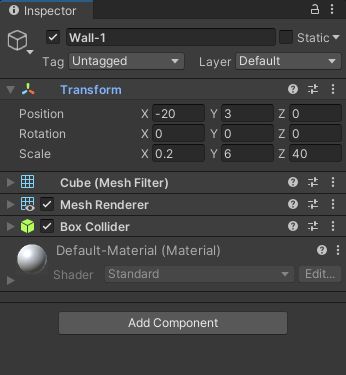
For the first wall, add a new cube to your scene (Game Object > 3D Object > Cube). Rename it to Wall-1. With Wall-1 selected, change the Scale values in the Inspector on the right to these:
Scale
X: 0.2
Y: 6
Z: 40
The Rotation values can all be left on 0. For the Position on Wall-1, change them to these values:
Position
X: -20
Y: 3
Z: 0
Here's what your Inspector should look like for Wall-1:
And here what it should look like in Scene view:

Now let's add a texture to this wall.
Textures in Unity
A texture is a flat, 2D image wrapped around a 3D object. When you add things like normal maps, bump maps and specular maps, the 3D object then comes to life.
A good place to get textures for your projects is this site:
The textures are all royalty free and can be used anywhere.
Search for a texture and download it. Go back to Unity and create a folder under Assets in the Project area. Call it Textures.
Now drag and drop the images you downloaded into your new Textures folder. In the image below, we've went for a Seamless white brick texture:
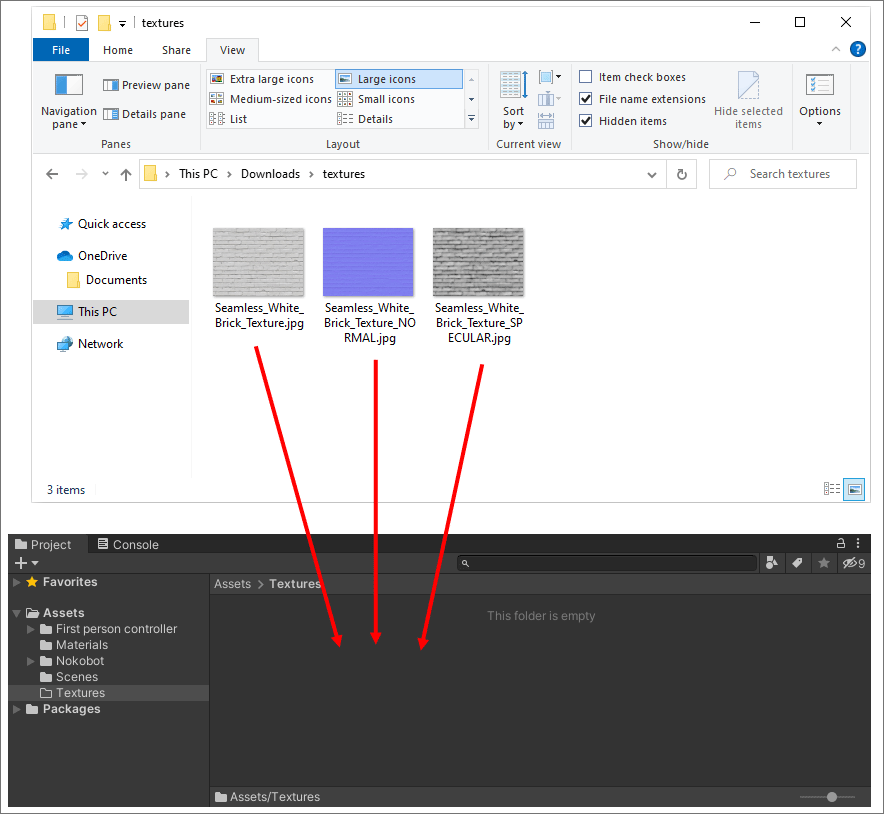
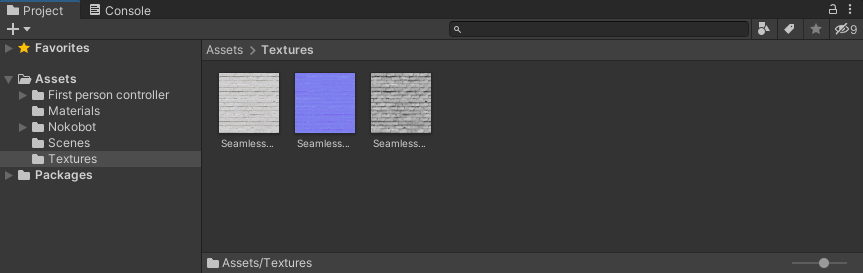
When you let go of your left mouse button, you'll have some images in your Textures folder:
Textures go on materials. When we added colours to our cubes in the previous game, we first created a material. The material was then dragged and dropped onto the cubes. However, you can drag and drop a texture onto a game object. But note what happens when you do.
Drag your texture (the first one) onto your wall:

Notice that the texture is applied to the wall in your scene (it looks awful, at the moment):

Now click on your materials folder. Notice that Unity has created a material for you, with the same name as your texture image:

It's this material that you play around with when adjusting your texture.
With your Seamless material selected in the Project area, look at the Inspector on the right. Notice it has a shader item at the top:

We want to apply a specular map, so change the shader to Standard (Specular setup):

Go back to your Textures folder and drag and drop the third image onto the Specular item (make sure that your material is still selected, and not the texture):

You'll find that your wall is a bit too smooth, so turn the Smoothness slider down to half:
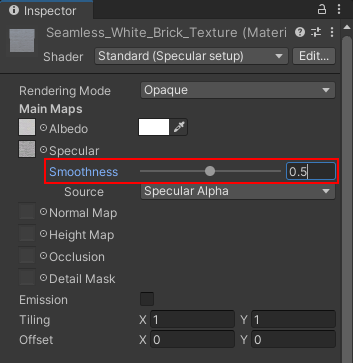
Now, with the material still selected, drag the third texture image onto the Normal Map item:

Notice the two areas highlighted in red, in the image below:

The first one says that the texture is not marked as a normal map. Click the Fix Now button to solve that. This will give your wall a lot more definition. With that fixed, play around with the Tiling values under Emission to see what they do. We've gone for a value of 6 for the X value.
So your wall doesn't look so white, you can add a bit of colour, just like you did with the car in the previous game. Click the color square to the right of Albedo. Select a colour. We went for a hexadecimal value of 8C6A58, and our wall looks like this when we play the game and get up close to it:
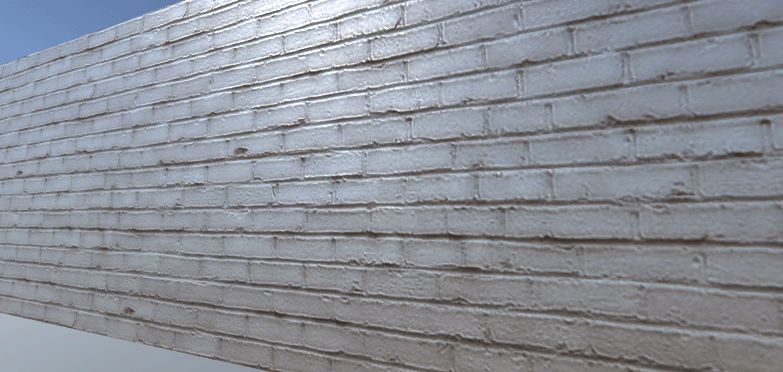
Looks a lot better than when we first dragged the texture onto the wall! Now that we have a decent looking wall, let's duplicate it a few times to create our corridors. Let's do the edges first.
Building Walls
In the Hierarchy on the left, select your Wall-1 item. Right-click and select Duplicate (or press CTRL+ D). Rename this new wall to Wall-2. You only need to change the X position of Wall-2 in the Inspector on the right. You can leave the other values alone. The X position of Wall-1 was -20. Change this to 20. (Just delete the minus sign.) Your Hierarchy and Scene view should look like this:

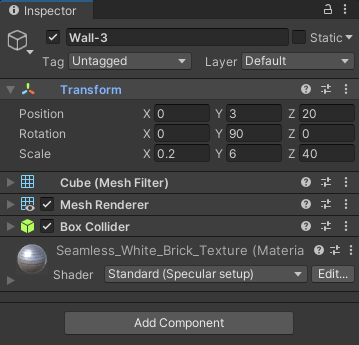
Now we can just duplicate Wall-2, rotate it, and reposition. So, duplicate Wall-2. Rename it to Wall-3. With Wall-3 selected in the Hierarchy, change the values to these in the Inspector:
Position:
X: 0
Y: 3
Z: 20
Rotation
X: 0
Y: 90
Z: 0
The Inspector should look like this for Wall-3:
Now duplicate Wall-3. Rename it to Wall-4. You only need to change the Z position in the Inspector for Wall-4. Change it from 20 to -20. You will then have four walls in place:

OK, let's do a couple of interior walls now.
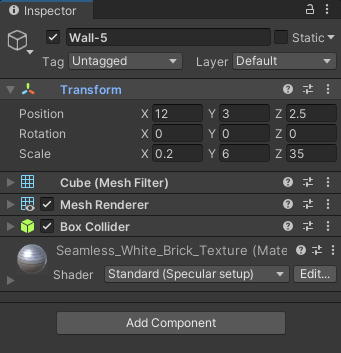
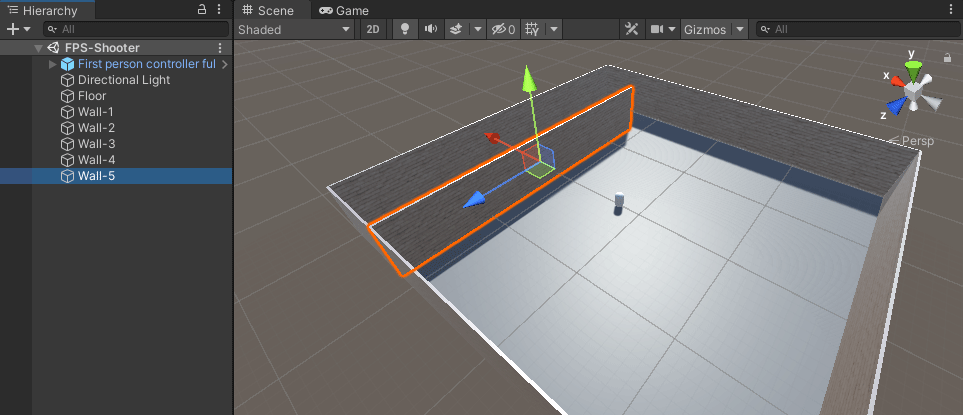
Click on Wall-2 in the Hierarchy. Duplicate Wall-2 and rename it to Wall-5. We need to rescale and reposition this wall. With Wall-5 selected, change the values in the Inspector to these:
Position:
X: 12
Y: 3
Z: 2.5
Scale
X: 0.2
Y: 6
Z: 35
The Inspector should look like this:
And the Hierarchy and Scene should look like this:
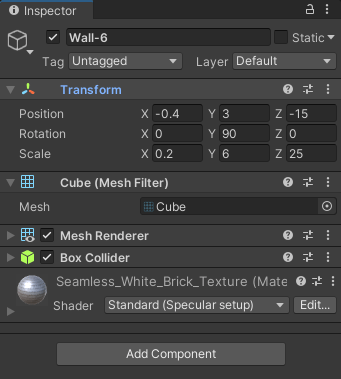
Now click on Wall-4 to select it. Duplicate Wall-4. Rename it to Wall-6. Now change the values in the Inspector to these:
Position:
X: -0.4
Y: 3
Z: -15
Scale:
X: 0.2
Y: 6
Z: 25
The Inspector for Wall-6 should look like this:
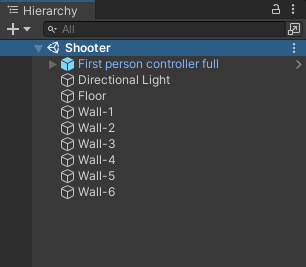
In the Hierarchy, you should have this:
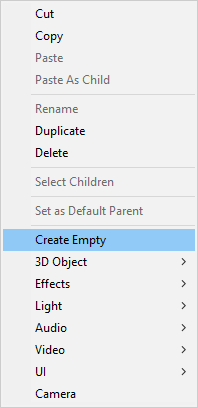
However, this looks a bit messy. What we can do is to create a parent for the walls and then group them. So, right-click in the Hierarchy and select Create Empty from the menu that appears: (Or click Game Object > Create Empty from the top of Unity.)
Unity creates an empty object. Rename the empty object to Walls. Now, select all your walls and drag them onto the Walls empty object:
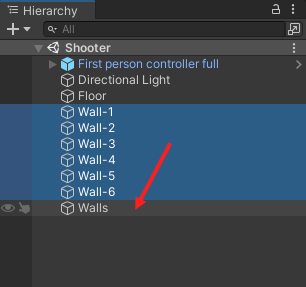
Your Hierarchy should look like this:
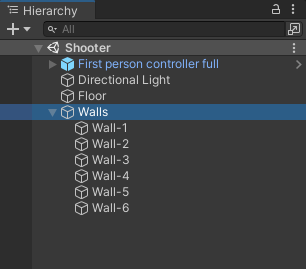
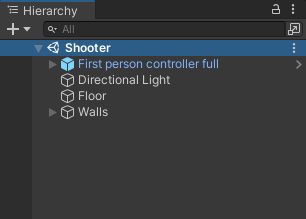
You can now click the arrow to the left of Walls to expand or contract the item, making your Hierarchy a lot neater:
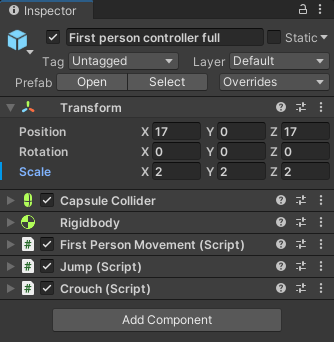
Before testing it out, let's reposition the player. Click on your player in the Hierarchy. (Click on First person controller full.) Now change the values for the Position and Scale in the Inspector to these:
Position:
X: 17
Y: 0
Z: 17
Scale:
X: 2
Y: 2
Z: 2
We're changing the position to the start of the corridors. Changing the scale makes the player a bit taller. Your Inspector should look like this:
Now that we have a basic environment to walk around, let's arm our player. We'll do that in the next lesson below.