Home and Learn: Games Programming Course
Unity - Car Body
In the previous lessons, you've created some car wheels, and added some code to get the wheels moving. In the lesson, you'll add a car body to go with the wheels.
To get a car body, we could import a 3D model from the Unity Asset Store. But there is another way to get 3d models for your games. What we'll do is to use a piece of free software called Blender. You won't need any Blender modelling skills, as we're going to load a plugin called BlenderKit. Once we have BlenderKit, we can select from a huge range of free 3D models. Some of these models are cars. (There's lots of locked content that you can unlock by signing up for the paid version of BlenderKit. Subscription fees go the artists.)
Using BlenderKit is a great way to grab yourself some fantastic 3D assets for free. You'll learn that you don't have to rely totally on the Asset Store.
Install Blender and BlenderKit
If you haven't already got Blender, go here to download it:
https://www.blender.org/download/
Once downloaded, install the software.
Now go here to get Blender Kit:
https://www.blenderkit.com/get-blenderkit/
Because BlenderKit is an addon to Blender, the download will be a ZIP file. Remember where you downloaded the zip file to.
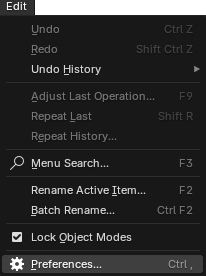
Open up Blender. You'll see a default scene with a cube, a camera, and a lamp. We'll delete these soon. For now, click on Edit > Preferences at the top of Blender:
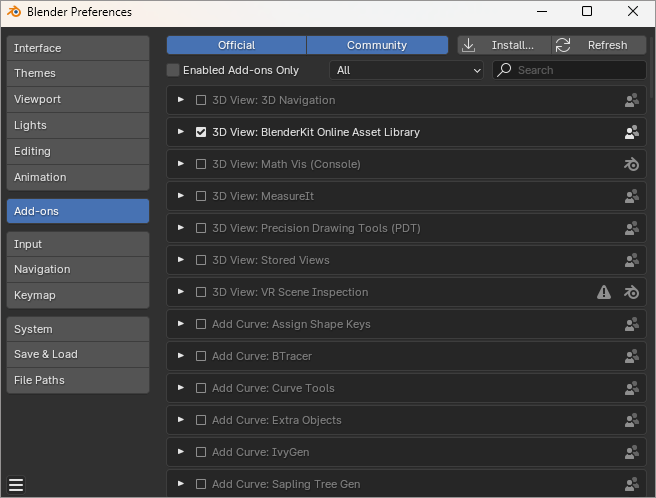
You'll see a screen like this one (Blender 4.4):

Or like this, for older versions of Blender:
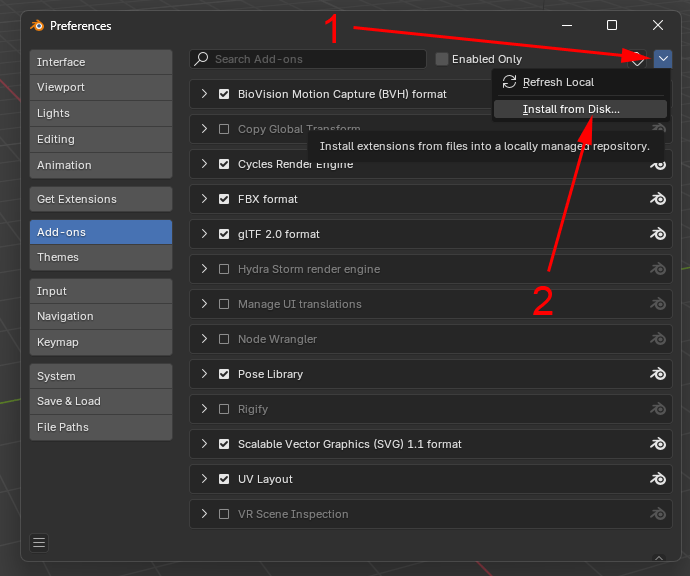
If you see an Install option at the top, click on that. For newer versions of Blender, click the down arrow at the top and select Install from disk:
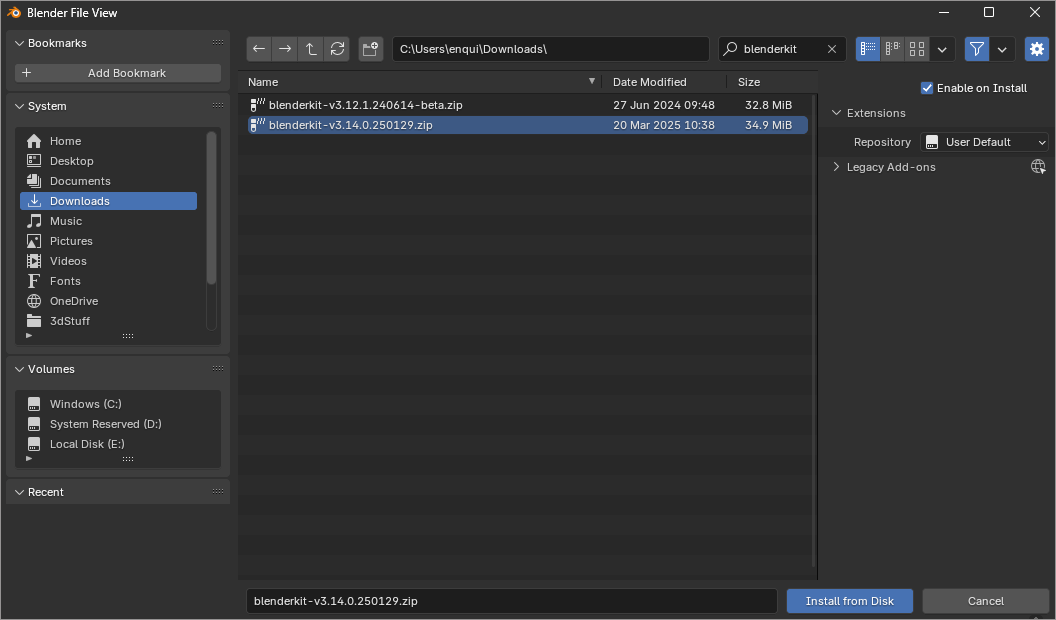
In both old and new versions, you'll then see a Blender File View dialog box. Navigate to where you downloaded your BlenderKit zip file. Then click the blue Install from Disk button at the bottom:
After BlenderKit installs, you'll be taken back the preferences screen and the addon section. If there is no check in the box to the left of BlenderKit Online Asset Library, check the box:

If you expand the BlenderKit addon section, you'll see lots more information and settings:
You can now close the preferences screen. (If you have updated BlenderKit, you'll need to restart Blender to see the new version.)
Notice that Blender has added a new bar at the top - the BlenderKit toolbar:
![]()
Let's clean the scene before exploring BlenderKit.
We don't need the default Blender objects (Cube, Light, Camera) so we can delete them. Hold down the SHIFT key on your keyboard. Now left-click on each of the three objects:
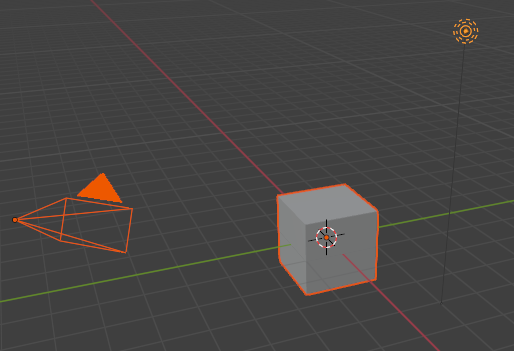
With all 3 objects highlighted, press the delete key on your keyboard. Have a look at the Scene Collector window on the right of Blender. After you delete the three objects, you should now just have an empty Collection folder:
Now let's explore BlenderKit.
Exploring BlenderKit
BlenderKit doesn't just have 3D models. It has a whole host other things you can download. Here are the icons you can select to narrow down your search:
![]()
You can leave these icons unselected and you'll get more results. But we're only interested in Models, so you can select that icon.
Type car into the search box and then press the Enter key on your keyboard. You should see some results appear:
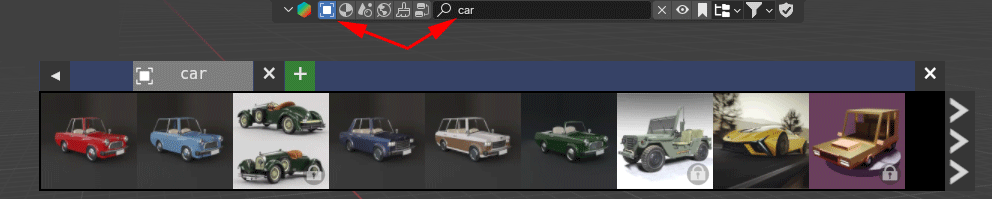
These are models you can drag and drop into your Blender scene. The ones with a lock icon in the bottom right are only available to premium subscribers. To see only the free models, click the filter dropdown arrow to the right of the BlenderKit toolbar:
![]()
You'll see this:
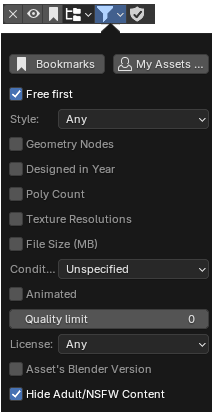
Check the box at the top for Free first.
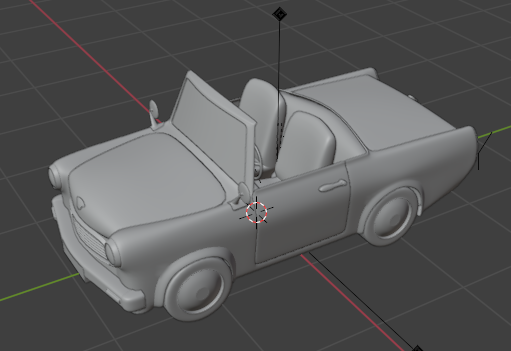
You can use the three scroll arrows to the right of the results to see more models. You may be tempted to grab the Lamborghini. But, instead, we'll use a model by 3D by artist Jordi Se-Cam, the green Cartoon Car:

Hover your mouse over the image to see a bigger picture:

If you right-click on the model, you'll see more information about it and its artist:

To get the model into Blender, you can either Click and Drag where it says so in the image above. Or don't right-click, but just hold down your left mouse on the smaller image and drag and drop it into your scene:

You'll see a green box. The model will then be downloaded for you. When it's finished, you should see this:
To see the textures and materials that have been added to the car, click the tiny Material Preview icon in the top right of Blender:
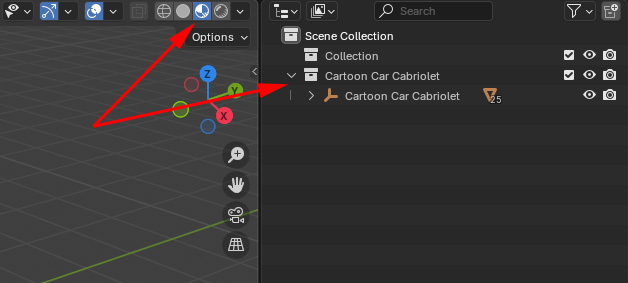
Notice that the car has been added to the Scene Collection. We'll come back to this.
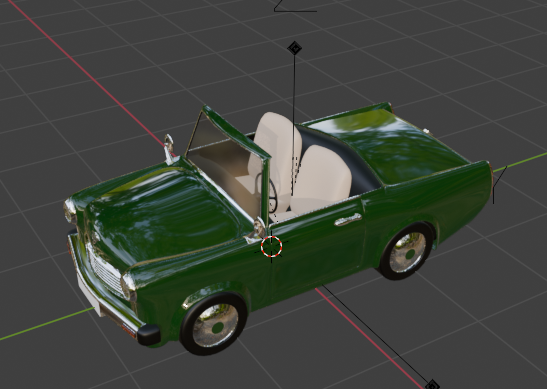
But your car should now look like this:
Excellent! We now have a model we can export into Unity! If you want to look at the model more closely in Blender, hold down your middle mouse button. Keep it held down to rotate around your model. Scroll your middle mouse button (without holding it down) and you can zoom in and out. To pan around, hold down the SHIFT key and the middle mouse button.
If you don't like the model, you can undo in the usual manner with CTRL + Z. But a better way is to delete from the Scene Collection area. Right click on your Cartoon Car Cabriolet item (the top one). From the menu that appears, select Delete Hierarchy:
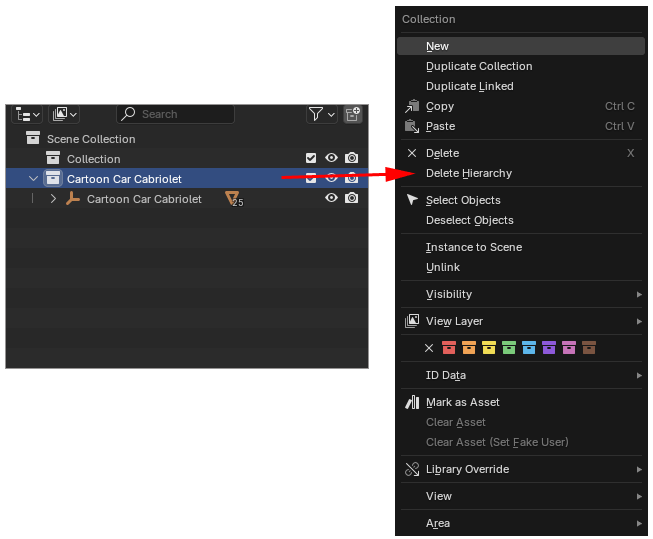
Deleting this way ensures that you are deleting all the objects.
Now let's export the model.
Export from Blender to Unity as an FBX file
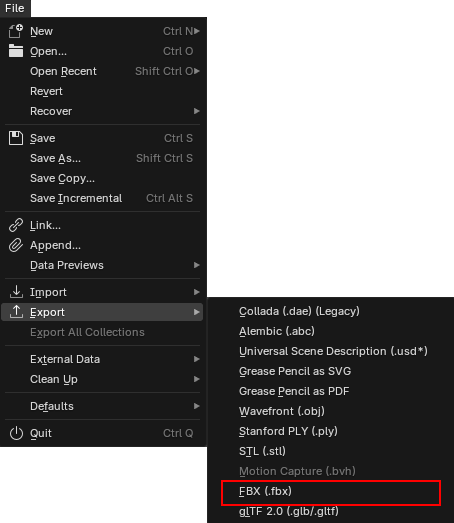
One of the most popular formats for 3D models is the FBX format. And Unity handles FBX quite well (though sometimes it can be a pain to export all your textures and materials correctly from Blender to Unity). Blender lets you export your models as an FBX file.
From the menus at the top of Blender, click the File menu. From the File menu, select Export > FBX:
When you click on FBX, you'll see the Blender File View appear. There are a few settings you need to tweak here. Examine the image below:
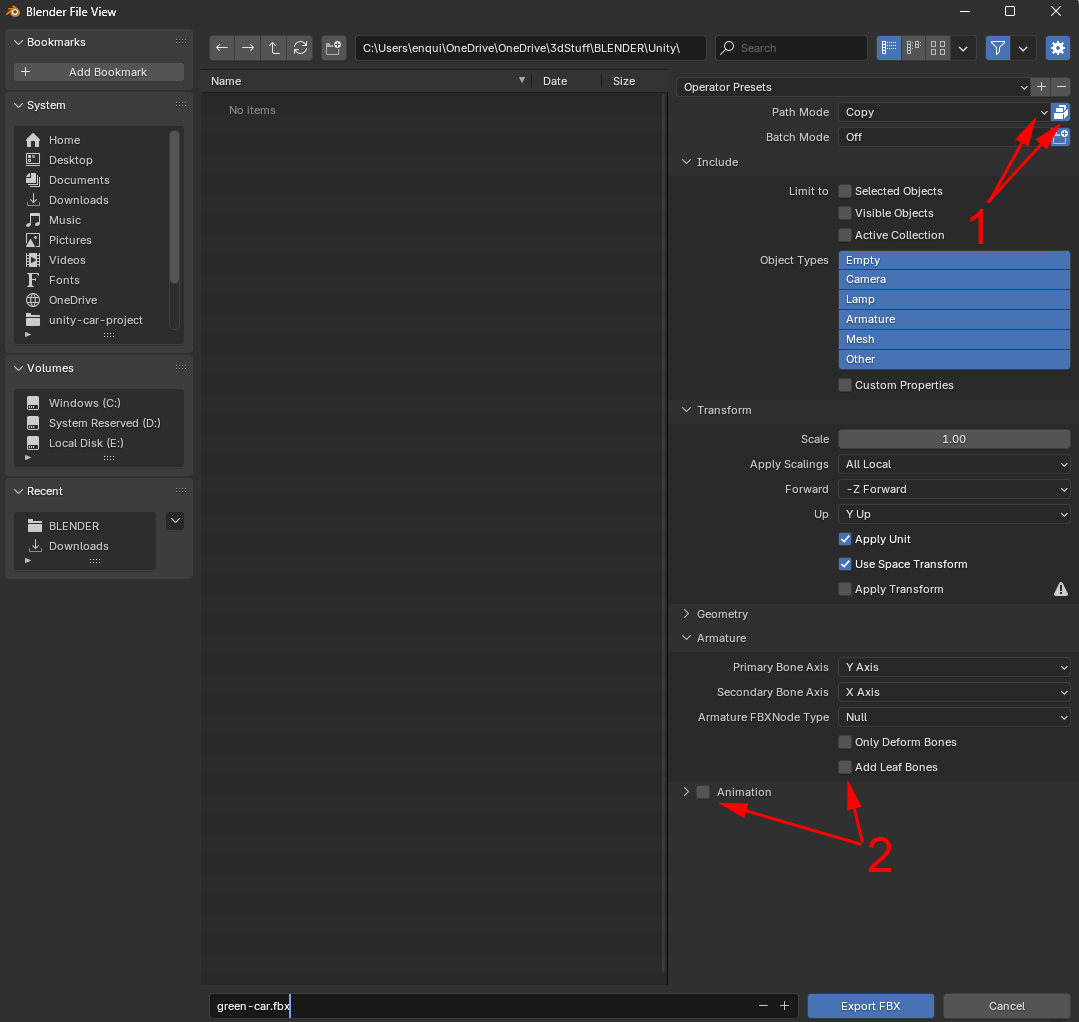
Notice the pair of arrows next to the number 1 above. The first is pointing to a dropdown. You need to change this to Copy. Then click the icon next to it for Embed Textures. This ensures that you're exporting the textures and materials from the model.
The two arrows at the bottom, next to the number 2, are less important. Uncheck Add leaf bones and uncheck animation. We don't have any bones in the model, and we're not using animation.
After typing a name for your FBX file, click the Export FBX button.
Now let's import into Unity.
Import an FBX file into Unity
Now that we have a car model in the FBX format, we can import it into Unity.
Go back to Unity and your car game. At the moment, we only have four wheels. Let's fit the car body the wheels.
In the Projects area of Unity, create a folder for your car model. We've just called ours Blender. Right-click inside of your folder. From the menu that appears, select Import New Asset. Navigate to where you saved your FBX file and import it into Unity. You should see this in your folder:

In the Inspector on the right, you should see a Materials option selected:
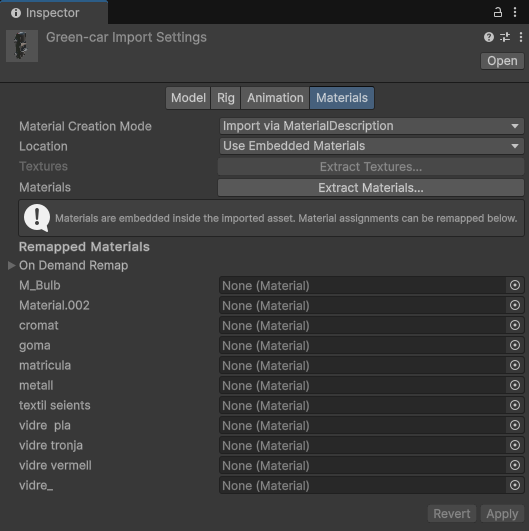
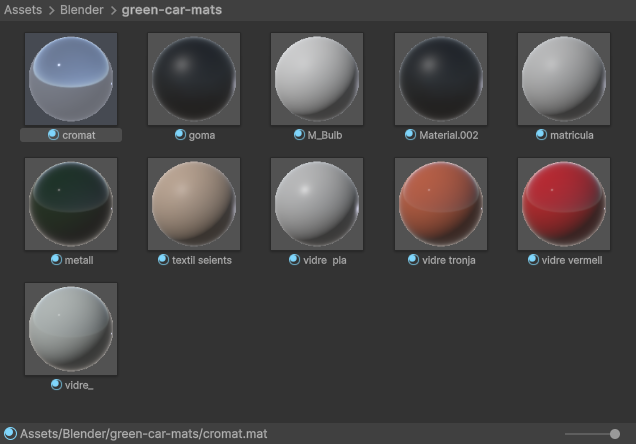
Click the button to that says Extract Materials. You'll see a standard file dialog box appear. Create a new folder to hold the materials and then extract them to there. We called ours green-car-mats. Your Projects area will look like this:

When you see a grey material like this, it means that the material has not been brought into Unity. You can play around with these materials, though.
First, let's add the car to the scene. Drag and drop your car model onto the CAR-ROOT game object in the Hierarchy on the left of Unity:
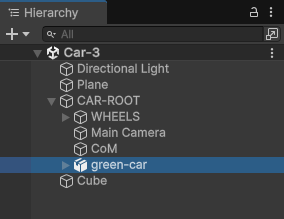
Just like we did with the tyre, right click and select Prefab > Unpack Completely. We don't need the car wheels, so expand the car model. Locate the wheels (wheels and wheels.001). Highlight them both and then hit the delete key on your keyboard. The wheels should vanish from the model: (If we didn't unpack the prefab, we couldn't delete anything.)
If you have been following along with these lessons, and have the same values for your tyres as we have, enter the following in the Inspector as the values for your car body:
Position
X: 0.9
Y: 0
Z: -1.47
Rotation
X: -90
Y: 0
Z: 0
Scale
X, Y, Z: 110 for all three values
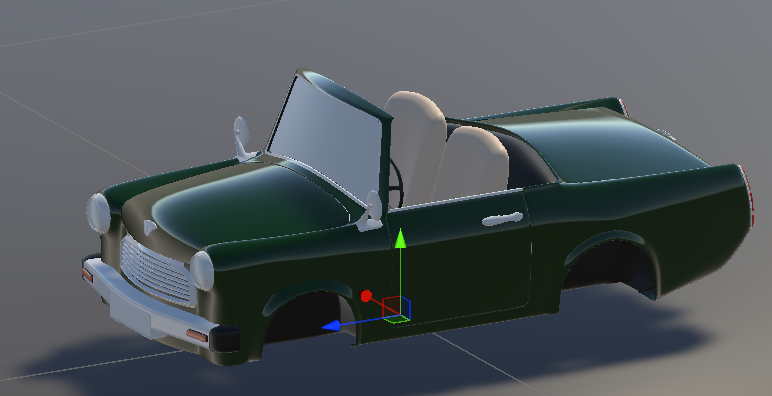
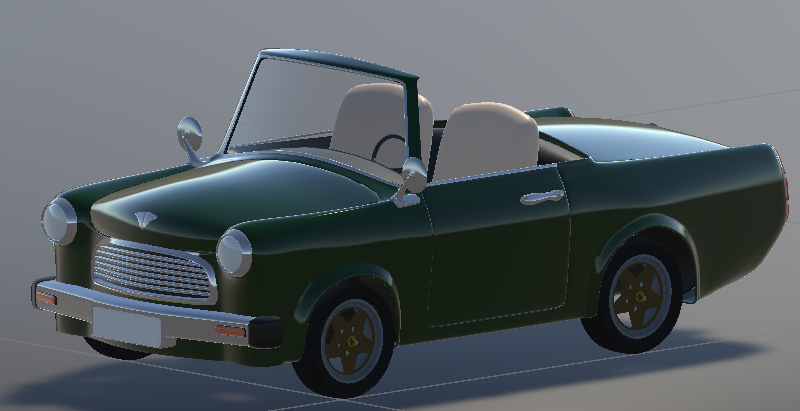
If your car body is not sitting on the tyres as well as you'd like, simply play around with the values above. Here's our car:
It looks like the chrome material and the glass material didn't come through to Unity at all. So let's play around with them.
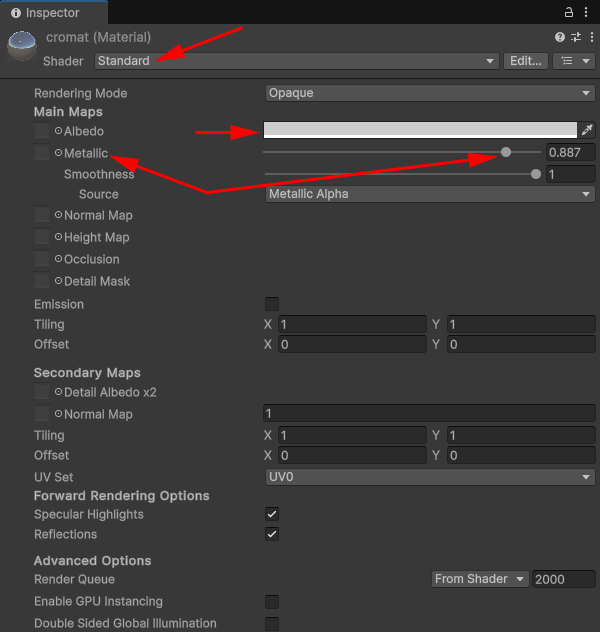
Inside of that materials folder you created when you extracted the car materials, locate the one called cromat:
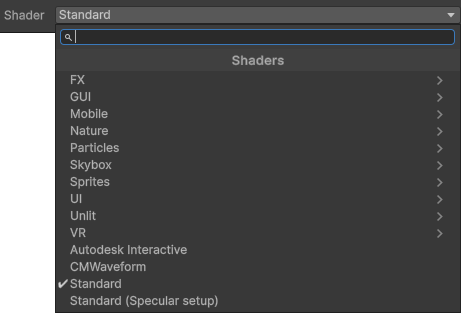
Click on it to select it. Now, in the Inspector on the right, switch the Shader at the top to Standard. To do so, click the arrow to reveal a dropdown of other shaders you can use (not all of them will be suitable for the pipeline we chose).
If your material turn a magenta color, make sure the Cromat material is selected in the folder at the bottom. Now click Edit on the menus at the top of Unity. From the Edit menu, select Rendering > Materials > Convert Select Materials to URP. Your Cromay material should turn back the way it was.
Select a grey Albedo color, and increase the Metallic slider:
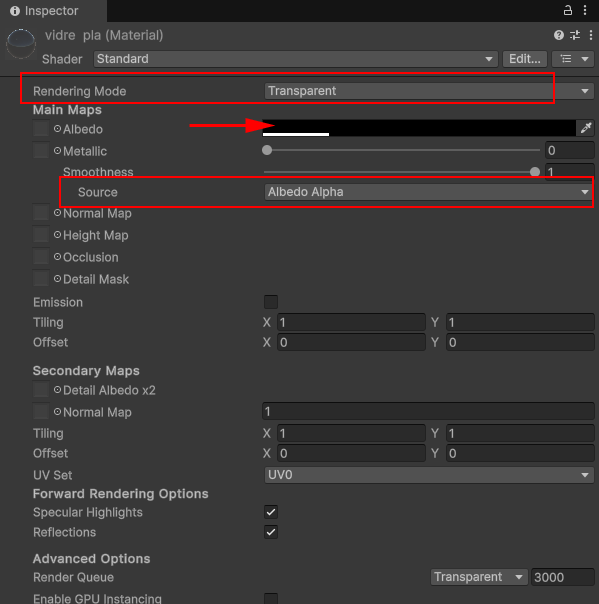
To get a transparent, glass shader for the car windows, locate the material called vidre pla in your materials folder. Again, switch the Shader at the top to Standard. At the top of the Inspector, change the Rendering Mode to Transparent. Change the albedo color to black and move the alpha slider right down:

Change the smoothness Source to Albedo Alpha:
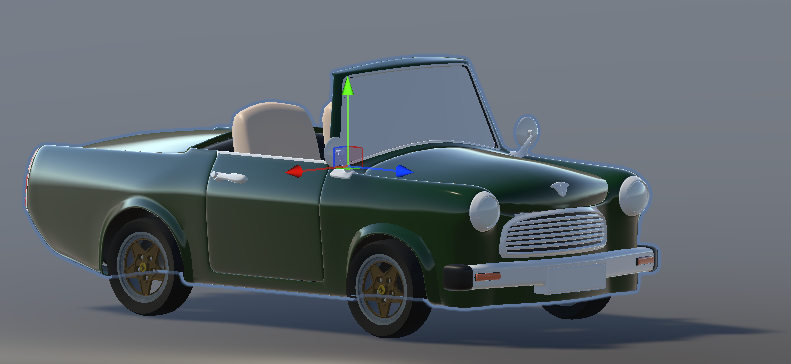
If you keep your eye on your car model in the scene, you should see the car windows turn transparent:
As an exercise, play around with the other grey materials. The material called vidre is for the headlights. The number plate is matricula. The M_bulb refers to the bulb inside the headlights. You'd need to change the headlights to a glass material to see the bulbs.

After all that hard work, try it out. Start you game and drive around in your shiny new car!
If you don't like this particular car body, you now know how to grab yourself a new one using Blender and BlenderKit. You can use BlenderKit to get models for all of your games. You don't have to rely solely on the Unity Asset Store.
In the next lesson below, we'll add some brakes and some audio to the car.