Home and Learn: Games Programming Course
Get a Player to Fire a Gun in Unity 3D
Now that we have a player, cameras, and a scene, we can get the player to start shooting.
Before we can start shooting, however, we'll need something to shoot with. There are plenty of free guns in the Unity asset store. The one we'll use is here (it's by game developer Nokobot):
https://assetstore.unity.com/packages/3d/props/guns/modern-guns-handgun-129821
Go through the same process you did before in the previous lesson to add the handgun to your assets. Download and import it into your Unity project.
Now move into the following folder:
Nokobot > Modern Guns - Handgun > Materials
You'll see we have the same problems as before - the materials are all magenta:

To fix it, select all the materials. From the menus at the top of Unity, select Edit > Rendering > Materials > Convert Selected Built-In Materials to URP. The materials should now be fine. But the handgun prefabs won't be. Move inside of this folder:
Nokobot > Modern Guns - Handgun > _Prefabs > Handgun Black
The prefabs may all be magenta. To fix it, right click in the _Prefabs folder. From the menu that appears, select Reimport All (we did this before). Unity will restart. Once it does, the handgun prefab folder should look like this:

The second handgun is the one we're going to use. Drag the handgun onto the MainCamera item in the Hierarchy on the left:

Your Hierarchy should look like this:

Positioning your handgun can be quite tricky. But, with your handgun selected in the Hierarchy, try these values in the Inspector:
Position:
X: 0.15
Y: -0.25
Z: 0.48
Rotation:
X: -4
Y: -1.5
Z: 0
If the gun is not right, play around with the values above. Change the Scale, if you think the gun is too small. Here's our Inspector for the gun, with no rotation applied:

Now, in the Hierarchy on the left, expand the Handgun Shooting item and click on the Handgun Model item:

With the Handgun Model selected in the Hierarchy, look at the Inspector on the right and notice which game objects have already been added:

It already has an Animator and a Simple Shoot script attached, which come as part of the Nokobot package. The Animator handles the animation of the gun - the recoil. The script handles the firing of the bullet and the ejection of the casing. Try it out. Play your game and press your left mouse button to start shooting. You should see this:
Nice! All that for free and just a drag and drop!
However, it's a very silent gun. Let's add some audio so we can hear the gun being fired.
Adding Gunshot Sounds
The MainCamera in our scene has something called an Audio Listener attached to it. As its name suggests, this component listens for audio sources (you only need one listener in the scene). If we have a listener, we can add as many audio sources as we want. Let's add one to the gun.
With your Handgun Model item selected in the Hierarchy, click the Add Component button in the Inspector on the right. Type audio and select the Audio Source item:

An Audio Source component will be added to the Handgun Model:

We now need a gunshot audio file in the slot next to Audio Resource. Sadly, the Nokobot gun we used doesn't come with any sounds. However, we can go to the Unity Asset store again. From the menus at the top of Unity, select Window > Asset Store. Copy and Paste this address in your browser's address bar:
https://assetstore.unity.com/packages/audio/sound-fx/weapons/weapons-of-choice-free-101807
Download and import the asset, just like you did with the controller and the gun. You should find that a new folder appears in your Project area. The folder name is Weapons of Choice FREE, and it's by Komposite Sound. Click on the Gun folder to see all the sound files:

If you want to play any of the WAV files to hear what they sound like, select a file and then press the play button at the bottom of the Inspector, indicated by the red arrow in the image below:

Once you've chosen your sound, click back on the Handgun Model in the Hierarchy. Now drag a sound file onto the Audio Resource item. Or you click the small circle and select from the popup box:


Uncheck Play on Awake in your Audio Source. If you don't, the gunshot will play when you start the game, even though you haven't fired a shot.
Hacking the Code
If you play your game, you still won't hear a gun shot. To make the sound
play, we need to add a few lines to the code that came with the Handgun.
Don't worry - there's not many lines to add.
In the _Demo Assets folder of the Nokobot download, there is
a C# code file called SimpleShoot:
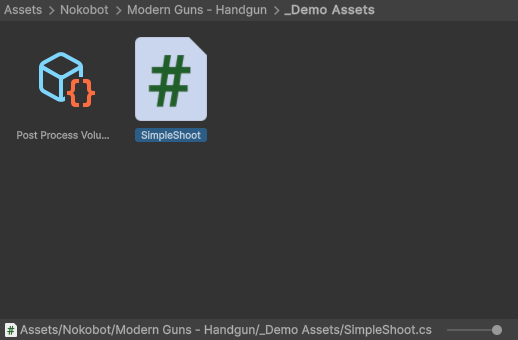
Double click the file to open it up in your code editor. (SEE BELOW IF YOU GET AN ERROR WHEN TRYING TO OPEN THE CODE FILE.)
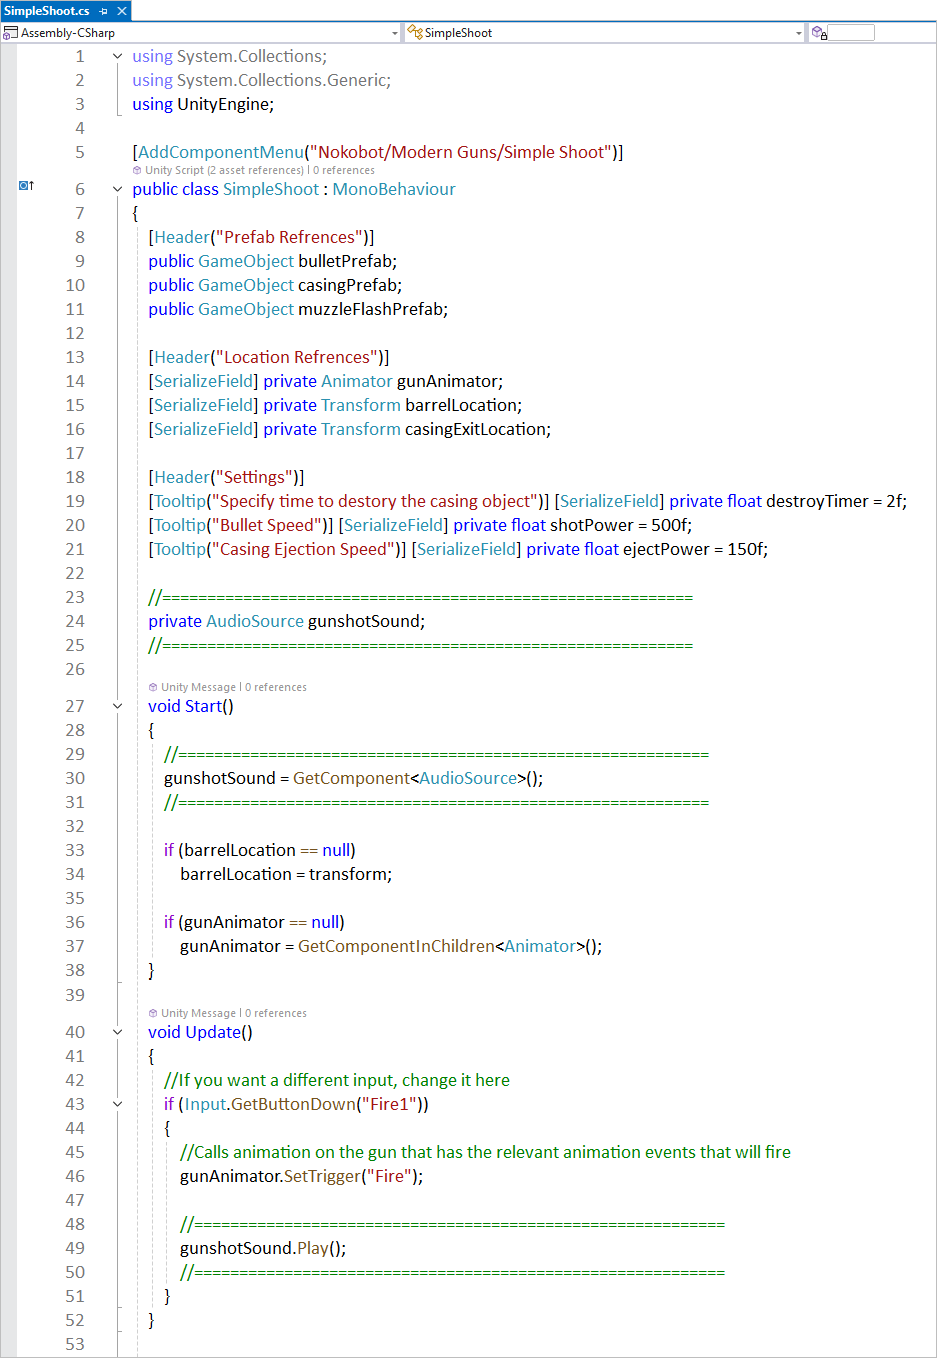
First add the following line to the top of the code, where are the other variables are set up (full code is show below):
private AudioSource gunshotSound;
Now add the following line inside of the Start method, just above the if statements:
gunshotSound = GetComponent<AudioSource>();
Finally, add this line inside of the Update method:
gunshotSound.Play();
The first line sets up a new variable we've called gunshotSound. It is of type AudioSource. (That's the type of component you added in the Inspector.) The second line gets the component when the code first runs (the Start method). We then store it inside of the gunshotSound variable. The third line Plays the audio file.
Here's what your coding window should look like: (Lines 24, 30, 49. We added the green lines. Note the two forward slashes [//]. These are used to denote comments in C#.)
Save your work in the code editor and go back to Unity. Play your game. When you press your left mouse button to shoot, you should hear your chosen gunshot sound play.
Now let's add something to shoot - it's zombie time!
Code won't open?
If you double click on a code file and it won't open, it could be that you haven't installed a code editor. We're using the free Community edition of Visual Studio, which you can find here:
Download and install it. Once installed, go back to your first person shooter game project in Unity. From the menus at the top of Unity, select Edit > Preferences. You should see this dialog box:

From the list on the left, select External Tools. You can select your prefered editor by selecting it from the dropdown list at the top:

As you can see, we have Visual Studio selected as our code editor. But we could have selected Visual Studio Code instead, as we have this installed as well.
Once you have selected a code editor, close the preferences screen down. Now double click the code file again and you should be good to go.
In the next lesson below, we'll add a zombie to the scene and learn how to take him down!
<--Back to the Unity 3D Course Contents Page