Home and Learn: Games Programming Course
Downloading 3D Models and Animations
What we'll do is to get a 3D soldier model from the Asset store. The model comes with idle, run, and shoot animations. But it doesn't come with a dying animation. So what we'll do is to download a dying animation from Adobe's Mixamo website and apply this to the Unity character.
Launch the Unity Asset store by clicking Window > Asset Store from the menus at the top of Unity. The character we're going to use is by Polygon Blacksmith, who has kindly set the pricing for the Low Poly Soldier to free. So, do a search for Low Poly Soldier. If you can't find it, go to this page:
If you have a look at the package contents, you'll see the three animations listed, idle, run, and shoot:

The idea is that you have a 3D model and separate animations for the model. You then apply the animations to the model whenever you need them.
So, download the character and import it into Unity. Rename the folder from LowPolySoldiers_demo to Soldier.
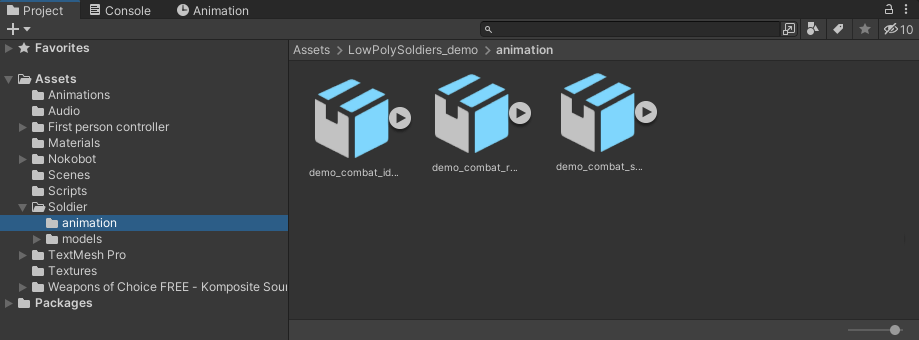
In the Projects area at the bottom of Unity, click on your Soldier folder. You should see two more folders, animation and models. Click on the models folder and you should see this:

(By the way, you can adjust the slider bottom right to increase or decrease the size of the icons.)
Click the Soldier_demo file to select it. Right-click this file and rename it to Soldier, as in the image above.
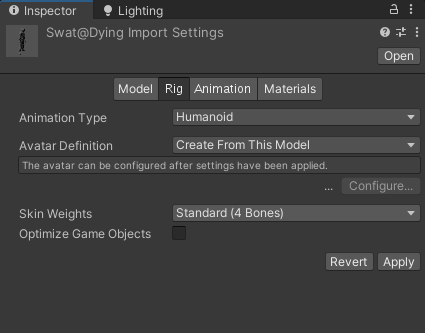
Now take a look at the Inspector on the right. You should see four
buttons at the top: Model, Rig, Animation, and Materials. Click on the
Rig button. The Inspector will then look like this:
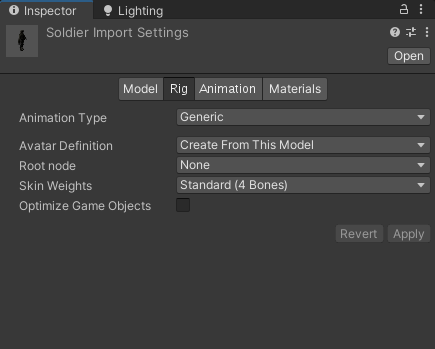
For the Animation Type change it from Generic to Humanoid:

Make sure Create From This Model is selected for Avatar Definition, then click the Apply button at the bottom:

(Incidentally, if you ever download a model and it looks all white when you add it to your scene, it's because the Materials haven't been applied. In which case, click on the Materials tab at the top and you'll see an option to Use External Materials. Click Apply and it should solve the issue.)
Now we need to do the same for the animations.
Click on the animation folder instead of the models folder. It should look like this:
Select all three of the animations (SHIFT + left click). In the Inspector, change the Animation Type to Humanoid from Generic. And change the Avatar Definition to Create From This Model.
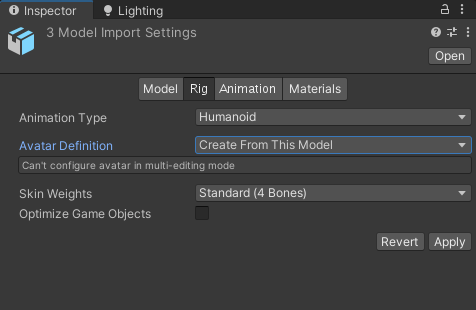
Now hit the Apply button in the bottom right.
OK, that's the Unity model done. Now to grab the Mixamo animation.
Mixamo Animations
One thing to notice with the animations for the Unity model is that there is no Dying animation. We need one of these for when the soldier gets shot. Otherwise, he'll just be standing around, even though he's dead. To remedy that, we can actually download an animation from a different website. The website is called Mixamo, and you can get free characters and animations. The animations can be applied to most character models, as they are just 'skeletons', as it were. So, if you have a soldier model, you can select any of the animations on Mixamo and they should work. (They can be a pain to get working, though.)
We only want a single animation for our soldier. Let's download it.
Head over to this site:
Unfortunately, you'll have to sign up for a Mixamo account. The website is owned by Adobe, so don't forget to read the licence agreement before you sign up and create an account. There's probably not a section in there to do with selling the soul of your firstborn to the devil, but you never can tell with Adobe.
Once you've signed up, click on Animations at the top. Type Dying into the search box. You should get a lot of results back. Select one and click the Download button on the right:
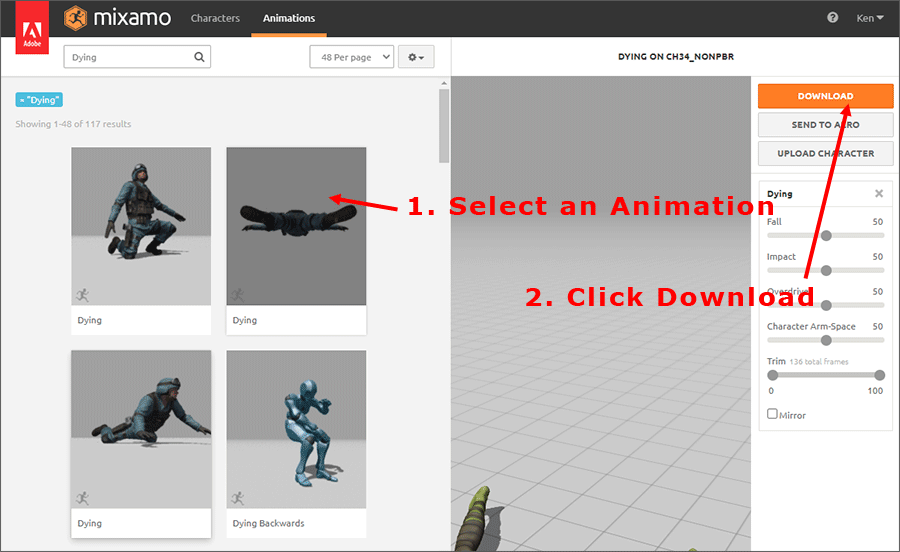
When you click Download, you'll see a box appear like this one:

For the Format, make sure you select FBX for Unity from the dropdown list. In the Skin dropdown, select the With Skin option. There is a Without Skin option where you get the animation without the model, and which is a much smaller file size. But this can cause problems. So get the full skin and we'll make a few tweaks.
Once you download your animation, drag and drop it into the animation folder in Unity.

We don't need the model itself, just the animation part. But we need to fix the Mixamo model first, just like we did for the Unity model. So select you Mixamo model. (Ours is called swat@Dying, the last one in the image above.)
In the Inspector on the right, do the same as before: set Animation Type to Humanoid and Animation Definition to Create From This Model:
Click the Apply button when you're done. (Don't worry about any Import warnings as we're just going to extract the animation.)
Extracting the Animations
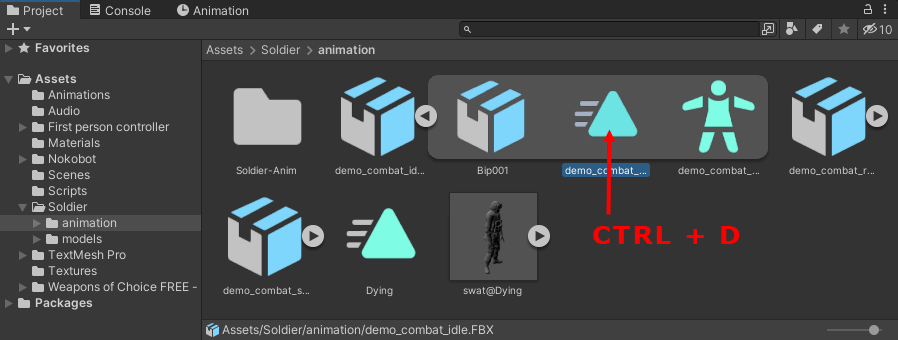
We only need the animations. So, expand the model you downloaded from
Mixamo by clicking the arrow indicated in the image below. You should
see more items under it:

The Animation is the green triangle. Click on the green triangle to select it. With the green triangle selected press CTRL + D on your keyboard to duplicate it. (Or select Edit from the menus at the top of Unity, then Duplicate.) The duplicate will appear outside of this soldier item. So you can close up the soldier item by clicking its arrow:

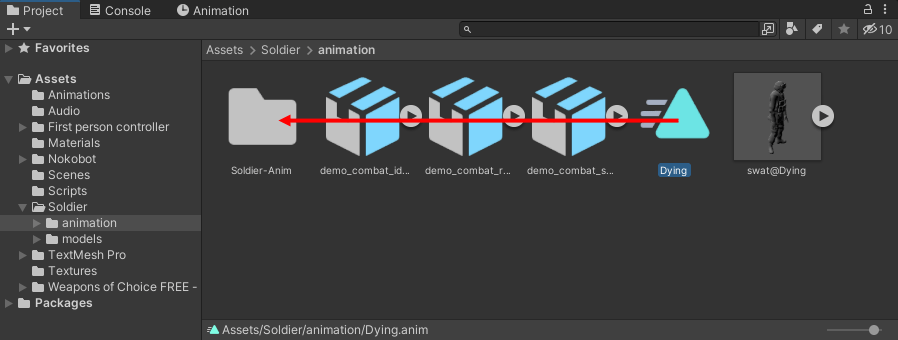
It would help at this stage if you created a new folder for yourself to store the animations. So right click and select Create > Folder from the menu that appears. Call the folder Soldier-Anim. Now drag and drop your green Dying triangle into the new folder:
OK, that's one animation file extracted. Now for the other three.
Expand the demo_combat_idle item. Press CTRL + D on your keyboard to duplicate the green triangle:
Now rename the demo_combat_idle item. Call it Idle. Close up the demo_combat_idle item and drag and drop your duplicated animation clip into your Soldier-Anim folder:

Do the same for the other two items, demo_combat_run and demo_combat_shoot. When you duplicate them, rename them to Run and Shoot. Drag and drop into your Soldier-Anim folder:

Inside of your Soldier-Anim folder, it should look like this:

OK, we now have all our animations. The next step is to create an Animation Controller.
Animation Controller
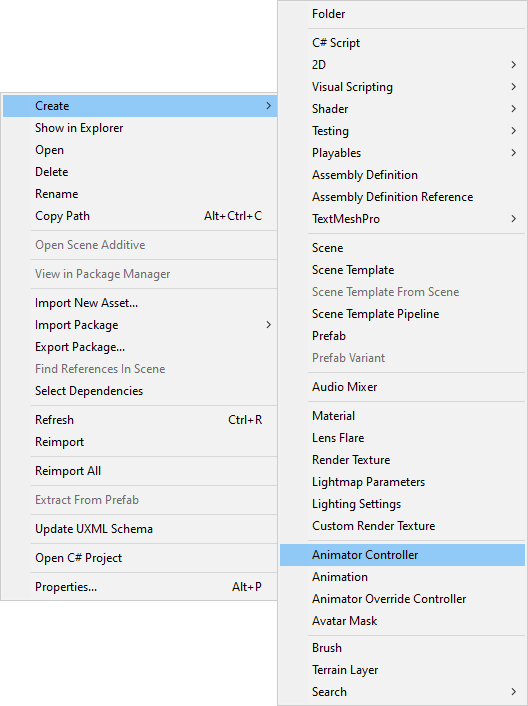
As its name suggest, an Animation Controller controls your animations. You've seen them before when we did the gun recoil. So, right click in the Soldier-Anim folder. From the menu that appears, select Create > Animation Controller (we've chopped a few items off the menu):
When your Animation Controller is created, rename it to AC-Soldier:

With AC-Soldier selected, take a look at the Inspector on the right. Click the Open button:

When you click Open, you should see a new screen appear: (If not, click Window > Animation > Animator from the menus at the top of Unity.)
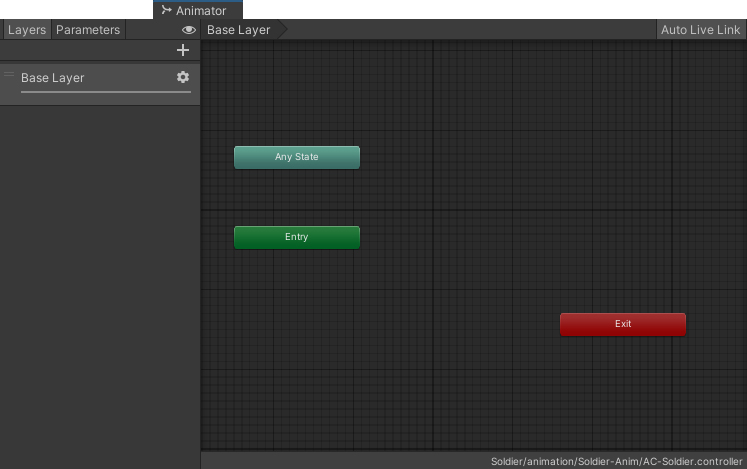
(If you can't see all the items, scroll with your middle mouse button.)
The idea is that you drag and drop your animation clips into this window. You can then set the states for your animation.

If your Idle block hasn't turned orange, it means it's not the default state. So simply right-click on the Idle block. From the menu, select Set as Layer Default State:

The names on the animation blocks are important when you come to code: you play a clip using the name on the block.
If you wanted to rename a block, select the block in the Animator window. In the Inspector on the right, type a new name at the top:
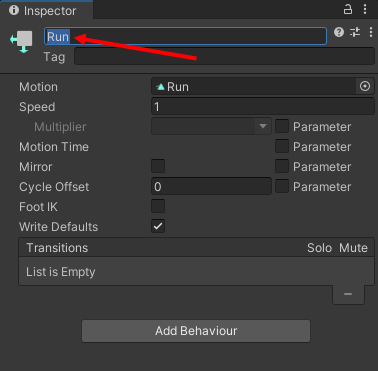
Now that we have an Animator Controller, and our animation clips in the Animator window, we can place the soldier model in our scene. We'll do that in the next lesson below.