Home and Learn: VB Net Course
Getting the Software and Creating New Projects (VB and C# Students)
The software you need is free from Microsoft and is called Visual Studio Community. You can get the software from here (opens in a new window so you can come back to this page):
Download page for Visual Studio Community Edition
Click on Visual Studio IDE, Download for Windows. Then Community 2019 or Community 2022. You'll be taken to a new page where you first install a helper file. Once this is installed, you'll need something called a Workload. You have to tick boxes here in the top right, depending on what you want to install. Select the one for Net desktop development. It's quite a big download, about one and half gigabytes, so patience is needed. If you get stuck, see this page on Microsoft's site for more details about the installation.
https://docs.microsoft.com/en-gb/visualstudio/install/install-visual-studio?view=vs-2019
Once everything is downloaded and installed, you're ready to start a new project.
Create a New Project in Visual Studio Community 2019 to 2022
When you start the software, you should see this:

Any projects you create will appear on the left, under Open recent, and you can simply click on your file to open it. Click on Create a new project, the fourth box on the right in the image above.
On the Create a new project dialogue box. You'll see this screen:

At the top, click the dropdown list for Language. Then select the language for the course you're doing. The image below shows Visual Basic selected. If you're doing the C# course, select that option instead.

You'll then see a list of project templates. If you're doing the Visual Basic .NET course, select the option for Windows Form App (.NET Framework).

If you're doing the C# course, your first project is a console app. Select this instead. But note, there are two templates for Console Apps. One says Console App (NET Core) and the other is further down and says Console App (NET Framework). If you're working on a Windows machine, select the second one, Net Framework:

Notice the one below it, for Windows Forms App. C# students will be creating projects of these types after a look at the Console App.
Click Next, though, whichever language you're studying.
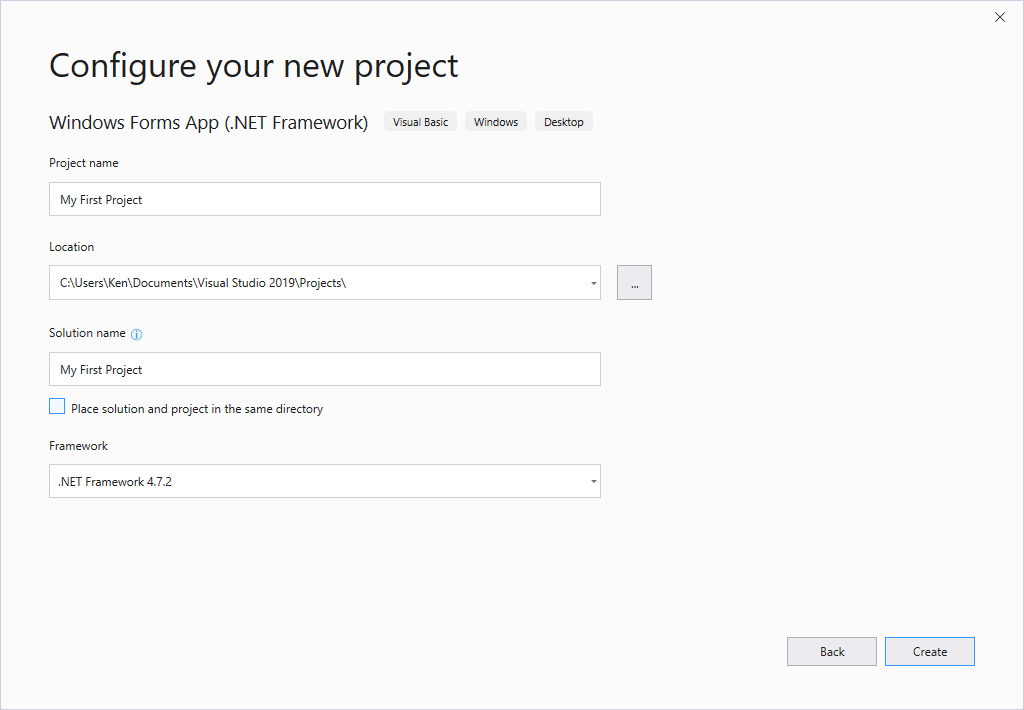
When you click Next, you'll see this screen, Configure your new project:

In the Project name box at the top, type My First Project. (It will probably say WindowsApplication1.)
You can choose a location to save your projects. We've created a folder called Projects, in the Documents\Visual Studio 2019 folder.
The Solution name box will get filled in for you. So just click the Create button.
Eventually, a new project will be created. You should see a screen like the one below:
VB NET Community - new popup window (47K)
You can now make a start on the course by clicking the link below for your course: